May 07 2017 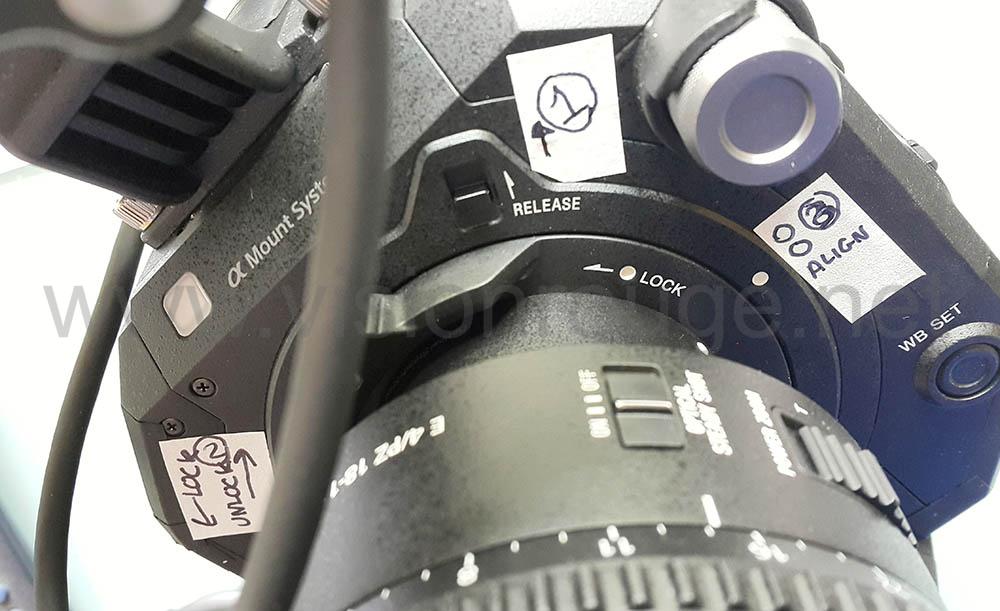
How to pimp your Sony FS7.
Sony FS7 Upgrade and hack
Getting a new camera is always something exciting and the first thing you may want to do is to fix few of the design flaw from Sony and get your personal touch.
(1) Better soft pad for your shoulder by using a wrist resting pad
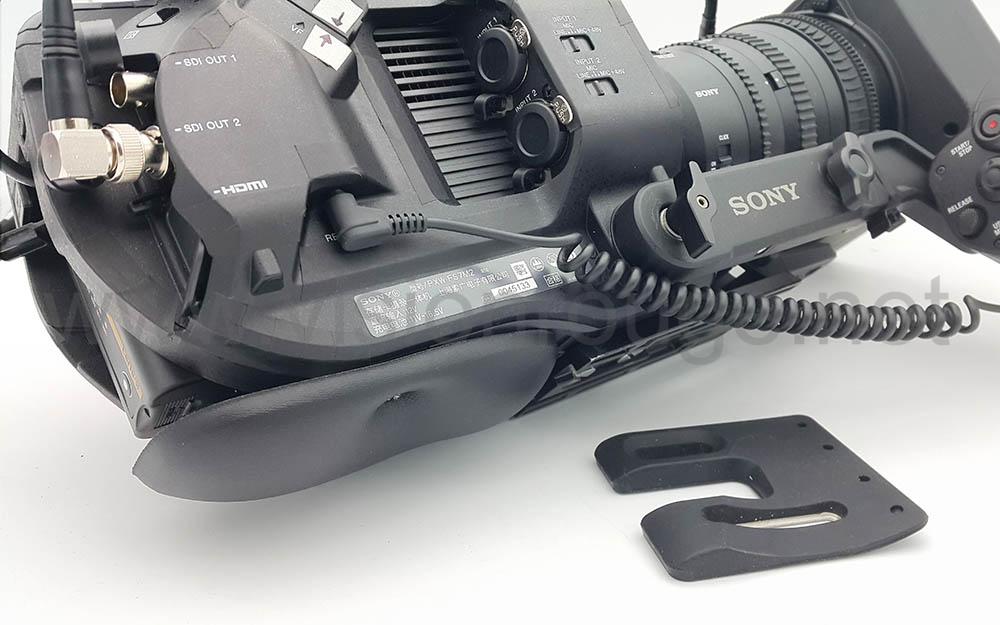

Pick up a gel filled one and just pinch 2 or 3 holes on it, it’s very soft and Continue readingApr 29 2017 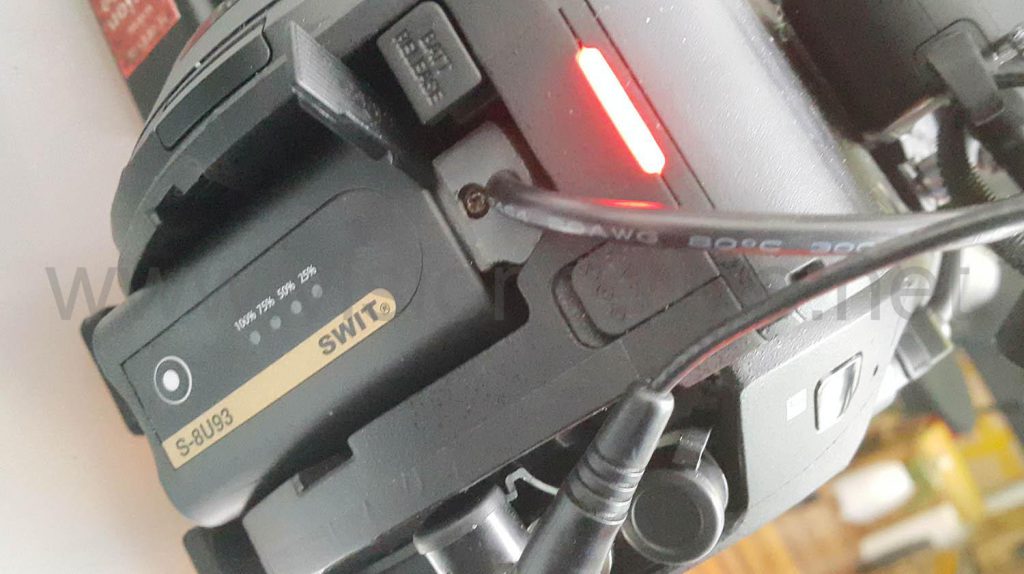

Battery SWIT S-8U93 review (updated)
Battery SWIT S-8U93 review
Being the happy owner of a FS7M2; the question of choosing the right battery will come very quickly.
You may also need to power accessories as a real EVF. Of course, one simple way will be to use the large V-lock battery and a rig to mount all at the rear of the camera.
This is one of my setup with the Sony FS7 mark I using Smallrig accessories.
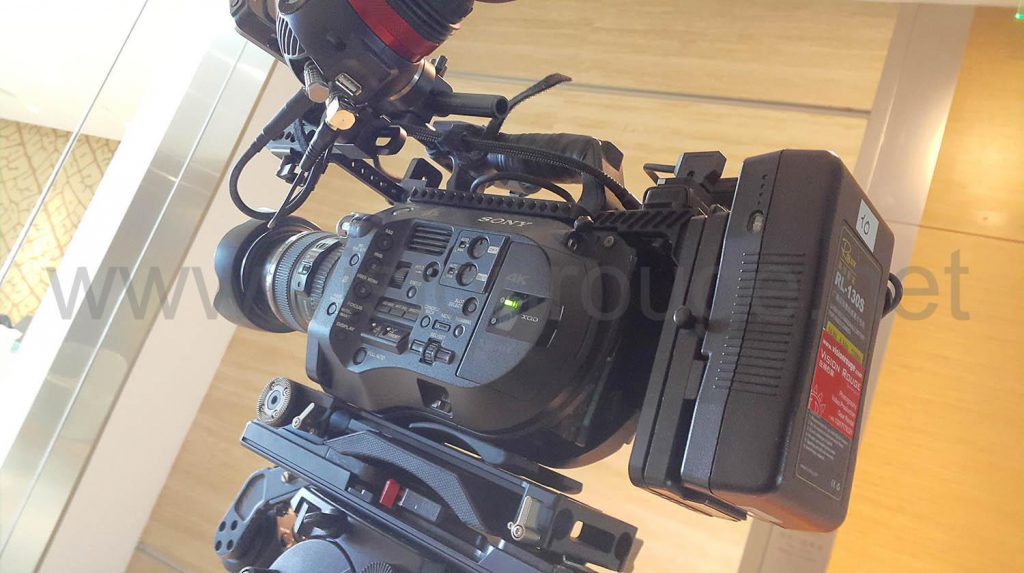

The power out of the V-mount battery is sent to a distribution board in order to split it to the camera body and to the EVF. Continue readingDJI Inspire 3.0, what do we need?
The future DJI Inspire 3.0
Dream list of the main changes to dream of on the new version of the DJI Inspire.
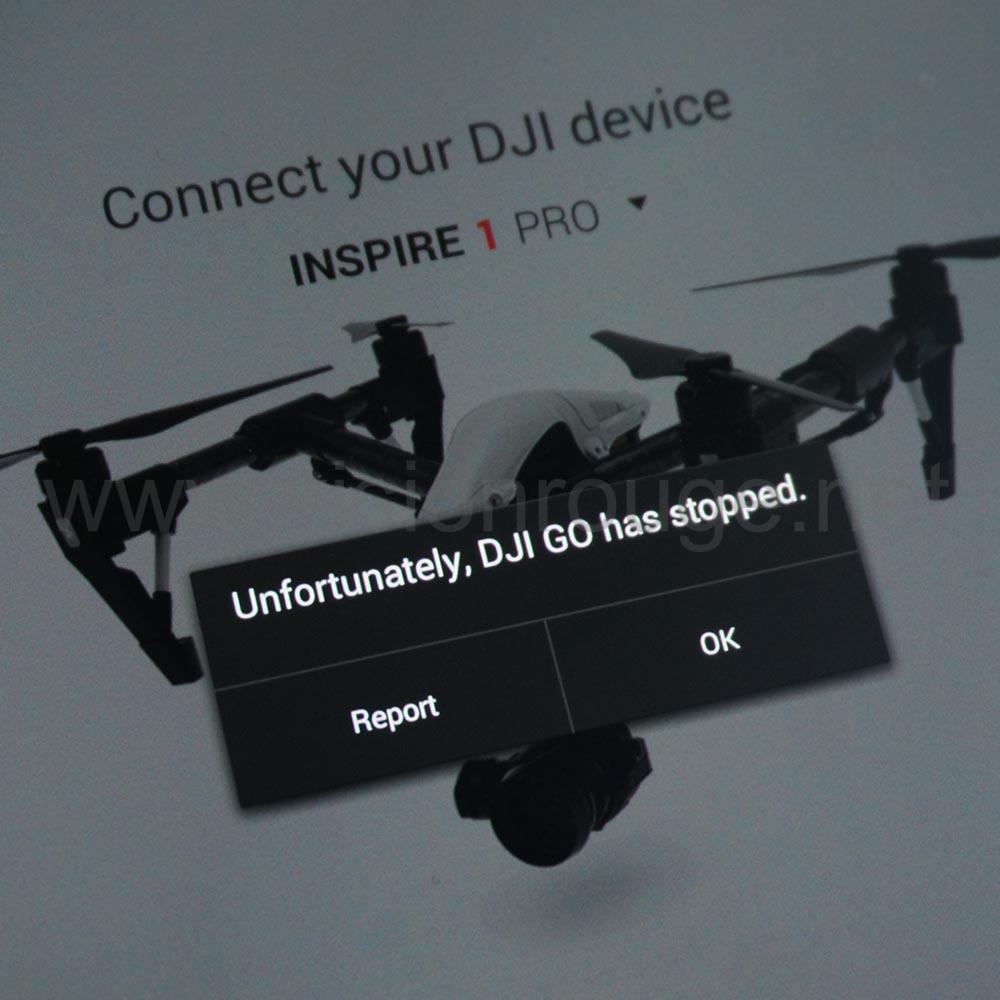

Software Application DJI GO
I would love to get a landscape photo preset; Something like 6 or 9 HDR photo of a dedicated area and surrounding. I can for example, put my main subject in the center of the screen, press the landscape preset and the head is automatically moving up and down, right and left to be able to get a patchwork of the surrounding in hdr mode. As this, it will be a amazing tools to create high resolution picture of a large building or area in just one click. Later, it will be very easy to assemble them in Photoshop. Continue readingFeb 07 2016 
DJI Inspire, One year after (2016)
DJI Inspire drone, One year after
You may find online some information about products to be released, product just released, but what about the product released one year ago and how do they hold they promises. This post also hold a lot of tips from my experience.
Here are my thoughts after one year of using as a professional tools the DJI Inspire. This product evolved a lot, mostly its software, from a amazingly powerful designed device to a more family oriented product.
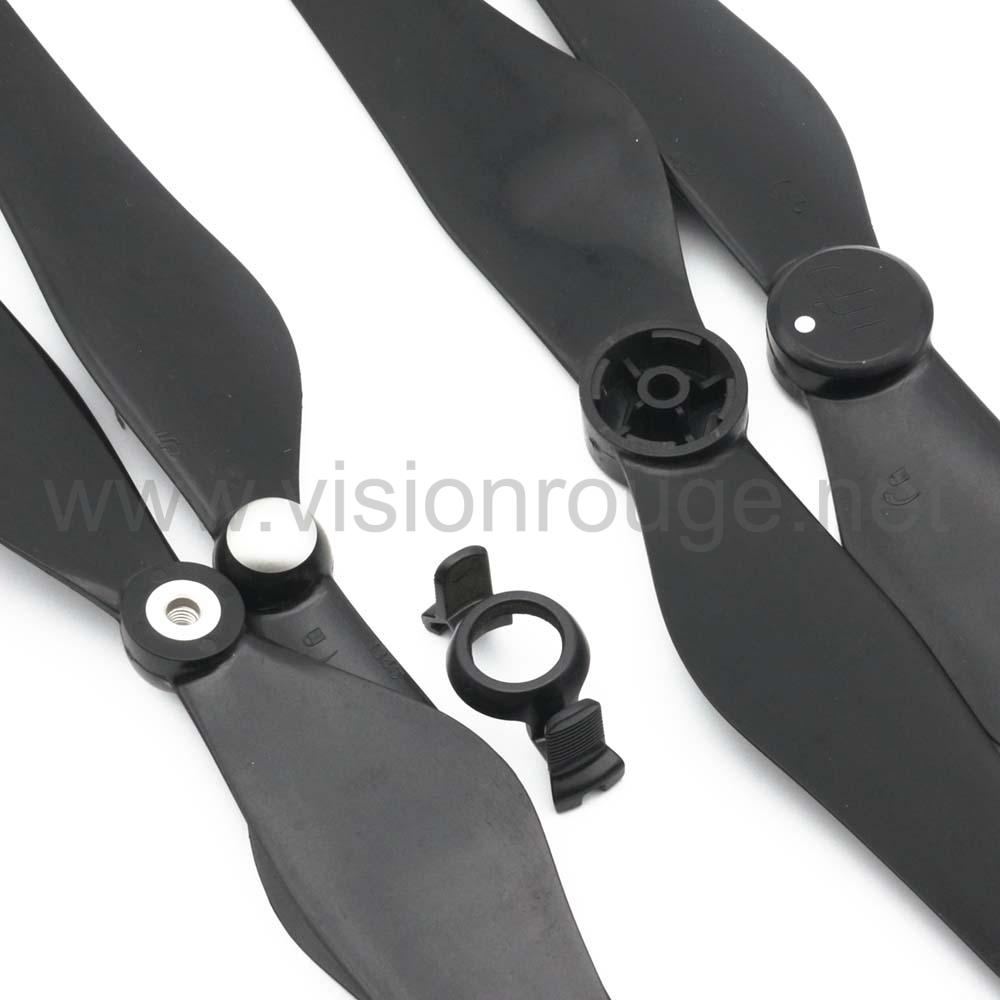
Propellers: During this year, DJI changed 3 time its locking propeller system, so I guess many of the pilot experimented some propeller trouble, it also avoid any unbranded carbon fiber propeller and forced you to stick to the DJI as the shape is quite hard to reproduced by third party. I have no trouble with that. Just make sure it doesn’t get loose after each mounting/dismantle operation. Get plenty of propeller around and don’t get cheap if you feel something is not right; just put a new one!
 Continue reading
DJI Inspire 1 versus Phantom and Mikrokopter. Pro and cons.
DJI inspire 1 vs phantom vs mikrokopter
I’m the happy owner of 4 different flying platform. Few years back, I started with a large Mikrokopter Hexa XL, moving later to phantom 1 and 2 and my last buy is a DJI Inspire. I’m using these for different jobs in different configuration as I think they are very different from each other and also. I will try to explain how different they are from each other.
Over the age…
My first drone, a Mikrokopter multi-blade drone Hexa XL;
To be honest, I built it way before the drone trend in order to get different pictures from the air. It was a very long and risky process at this time as only few passionate where moving from RC plane to these so called “drone” blog and online help were very hard to get right as everyone was publishing its own experience with no commercial model available.
I trained myself first in 3D simulated software using my remote connected to my computer at first as you cannot afford any crash. I still think that the right way to start with learning how to control your drone.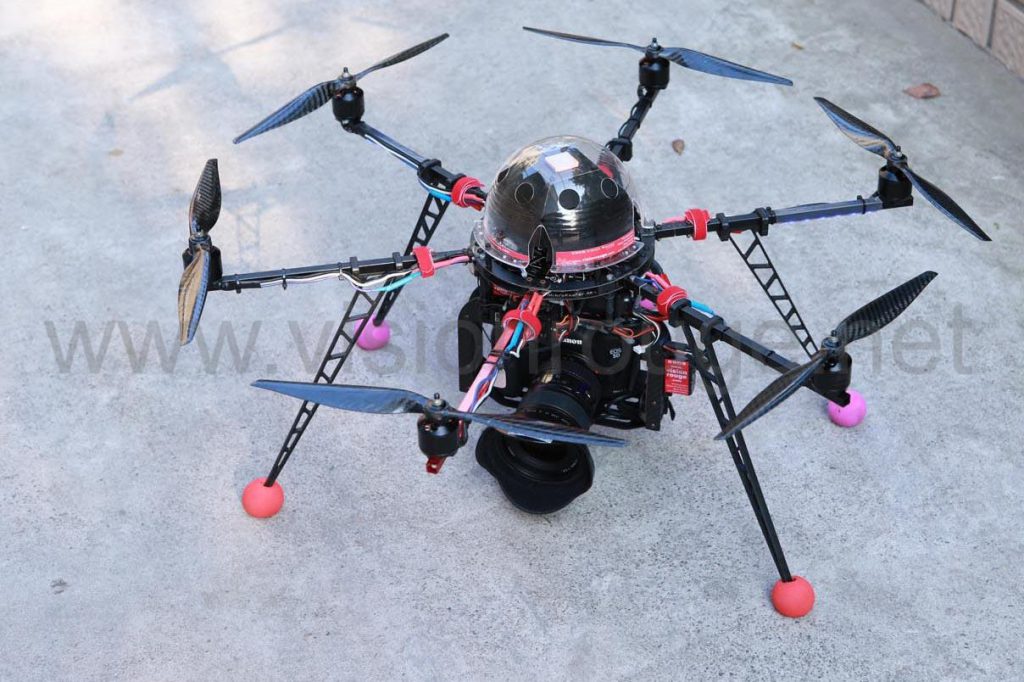

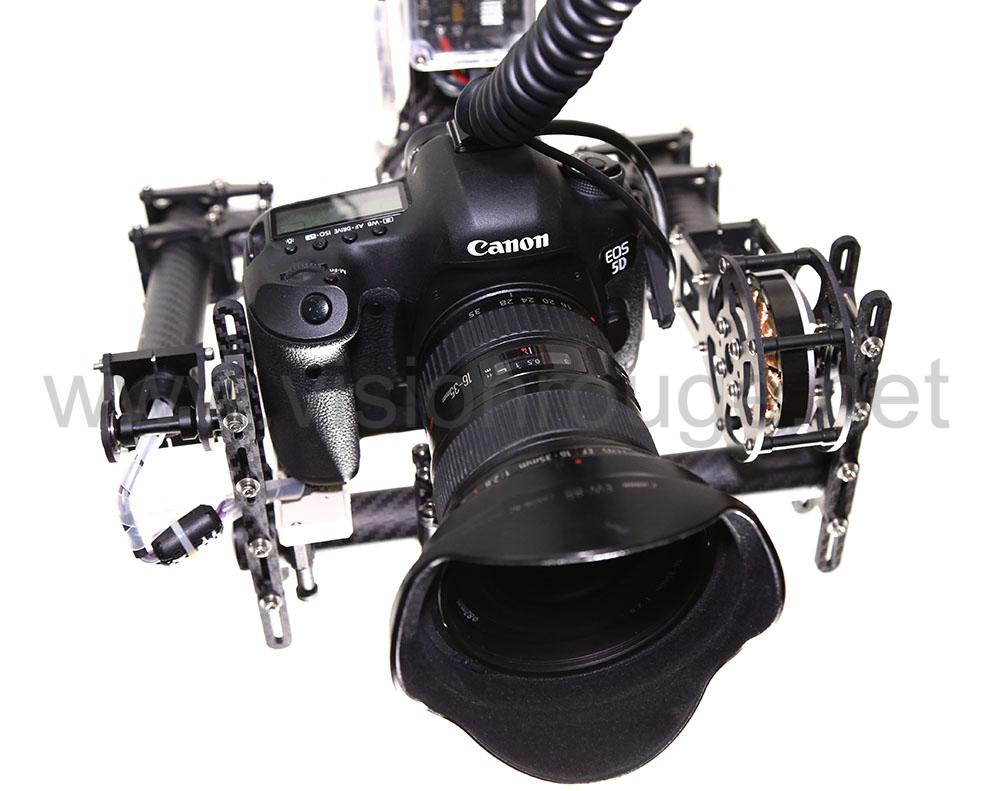
My Mikrokopter setup with Canon 5D camera
It was a more larger DIY project and I do not advice someone without good electronic, programming and mechanical experience to start such project. I had the feeling that I was spending most of my time upgrading in order to get it better after each flight. I was still an extreme rewarded experience and a perfect way to learn how to flight without all the GPS and gyroscope help. Continue reading
Jul 13 2014 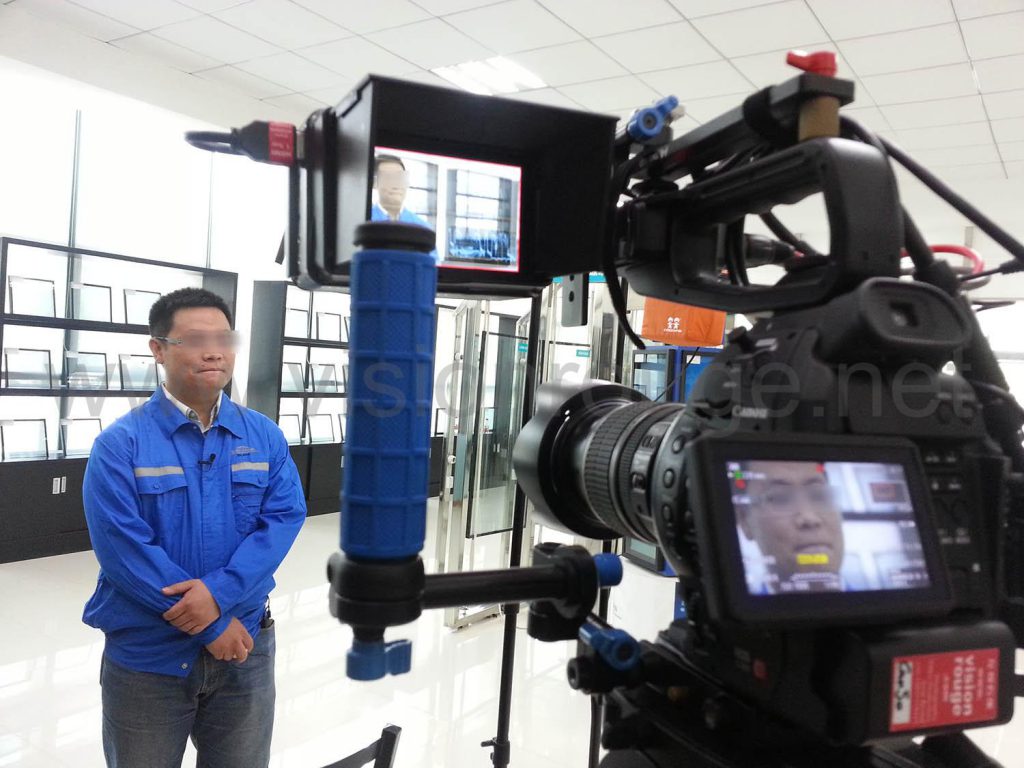

Why did I choose to buy a Canon C100?
Canon C100 review, main advantage with the competition
The perfect equation
Let’s be frank, I never been crazy of the huge sensor DSLR trend. Each time a client contacting me for a Canon 5D shooting, I was trying to avoid it; poor resolution, too large sensor making you struggling to get the main subject in focus, no proper sound, lack of ND filter and a very poor handling system. Yes, for a very fraction of the price, you can have the look of a cine camera, but as the team needed to be reduced in the same proportion, no way to get a film look with nobody around the camera without a lot of pressure on the operator.2 years ago, the Canon C300 was introduced to add all the missing DSLR feature in a nice body, but clearly the price was far beyond my reach in a keep changing market. The C100 came out the year after with almost all included and even extra improvement excepted the recording format. That was still not the right camera as adding a recorder was adding a lot of weight.
But recently, I start using the new Atomos Ninja Blade; great resolution, acceptable battery life, lightweight and all footage available for review or editing right out of the recorder. As, in my opinion, I will always add a preview monitor to any camera system, having it on a C100 was a complete acceptable solution.
So, here I come buying a C100 after many shooting with a rented C300,.. and I do not regret it!
The main preview is done with the Atomos Blade Ninja and I discovered that the few difference with the C300 were more actually in favor of the C100 if you put the price in the balance.
The cons and the way out of it– Recording format limited.
Need to add an external recorder in HDMI + preview monitor as the Atomos, but that give you actually a dual recording, one prores HQ even better than the C300 and a compressed one for quick upload for your overseas client.-No SDI output, just HDMI.
The HDMI output have a screw linked to the body of the camera, you can create your own cable and lock it, it will be even a stronger connection that the one you could have in SDI! Please read the remark at the bottom of this page about the HDMI output.-No Time lapse function.
Maybe one fun feature missing just to keep this to the C300. But if you shoot with the internal codec, you can still run hours with a 64SD card and keep your footage small in size. The quality difference will fade as soon as you will speed up the footage.-No slow motion.
The C300 is not also a slow motion king. The EOS series cameras are not the one you should be using if slow mo is your thing, nothing new.-The camera screen is not easy to adjust compare the C300 one.
That will be my main complain, there is an angle where you can’t have the screen right in front of you with the right tilted angle and that when the camera is high on the tripod to get a 2 buttons framing shoot, quite a common situation… But as the preview screen will be added, not to worry. Continue readingDec 22 2013 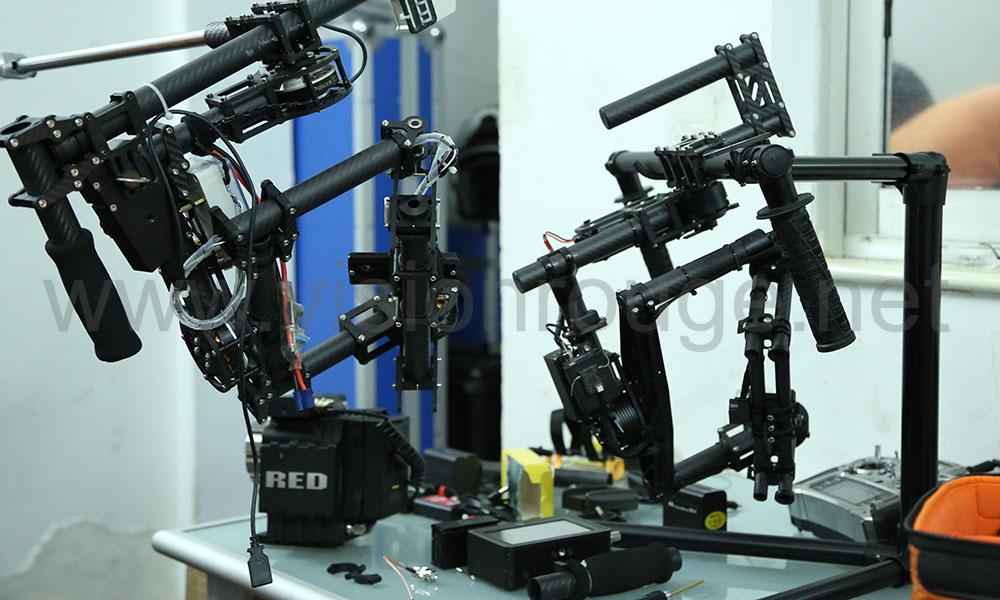

DIY Alexmos gimbals VS FreeFly movi
Alexmos gimbal versus FreeFly movi review
First, here are the latest update on my E-Steady system,

I did few improvement on the last setup, making it completely workable unit and ready to rent it to non experimented shooters. It’s available with different options at the rental section. Continue readingNov 30 2013 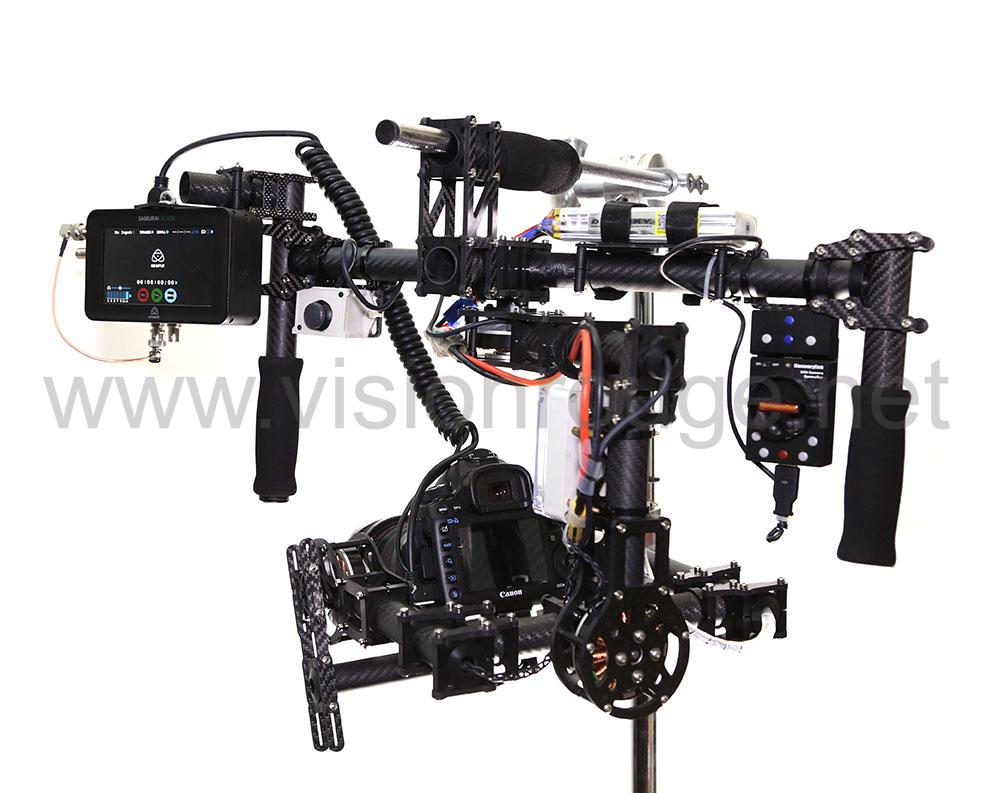

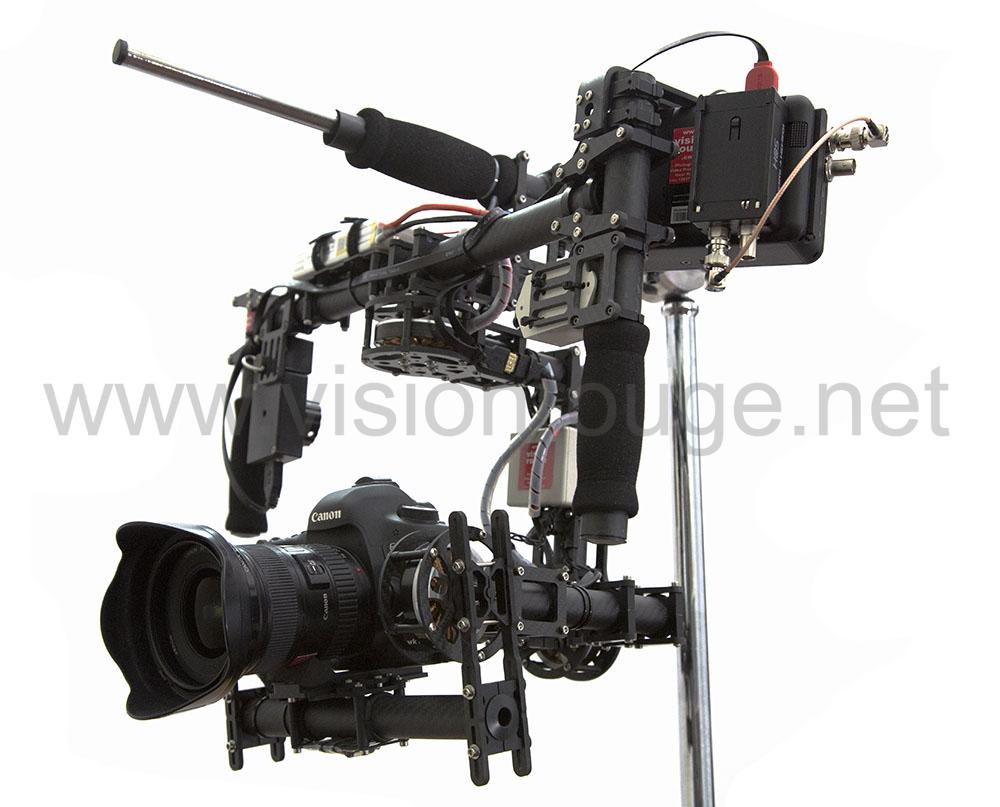
Electronic-SteadyCam 2.0
In House Electronic-SteadyCam 2.0
Since flying object are in the sky with video camera, the engineer have tried to make the footage less shaky by adding gyroscope and motors to compensate the tilt and roll. With time, technology shift to faster motor and better gyroscope, It took not so much time to build bigger gimbals for bigger camera.
Turn out that any hand held system may benefice from this technology and the development from a single engineer in Russia finally took over everything we knew.

Alexmos developed a simple board, based on Arduino processor, including anything you need to balance with specific motors, the brushless one you could found anywhere. Continue reading
Drone tips
Drone tips for a safe flight
After about 2 years of experience in flying, I learn a lot and found out that I was very lucky to not have more trouble during my flight at the beginning of these projects.
So, I save you a lot of trouble by writing down all what I found so far as a list of things to think before and during flight. You will have to read but also follow these. Don’t jump too fast to the next step…
I supposed you already read all the checking list before sending something in the air, so I will jump to other matters.It’s always good to picture in your head how will look the view from the sky, it will help to decide your flying path.
This castle is almost invisible from the ground, but looking great at 150m high (France, 2012)


Don’t over estimate yourself.
Flying is easy at first: you buy a copter, you turn it on, it’s flying in a field, and you are a pilot! Continue readingDJI Phantom 3.0
DJI Phantom 3 test and review
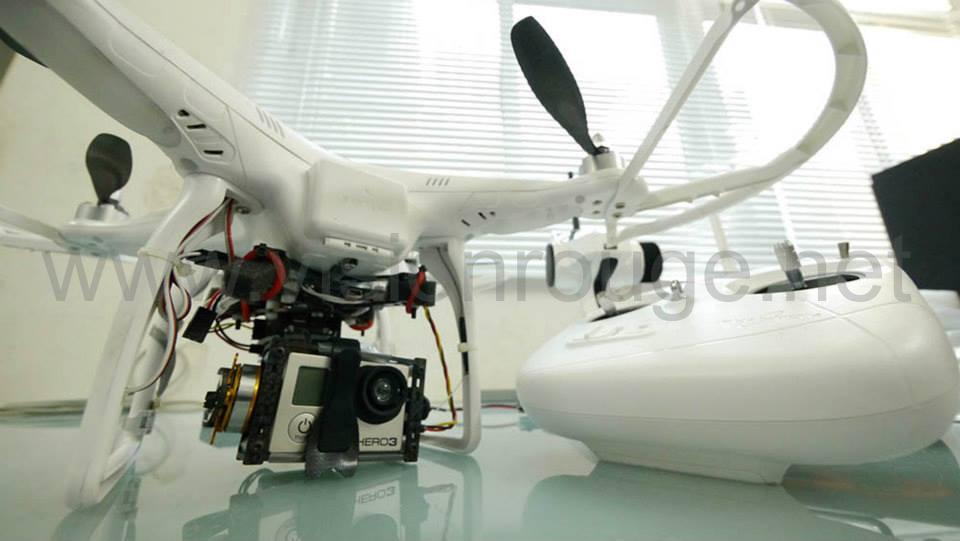

We are proud to get our third version of this DJI project.
After tweaking for 6 months the incredible DJI toys, we have to a very usable tools for production.
Here are the list of changes I did on the basic model available anywhere.Landing gear.
The foam tube help lifting up a bit the copter and avoid hard landing as well as increasing the footprint to protect from flipping. Continue readingSony UP DR150 printing problem : Black line around dark area
Sony UP-DR150 Instant printer black line
It’s when some black lines creating a shadow each time the printer need to have a deep black area.
Here is the sample with the used ink roll


And here with the brand new ink roll. Continue reading
Jun 03 2013 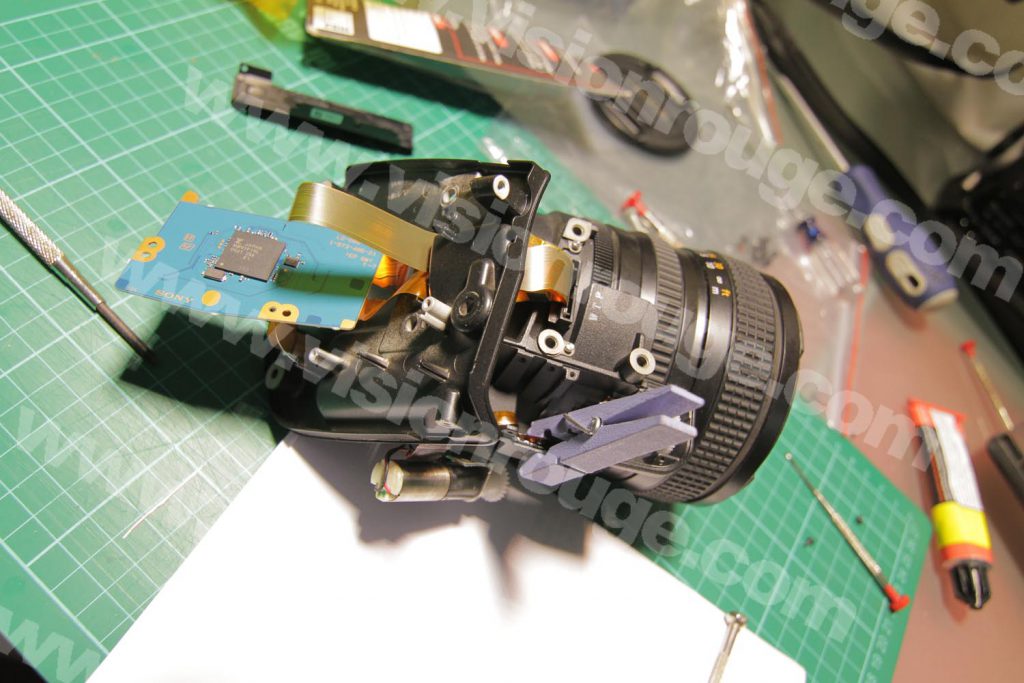

Fixing the sony z7 tele lens
Shanghai Sony repair center experience
On a shoot, i realize that i can’t control the zoom level by remote.
I was able to switch to manual/remote, feel the motor or not, but nothing happen when i press zoom in or zoom out, both on the camera button or handle!
I had no idea if it was a sender (the camera) or receiver problem (the lens).I bring back the camera to Sony and they said to me that the lens is dead, a new one is around rmb 7,000 (750 Euros)!
The repair guy did not touch the lens, just plug a new lens, test it, so affirm that i need a new one, without even opening mine!I was not prepare to pay for a new one so decide to take back the lens at the office and open it to see how it is, anyway, the lens is dead to them.
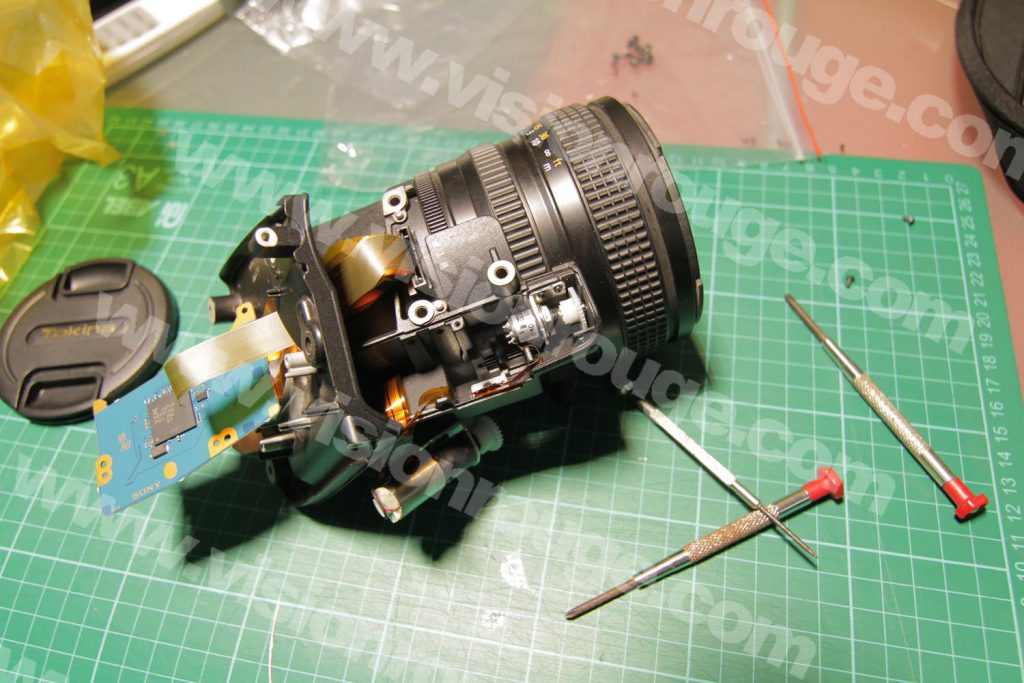
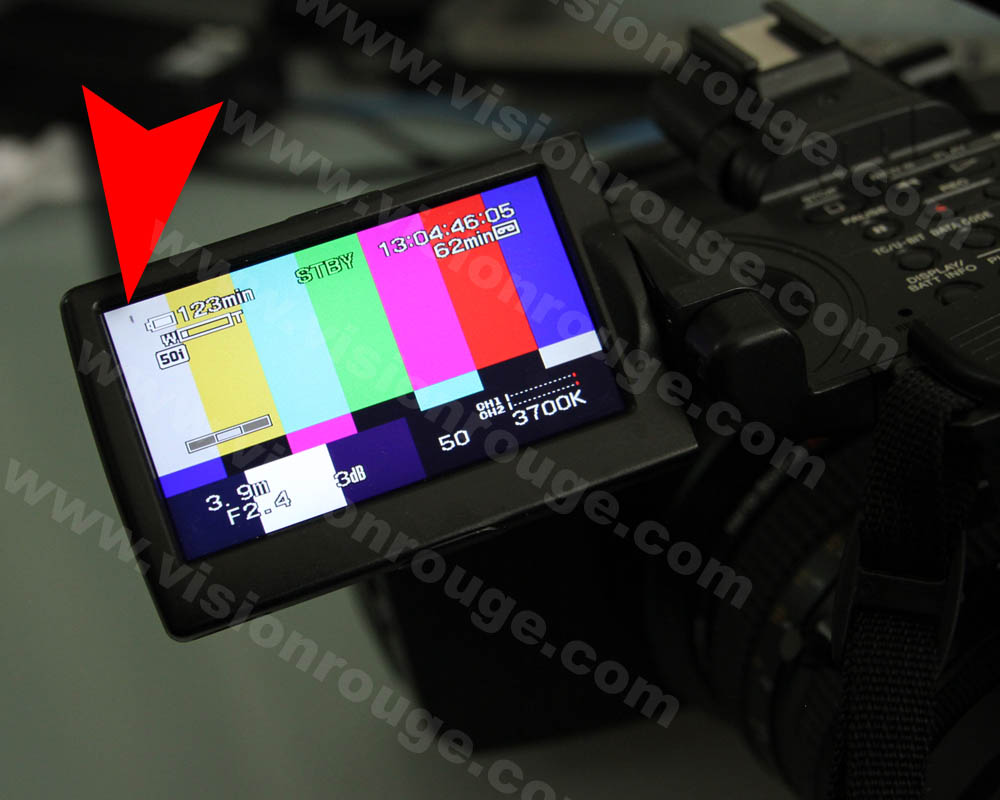
I start opening the motor panel as it was for me a dead motor.
And i notice a slight lift under the motor where the switch is. (See the red arrow) Continue readingJul 14 2012 

Unbreakable hdmi cable connector for 5D
DIY HDMI cable connector
Here is one idea to end the mini HDMI trouble you can have with the DSLR setup. for 5 usd max…
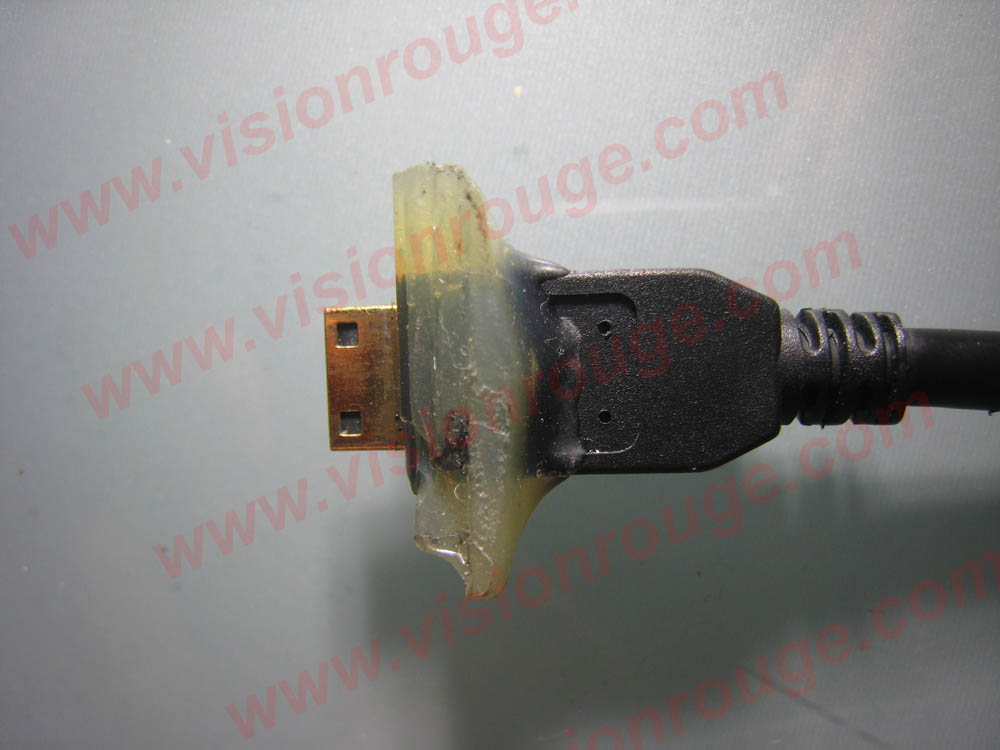
This is a part of a series: How do I upgrade my DSLR shooting experience. (external aperture control + Start Stop Remote control)
What i did.
I use the scotch tape used to send box by mail, usually a brown colored one.
I choose this for 3 main reasons:
-It’s not too sticky on plastics or metal Continue readingJul 10 2011 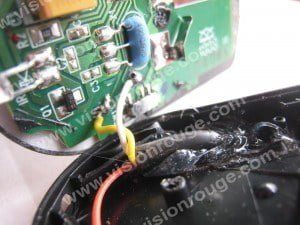

Siple Remote Start Stop for 5D or 7D Hack
DIY Remote Start Stop for 5D or 7D
As the external shutter remote only control the shutter, the only way to remote the recording is to use a IR remote. But the IR need to be in front of the camera as the sensor is inside the camera hand-grip, not very convenient.
Here is a Canon RC6 IR remote working for both 5D and 7D (cost around rmb 390 but copies available for rmb 50)


You need to remove the front adhesive layer (there is 2 layers) with a cutter and gently remove the IC board. (Remove the battery before, of course). There is a small switch at the back to delay your remote order. Keep it in “no delay” position to avoid waiting time at each take. I remove the switch cap and use the empty hole for my remote wire.
The Shutter control
The remote is a cheap copy of the canon shutter release but any brand will do. In fact, any push button will do, so a bell push button is fine also Continue reading
May 29 2011 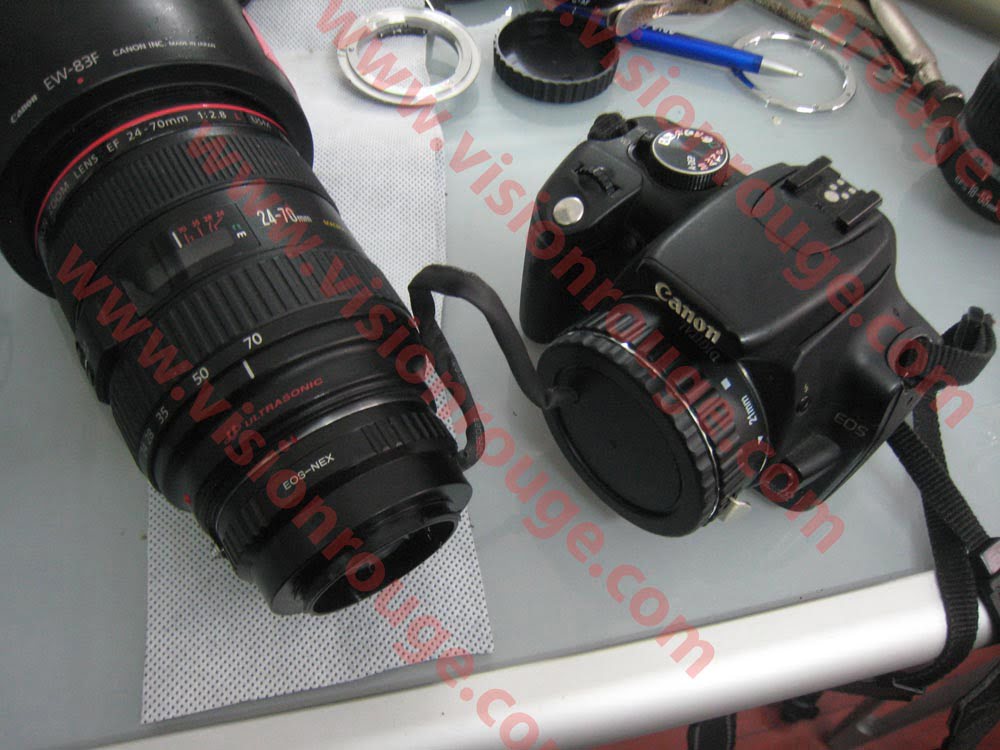
External aperture control for eos lens
Canon EF lens External aperture control hack
In order to keep my EOS EF / EF-S lenses on Sony NEX range camera (FS-100) i will use a regular adapter, and add the electrical control system coming from another EOS body.
Of Course, Cheap to buy, but i also bought some macro ring for Canon Lens, dismantle, cut it and add some wire, and use a old canon DSLR (350D) as a remote.
I spend 4 hour on this, so not too complicated to do, and it’s working perfectly!!!
Next step is to buy a broken body in order to put a switch on the “deep of field” button instead of pushing it, add a power supply with 12 V and some rig to attache all of it.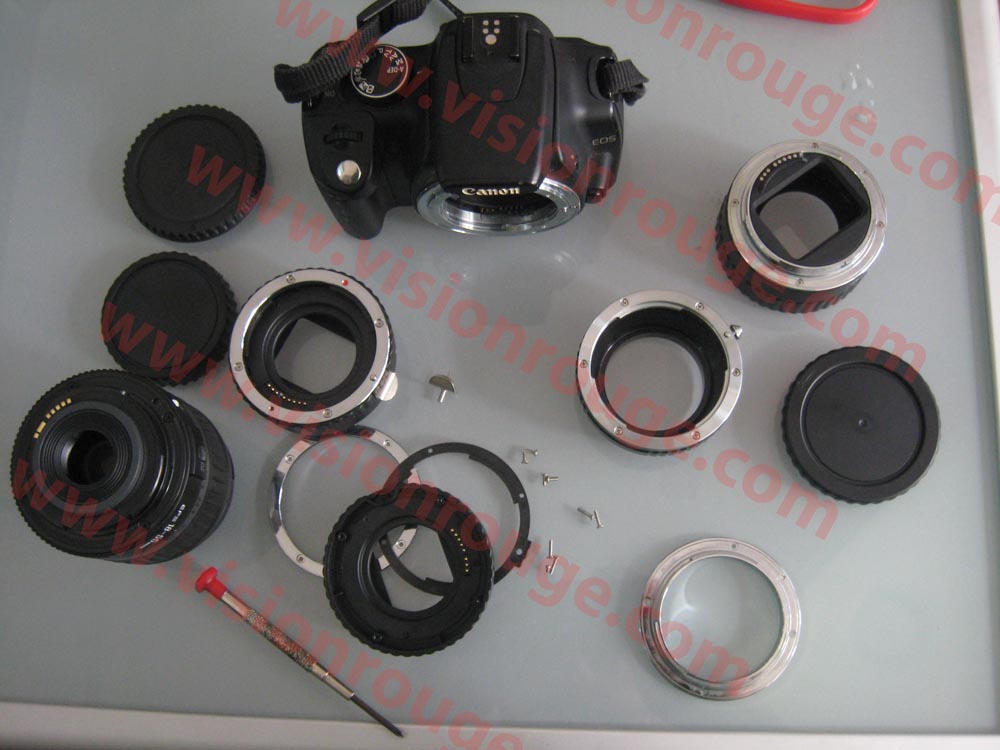
All the stuff to start, Kippon Adapter E-Mount to EOS (mecanical only), Extension tube for EOS, 350D EOS Body and test EF-S Lens. Continue readingJun 10 2010 

Remove dust inside a Sony Z7 LCD screen
Sony Z7 EVF dust (and other camera)
Since Sony’s HVR-Z series camcorder, i have noticed a weakness on the preview screen design. The screen is between two plastic covers and it’s easy to have dust or even water getting inside it, between the lcd and the back-light. It happened first with my FX1 with one rain drop and i was pissed to see something on my brand new Z7. Shanghai is a dusty city!
Dust inside screen
The first thing to do is to remove the battery pack to avoid any electric miss-connection during operation.
Flip over the screen and unscrew the 2 small screw. That will unlock the two cover part. Continue reading
May 10 2010 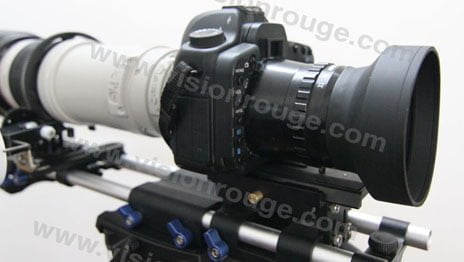

DIY Dslr lens viewfinder
Dslr lens viewfinder
The idea is to use a magnifier lens for contact sheet glue together with a folding sun shade. The main goal is to keep a pro look and also to have something able to work in a industrial environment. Also, all the item should be available and should be cheaper than the “pro” one’s!
When I wrote this post, only few possible expensive model were available, now, you can easily found something without all the bothering diy step.Loupe x5
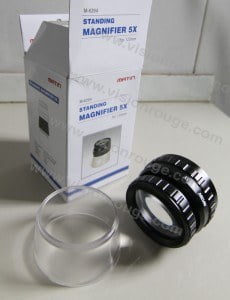

This lens is design to reduce deformation on the corner of the picture. The cost is about rmb 900. The support is in metal but some other version are available in plastic. The 5 time magnifier is perfect for a 5DII or 7D and make the screen amazingly huge. The second lens can rotate to adjust focus for people wearing glass. The main problem with this design is that you need to do it for each camera family as a 5D back is different from a 7D back. Here I used it for canon family, but Sony or Nikon are possible too, as soon as the folding sun shade is available. This is the first step before moving to a real EVF. Continue reading
- 1
- 2