ISO, RAW, UHD, 4K FullHD, EI, ASA, dB, LOG, RAW, ND, CPL, IS (part 1)
RAW, ISO, ASA, Db, LOG, ND, …
Camera and video camera are getting cheaper every year and more and more people have access to it. The market expand and it’s getting sometime confusing to understand what a camera is actually capable of, either when you want to buy one, or when you want to use one you rented.
I have tried here to sum up in a simple way each step of setting your camera recording mode and how it will impact your image.
This step by step is also the way you will have to follow the menus inside your camera system as it may need to reboot at some point when changes are requested.
This is more for a video camera, but as a photographer, you still may learn few notion and help you jump to video.
To makes thing simple, a video camera is recording a succession of pictures and this create a movie. So we can start by understand how a single picture work before going to the idea of recording a full movie. Later, I will explain more about video.
Recording a picture is a very simple link between 3 factors impacting the amount of light a camera sensor will received. A sensor is composed on many small light receptacles called pixels. The amount of pixels define the resolution of the camera. A high resolution mean that the camera have a lot of pixels, and can also be setup to use only part of it depending on your project. In a picture camera, the possible resolution is quite open and many manufacturers offer many different resolution. In video, the resolution is fixed by the video standard so a calculation is made to down-convert to approved resolution. depending on the calculation, it may impact the picture look. it’s sometime impossible for the camera to choose what should be the color of 2 adjacent pixels divide by 1.3 for example. This may create a pattern called moiré on you final image.
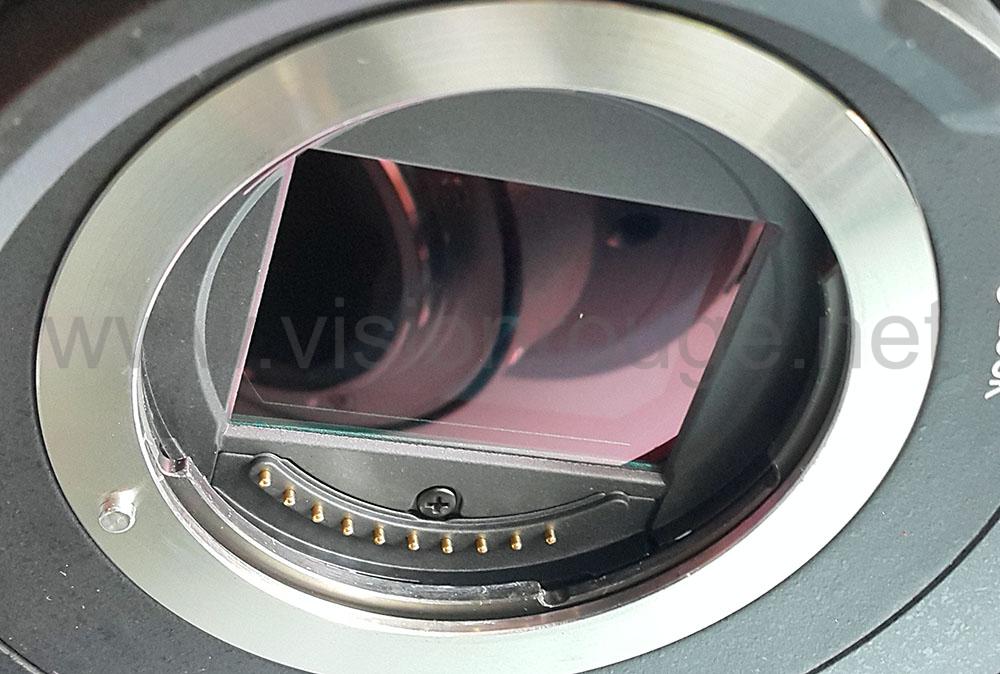
To go simple; the sensor will convert light into electricity and so digital information to be recorded on your media, creating a picture. Let say that you need a certain amount of light to get a picture the right way in your camera. Too much light equal too much electricity and your picture is all white, not enough light and your picture is dark and black, all details are lost.
To get the right amount of light, you can play with 3 elements:
–The time during the sensor will received light (more time for a picture, more light will hit the sensor), it’s called the shutter speed.
–The sensor sensibility (more sensible the sensor is, less light is needed for the same time exposed) This parameter is the one who changed the most over the years. All sensors have a base parameter and you can add some electronic gain to get even more sensibility. This is like your sound system at home, you can increase it to a certain limit; at one point, the sound will get distorted. For light, it’s the same, the distortion will be displayed as noise!. We measure this with ISO or ASA, sometime also called simply gain. Iso 50 is often the lower you can go and ISO 1,600 is a average usable sensitivity these days.
It may be hard to understand, but some cameras have now different basic ISOs with the same sensor. Even worst: basic gain is also changing depending camera recording parameters! On camera specs, the best working condition is achieved when using the camera at it’s based ISO. Don’t get fooled when looking at camera specifics online, brand are now announcing very high possible ISO, but the noise level is so high at these that it’s almost useless.
–The amount of light your lens will let pass through it to let the sensor enjoying its bath of light, it’s called aperture. A small aperture means a mechanical iris with many blades is actually able to let more or less light passing by light a water faucet. This is called aperture. (more light a lens can gather, larger is the aperture, and often more expensive is the lens). The amount of blades on a iris mechanism will help getting shape of the bokeh: the out of focus part of your picture. A 9 blades lens is standard, some Cine lens goes to 11 and produces a very nice rounded shape point of
You can always play with these 3 parameters to get either a long exposure time to get plenty of light, but closing down the aperture to keep it under the limit, or opening fully the aperture and choosing a short exposition time.
This is in the perfect and dream world where you can take as many time you want or open iris on demand, but physics have limits and you will have to use compromise.
For example, on long exposure time is not working if your subject if moving fast: it will be blurred for sure. A very fast exposure may let some part of the picture not exposed if it’s lighted by a led (TV screen, outside billboard advertising,…)
Also, changing lens aperture impact on the rendering of the picture. A large open Iris will give you a very small part of the picture able to get the focus right, where a very small aperture will get almost all your picture in focus easily. To get a small depth of field, you need to get the aperture a large as possible. (beware that a large aperture is actually represented by a small number; f22 is a very small opening and f1.2 is a very large aperture)
It’s important to notice that the aperture chosen also impact on the sharpness and each lens ha a specific range of aperture where sharpness will be perfect. Usually, using a lens at its limits is not recommended if sharpness is important. If you buy a F4 lens, it may be recommended to use it at F8 to get best sharpness, when a F2.8 capable lense will work better at F4.
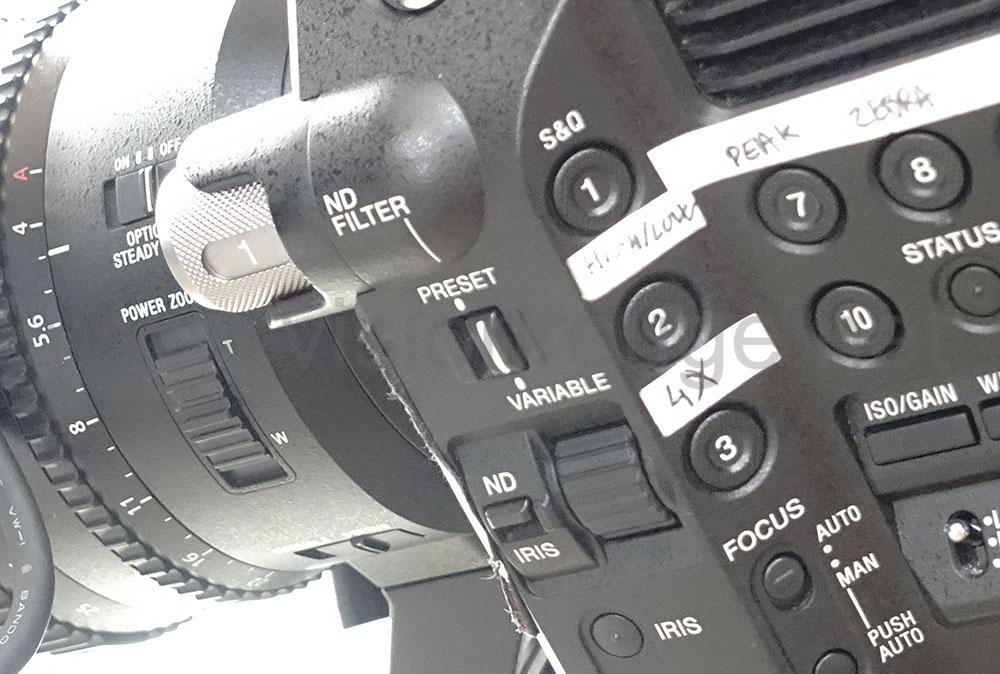
One other parameter that you will found in most of video camera and can buy as separate item for picture is something called: ND filter. This is acting like a neutral filter (it do not impact on the color of the picture), but dim for a certain amount the total light entering. On most of video camera, it’s a wheel holding different filters with increasing densities that you just slide right in front of the sensor. A new tech is now in place call electronic ND where we can adjust the exact density of the filter to avoid the steps between each filter. A manual version exist too and you can buy one very easily for your picture camera called variND. You can rotate by hand and get more or less light entering the camera lens. This filter can be screw in front of your lens or slide inside the lens for very wide lens where the curved shape of the front element do not allow to hold one.
It’s a must have for working outside as sensor are getting more and more sensitive and there are sometime too many light entering the camera body even trying to close the iris to the max. To makes thing a bit more complicated, there are 2 ways of describing a ND: we either said ND2, ND4,ND8 or .3ND .6ND. 8ND.
One common confusion here is the ND0 filter that a lot of people buy and put in front of their lens to “protect it” As it’s suggest ND0 is a 0 filter, acting like a simple piece of glass who just let all light getting in but protect the front optic. As stupid as it’ sounds, most of these cheap filters are actually in plastic and will impact on the final picture sharpness or color rendering. It will also add reflection when shooting in front of bright light or produce vignetting (darker area on the border of the frame) on wide angle lenses. As the extra filter is mounted on the outside of the lens, it create a shadow on the image border. The lens is circular, but the picture is a rectangle, so only the 4 corners are affect.
So, now that we understand few photographic notions, what is the upgrade going for video?
A video is a succession of pictures, but the number of pictures needed per second is fixed by recording TV/Cinema standards.
The basic frame rate are: 24,25,30,29.976,23.976 pictures per second which makes all a bit complicated to understand. Some camera brand do not offer all these. After a shooting it’s almost impossible to get the frame rate changed and so it’s very important to set up the right frame rate according to your project.
24p is when you need to mix your footage with cartoon animation mainly.
Old cartoon movies where designed by hand and drawers where using a basic 12 images per second to draw to makes things simple. But years passed by and computer generated draw are now more flexible. It will be very unlikely that you will be asked to shoot this real 24 pictures per second.
23.976 is the standard for cinema and perfect for filmic look
25p is the TV standard in Europe and China, also called PAL
23.976 is the standard for TV in USA also called NTSC
30P is a shortcut for some camera who don’t got the real 29.976
The only reason these day to choose one over another is the use of your movie. For example, if you need to get your footage edited in the US where all workstations and motion graphics are in NTSC mode, you should respect this, but if you are doing a footage for yourself and put it online, you can choose the one you like.
There are still a point to consider when choosing a frame rate is the actual location of the shooting. These frame rate per country are based on the actual frequency of the electricity system; 50Hz in PAL country. Some lighting may create some blinking if you are not in synch with the frequency. My advice when you are working in an environment you cannot control is to follow the frequency of the country to avoid too much trouble.
The lower the frame rate, the more time you will have to get each picture composing your movie and so this “cinematic look” at 24p where 30p will be more like a TV look.
The funny part is despite these basic frame rate at which your footage will be watched for sure, higher recording frame rate can be also setup in order to get a slow mo effect later. If you shoot 60p for a 30p movie, it can be slowed by 2, but if you are planning to use it on a 24p movie, it can be even slow down more.
To makes things even more complicated in video, the chosen frame rate will affect directly your possible shutter speed. If you need to take 24 pictures per second, you can’t have a shutter speed slower than 1/24! so if you decide to go for a slow mo shooting and need to do a 180 frames per second recording; each picture composing you video should fit this 1/180 per second space and so you may start to have a problem with lighting. As we take more pictures per second, the duration of each picture is shorter and the amount of light entering inside the lens will be also reduce. Very high rate shooting need very strong lighting to fight the fact that the shutter speed get higher too.
It’s a common practice these days to shoot all at double speed and see if we use it later for the editing. Few tricks in software also help you to fake this slow mo. A 60p footage can almost get slowed 4 times on a 25p timeline with a dedicated plug in, the extra missing frame are recomposed by the computer.
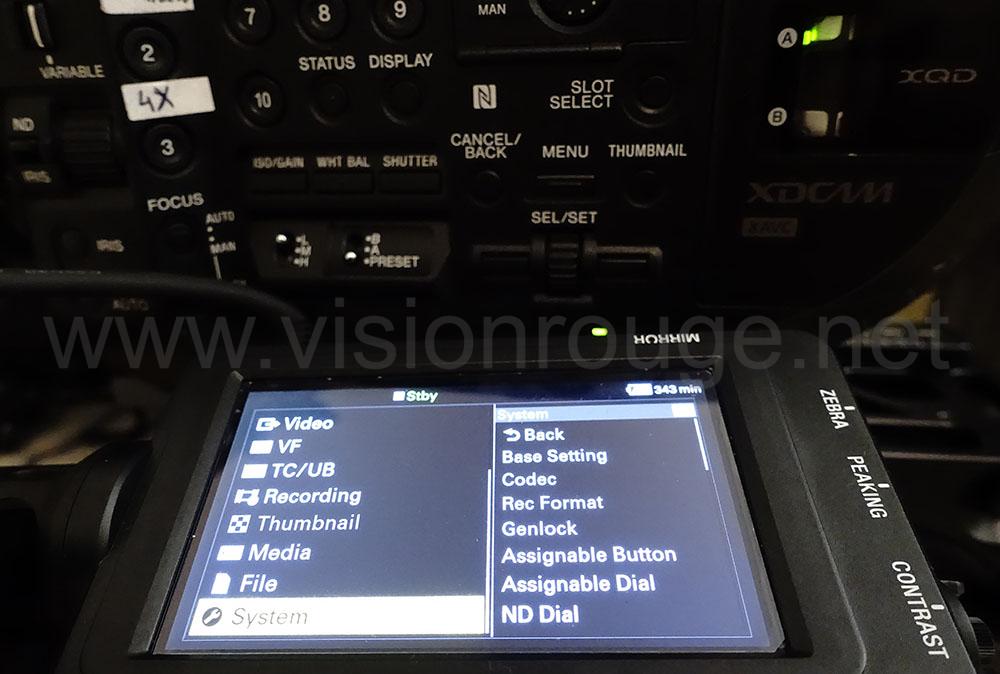
The next thing to consider is the resolution. In photography, we have as many resolution as we have camera model, almost! and no one really care. But in video, it have to fit few defined size. All these size and ratio have their own names; few are generic, other are very specific format.
Historically, there are 4 big steps until now for video resolution,
– SD or Simple definition size, in PAL or NTSC (at this time TV format was in synch with electricity and as broadcasting through the air using limited space, the frequency define also the amount of lines displayed). Image ratio could be 4/3 or 16/9 depending on the shape of the pixel on your sensor… How to makes things easy for all…
– Later came HD (High Definition) which mean nothing specific except that it was higher than SD.
So we saw 720p on Panasonic, HDV for Sony and finally the only left: FullHD (1920×1080). In HD, all ratios were this time fixed to 16/9.
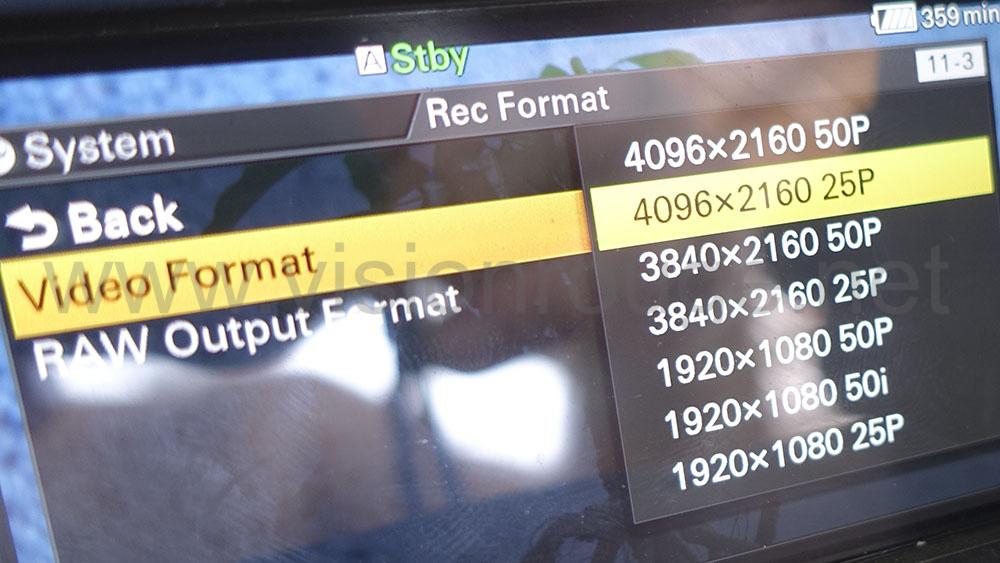
– 4K started and things kept changing with this time 2 formats available with different ratio!
4K (or 4K DCI) 4096x2160p with a funny 256-135 ratio and the UHD 4K 3840×2160
Generally, people kept talking about 4K but it’s clearly 2 different formats. If you are planning on exporting to a lower FullHD project, it’s better to go for UHD as the ratio is the same. If you go for 4K DCI, you will have to remove a bit of both left and right side of your picture when reducing the side to keep the right ratio.
– And more! The future is to go beyond 4K with the new 8K and there are a new work ahead. With such large recording size, each frame can be print on very high quality and video will start to take over on photography. This is another story.
End of Part 1, Please use the comment section if you want to see more!