DJI Phantom 3.0
DJI Phantom 3 test and review
We are proud to get our third version of this DJI project.
After tweaking for 6 months the incredible DJI toys, we have to a very usable tools for production.
Here are the list of changes I did on the basic model available anywhere.
Landing gear.
The foam tube help lifting up a bit the copter and avoid hard landing as well as increasing the footprint to protect from flipping.
I made sure to tighten then so they will not move and shake the copter during the flight with the wind from the propeller.
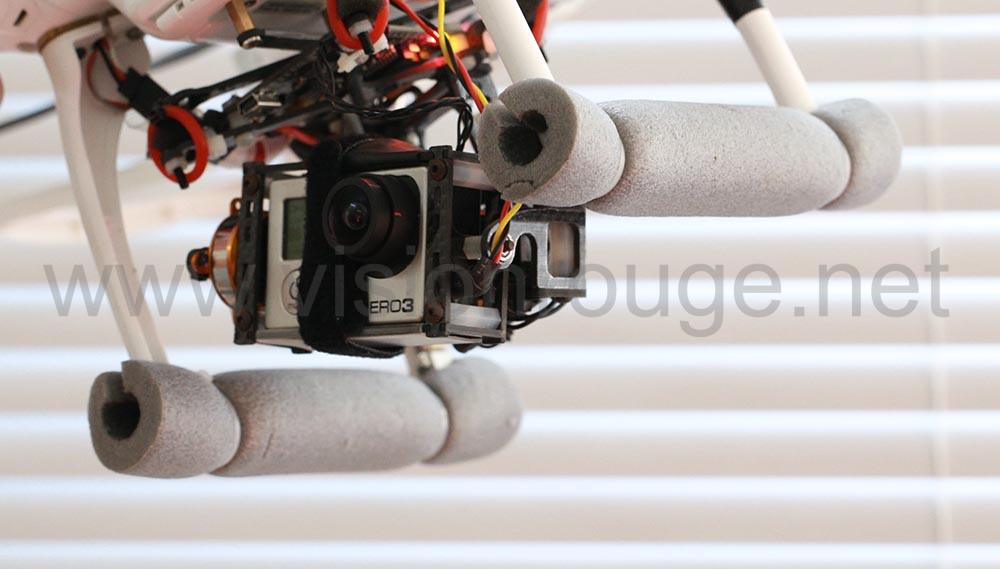
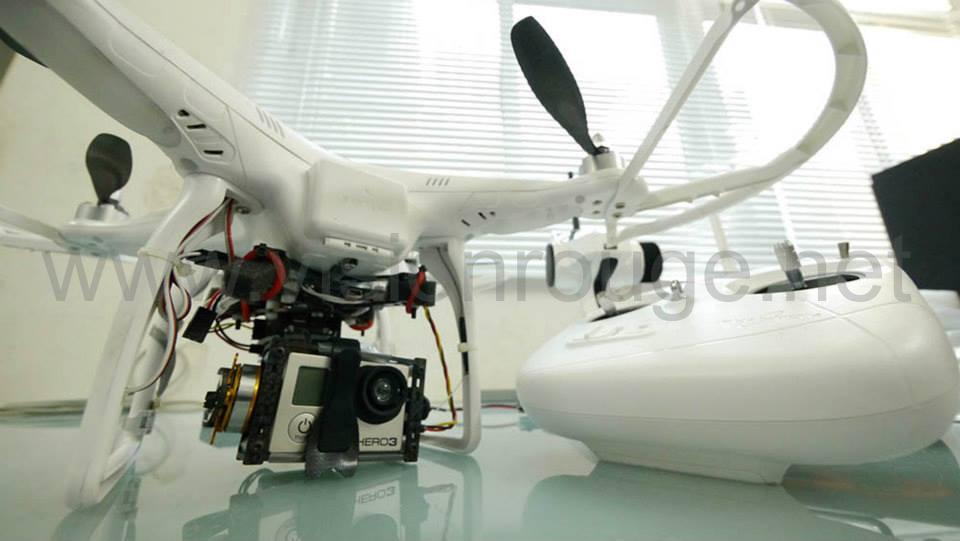
Go pro camera.
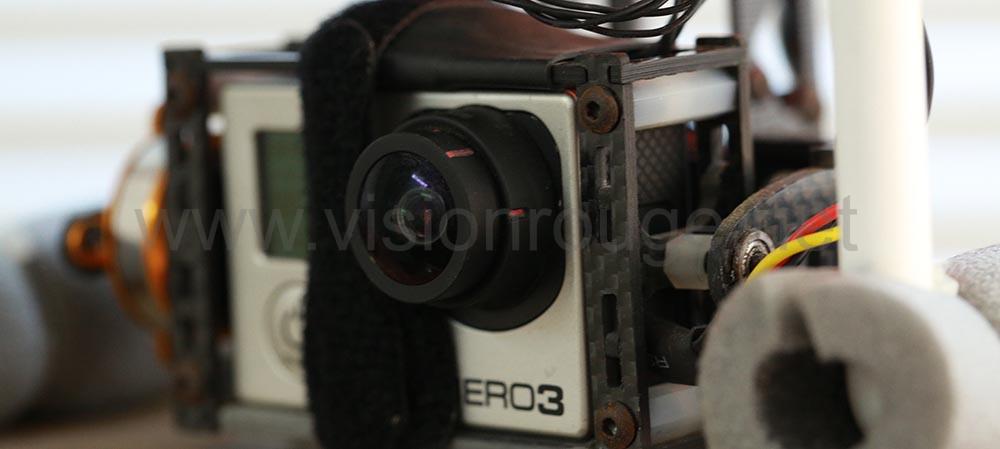
You can find on line plenty of help how to change the lens on the GoPro HD camera, so no need to explain here the way to do this. I decided to go for the expensive lens SUNEX DSL377 in order to correct a bit the fish eye effect from the gopro. After testing I also noticed a better color rendering with it. The downsize is that the lens is now more front and so start to catch light from the DJI Led arms. I did now cover the front red light completely.
I powered the GoGro with it’s own battery cause you can’t just use the power from the usb input only, you still need a battery to make it work, so as the weight is there anyway, let’s save few mA from the main battery.
I use a gopro without the rear screen to save again on the weight.
The video signal will be output from the USB connector, just make sure the cable do not jam with the landing gear when the camera is tilting/rolling.
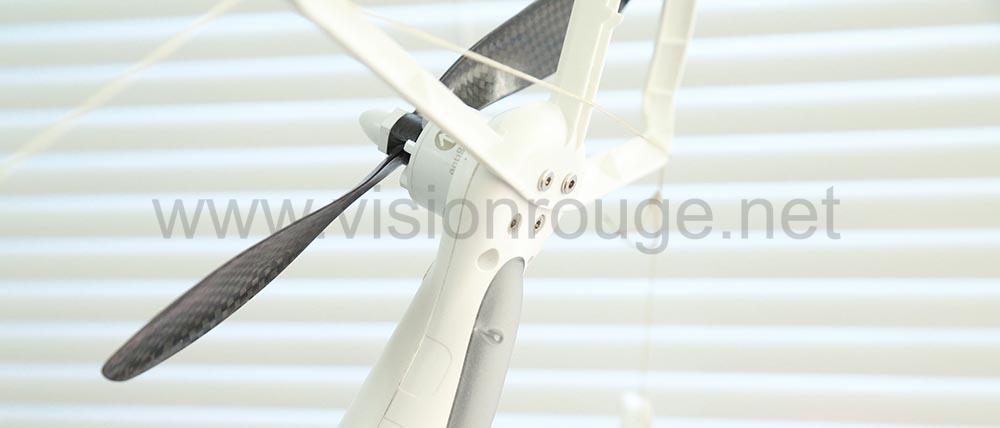
Brushless Gimbal
When I started this project, the originla DJI muse was not available, so I bought a version from taobao and changed the electronic board for an Alexmos one as I’m quite confident with the way it will work. I was so able to adjust the way the motor are driven and make it very smooth without using too much power.
This gimbals is very well design as it’s literally float under the copter. There is no hard part and no way something could break at all will just disassemble during a crash.
The day I order it, the seller told me that I could not complain about the cosmetic aspect of it. Turn out it’s looks ugly but works damn well!
It’s super easy to interface with the hidden channel on the DJI controller and so control the tilt.
With Alexmos, you can choose to lock it to 0 to 90 degree only, so, no risk of jamming the cable by going too much up or down. I decide to use a regular variable resistance to control it by value, but it was also possible to add 2 push button on the remote controller to get a tilt by speed and not value. This is a personal choice and easy to change if you feel it’s not your way.
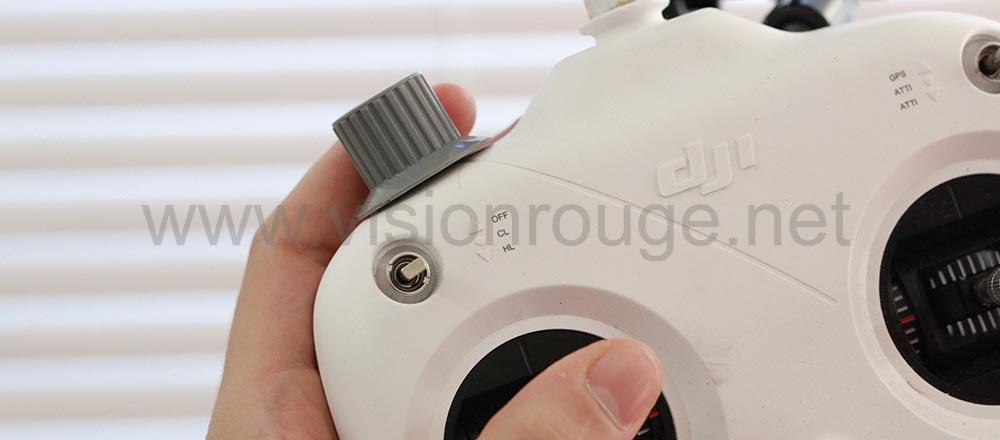
Remote control with a tilt axis for the gimbals
I unsold the existing 500K resistor to put a new one with a big knob right under my finger, so I can control the tilt and keep both hand on the controller during the flight.
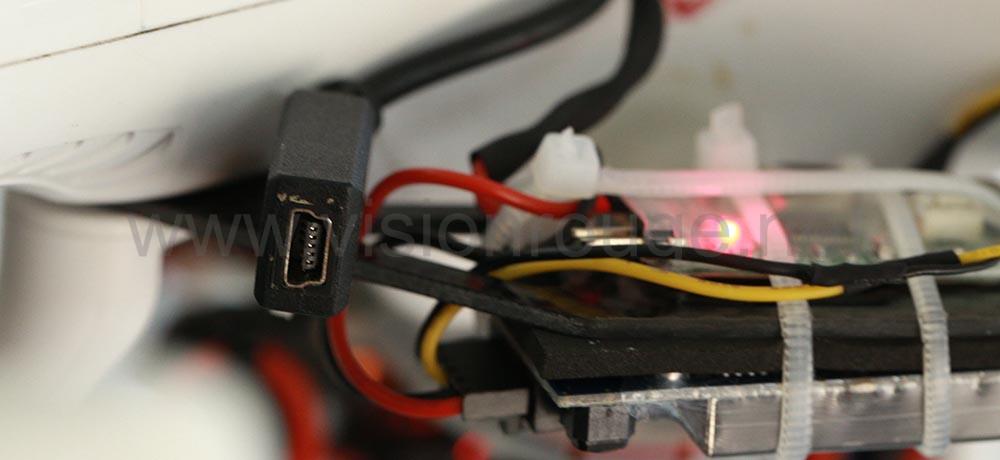
USB cable.
I did remove from the inside the long usb connector and drill a small hole with a shorter cable, and so save few weight and also make space for the battery avoiding jamming inside.
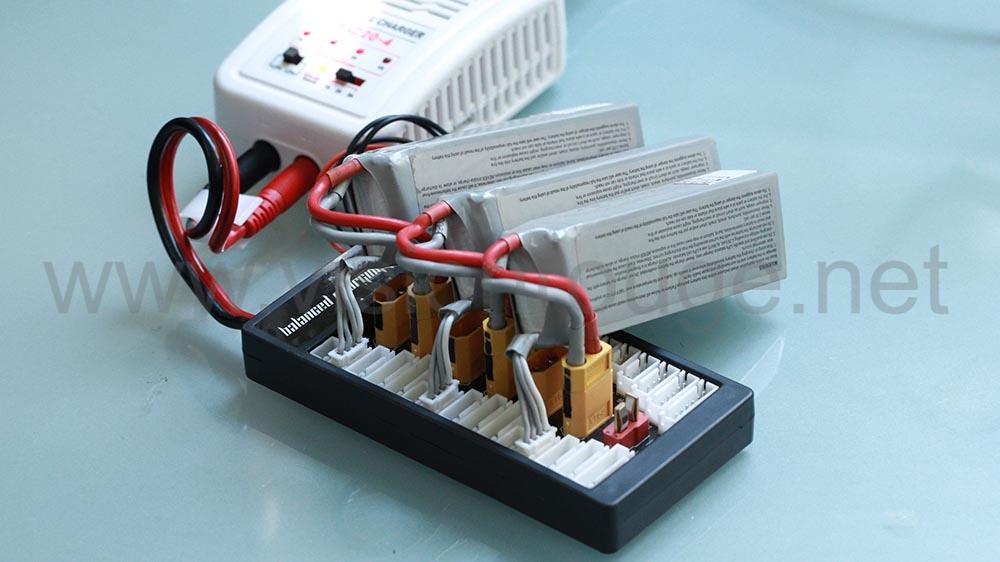
Battery charger.
I decided to buy a lot of batteries (10) so I can be ready for an hour of flight, enough to cover client’s needs. The battery drain fast, about 5 mn in this configuration, so charging may be an issue if you need to charge all of them one by one. With a external platform you can plug until 3 batteries at the same time and forget about the swapping time. I have 2 chargers with 2 plates, so can charge 6 batteries at once, (about 3 hours )
They don’t sell it as it, but it’s just few connection to make it happen.
If you have time it’s better to charge with the position 1A (longer time, better battery life), than 3A as it will kill sooner the battery.
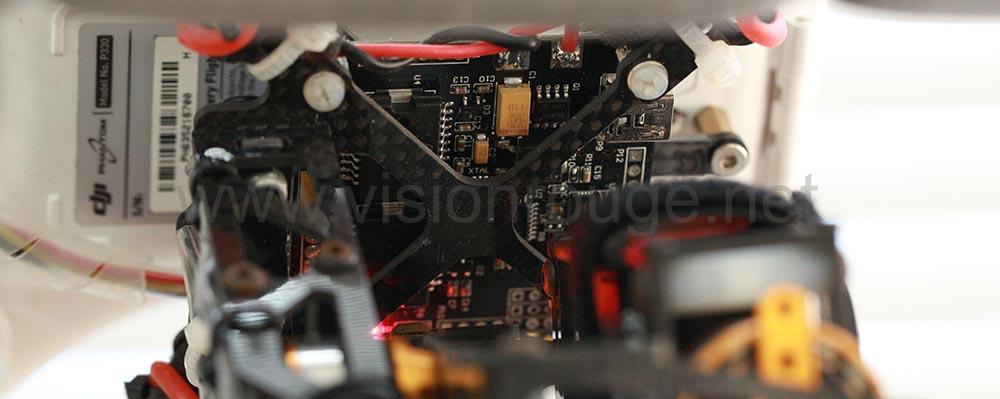
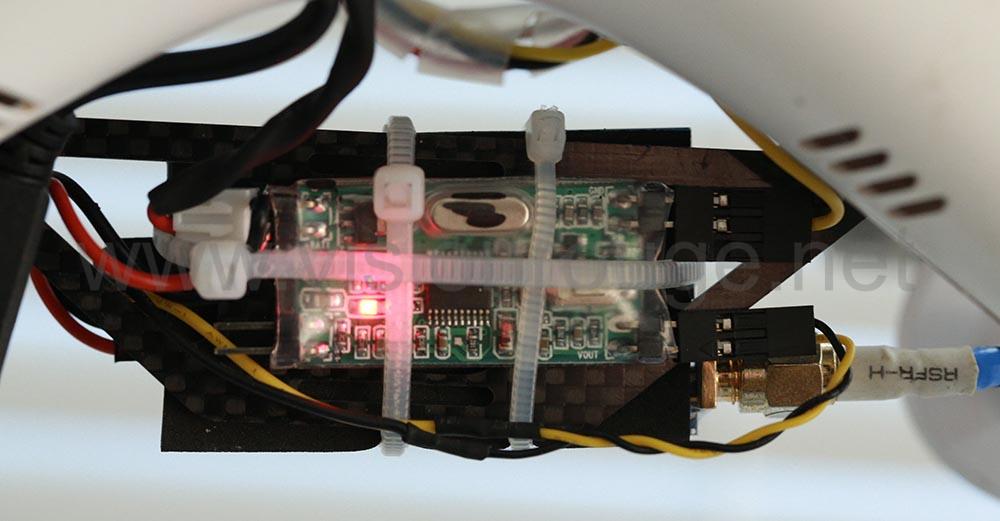
OSD Voltage monitor
When the DJI is in the air, there is no way of knowing the color of the led blinking, and I decided to add at first all flight information as GPS, Voltage, direction,… to the GoPro feed and send it to the ground station, but after few flight, as I’m most of the time inside, the gps did not give ma any valuable input, so I choose a very simple osd giving me the voltage from the main battery and the power up time (almost the flight duration). It’s a great small board, very light, easy to plug and you can choose where the info are put on the screen to not be where the important info are on the feed. As the flight duration depend also on the wind condition and flight mode, I now feel way safer to check the voltage and come back before the red light starts.
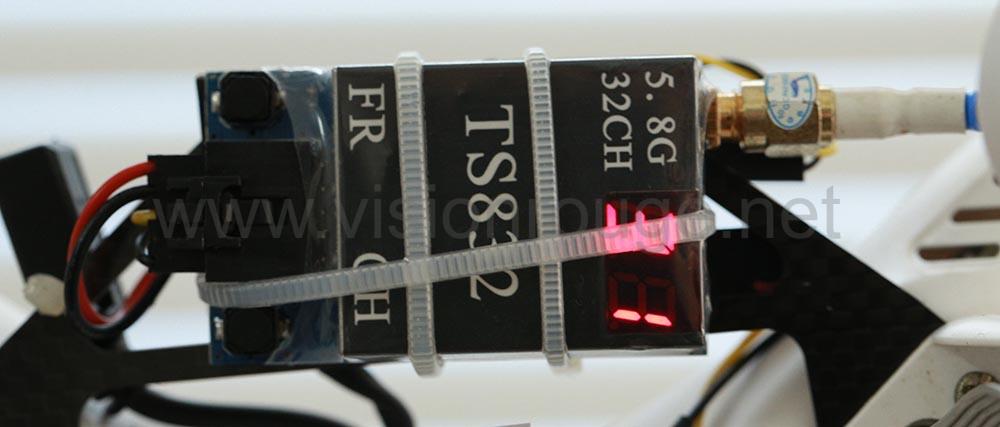
Video sender feed.
This is the last part needed to be improve in my opinon, but for now it’s working fine unless I’m going more than 200m where I can start losing a bit the picture. I think I should find a better way to power my TX, maybe with another battery pack, maybe with a BEC…
I choose a 400 mW 5.8Ghz with cloverleaf antenna on the TX, trying to put the antenna as far as possible from the legs with the 2.4Ghz from the copter remote system. With the help of a small plate at the rear, I can have all balanced with the gopro Gimbals on the front. It’s very nice setup, covering a bit the LED, which I don’t need that much now that I can monitor from the ground.
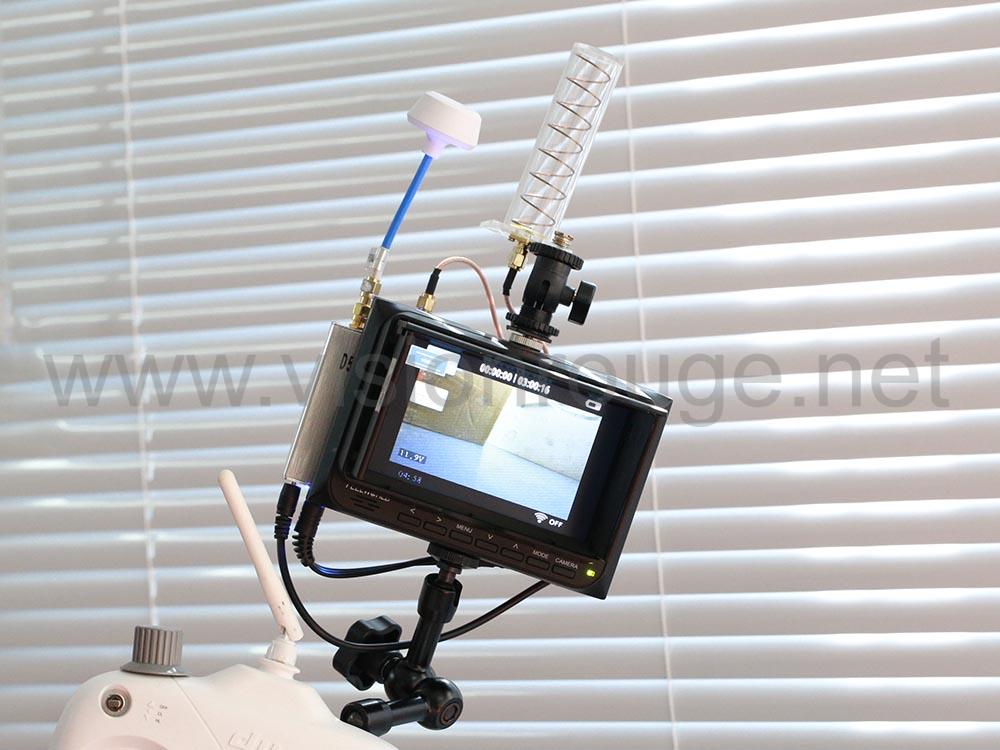
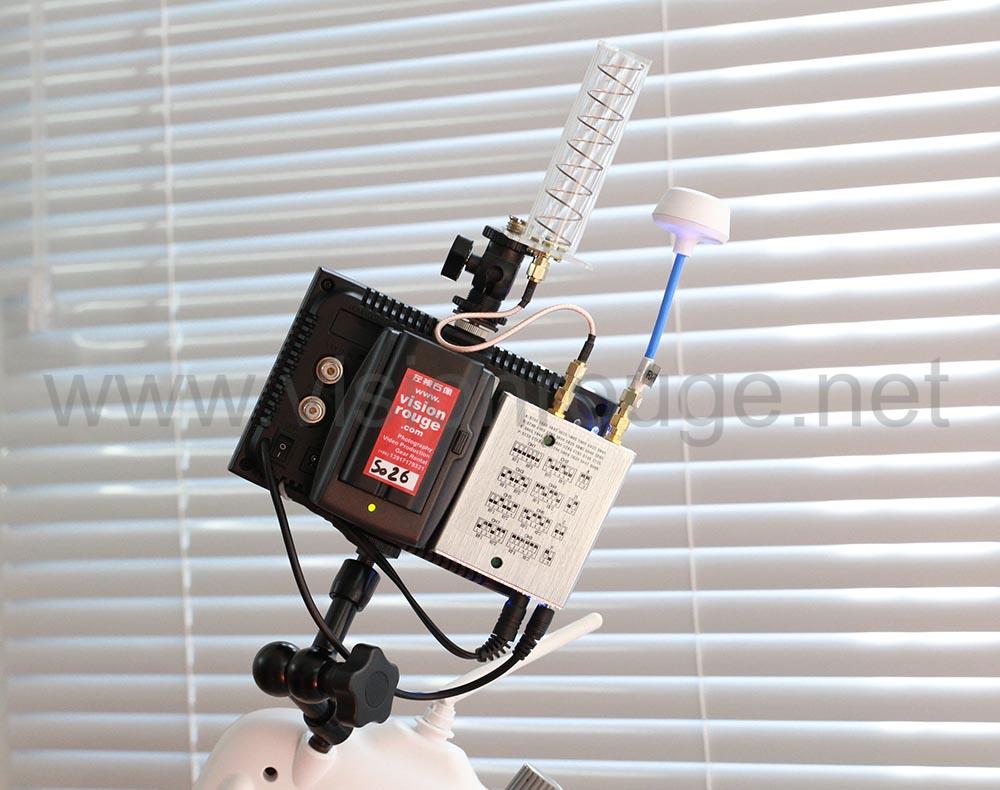
On the RX side, I went for a diversity module, a Spiro and one cloverleaf antenna, all screwed at the rear of a small 5 inch monitor. I also created a power supply working with regular SONY battery as I have plenty of them and they are quite reliable.
The whole preview system is fixed with a small magic arm and been hold during flight. With the rest of the gear in a small backpack, I can be very fast moving position to position without tripod or cables.
DJI motors upgrade
I decided for test to go for the “anti-gravity” motors and the result is bluffing. The copter is way more stable. Also the screw system offers now an auto lock system so you feel a bit safer. The sound they are producing is a bit different, but noting else make you think they are not the original one despite the color. It’s not cheap, but way better control on hoovering for sure.
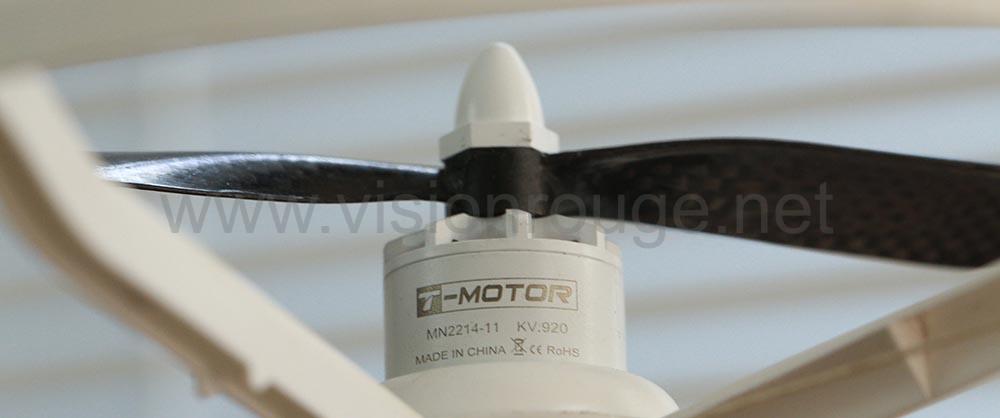
Carbon propeller.
I can only recommend to go for these instead of the original one, stiffer is better. There is hundreds of copies of the 8045 propeller, please make sure to balance them before flight and do not go for the cheap one, they will just vibrate and bring error to the compass, you are going for shaky footage!
Propeller cage.
This is amazing product from DJI and I’m glad they thought about this. No more tip over on landing, no more touch and fall on walls, no more broken propeller. You feel safer, but they also act as a bumber in case of crash. They may brake, but the rest of the copter is safe. Always got few extra as well as a pair of propeller on the set!
Tools.
It’s good to go all the time with some tools and the DJI only need 3 kind to be fully disassemble!
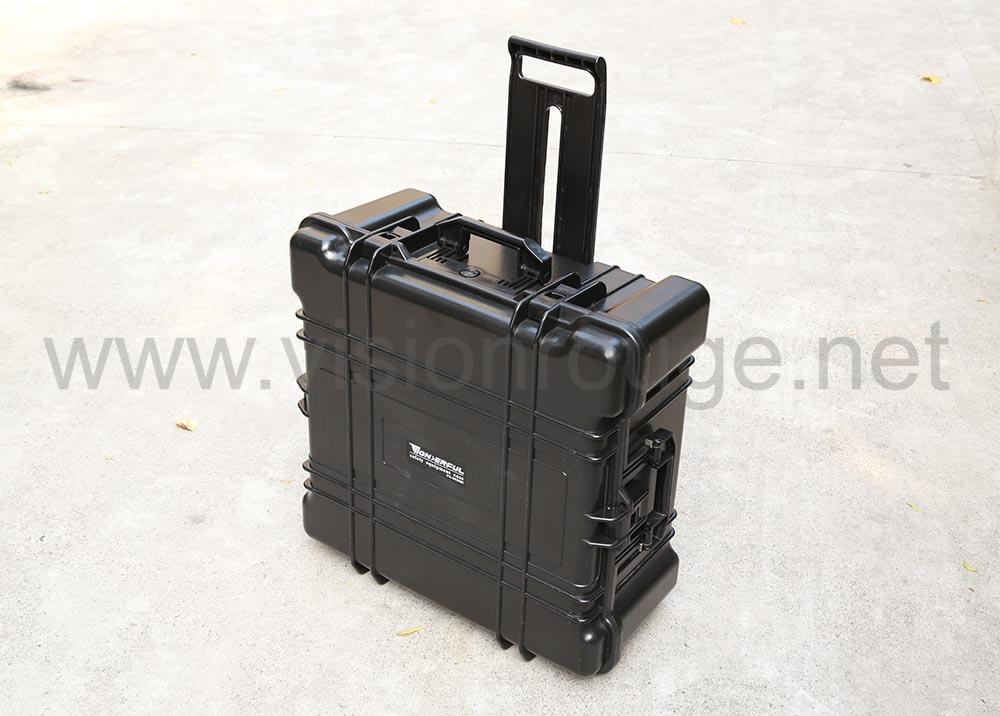
Case.
I always prefer to go with a ready to flight copter than having to assemble it in front of my client, so went for a hard case where the copter with the propeller cage fit altogether. this maybe a bit expensive at first look, but a great way to start by impressing your client as well as be able to ship it anywhere in the world by plane.

Weight
The full copter with one battery is 1,200 grams, including the GoPro and video feed system! You will have between 5 and 6 mn fight duration.
Carrying around
I did some test trekking during 2013 summer with a backpack and the copter reverse on it, holding it by the propeller cage and its’ so light that you can really go anywhere in the mountain to flight from remote location.
Next step.
Again, the range of my video feed do not convince me, and this is the part I want to work with.
Hope to get some news on this blog for you soon.
Here are two sample done before these updates
The first one is almost done at the flight speed, no pot stabilization added, straight from the camera. (I did crop to remove some time the propeller inside the frame)
The second one with almost all speed up
And the third with Indoor only