Apr 25 2025 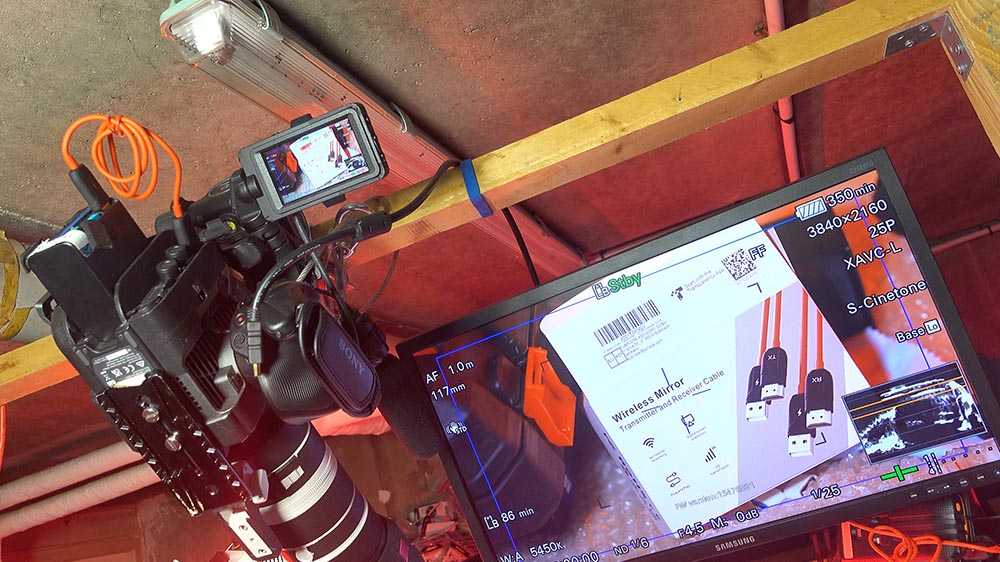
How to add wireless capability to any HDMI video monitor ? (Sony FX6 + Atomos)
What’s in the Wireless Transmission Kit?
The Wireless HDMI Transmission Kit arrives in a compact protective pouch.


Inside you’ll find:- 1 × HDMI transmitter module that look like a simple cable and plug to USB for power.
- 1 × HDMI receiver module with similar look to the transmitter
- 1 × Micro‑HDMI to HDMI adapter
- 1 × Mini‑HDMI to HDMI adapter
- 1 × One documentation in english
Both HDMI adapters can be mounted on either the transmitter or receiver.


The lightweight pouch keeps everything organized and is far more convenient than a bulky 5 m HDMI cable in your camera bag.How the wireless kit works.
This is a wireless system that plugs into an HDMI port and has the transmitter and receiver integrated into the port. The remaining wire is a USB cable that provides power.
It’s easy to install and works without any configuration.
The signal is in Full HD.
One port is the transmitter, labeled TX.
The other is the receiver, labeled RX. But the external appearance is very similar.
What’s interesting is that the transmission part is integrated directly into the port, making it virtually invisible.
HEre is my video if this is not clear.
How to Connect the Kit ?
Although the documentation is only in English, setup is truly plug‑and‑play—there are no buttons or menus to configure.
I created this video to show the basic setup and test of this great device.- Connect the RX (receiver) HDMI port to your TV or monitor.
- Connect the TX (transmitter) HDMI port to your camera or computer.
- Power on either unit first—you can start with the receiver or transmitter.
Status messages appear on‑screen automatically. If you swap TX/RX by mistake, you’ll simply see no image—no harm done.


I plugged the RX to the Sony compatible battery that have an USB extra output.
The TX is plugged as well to an IDX battery that also have a USB port.Operation & Transmission Delays
After powering up, the receiver requires about 28 seconds before the live image appears. Once active, latency is around 20 ms (≈8 frames at 25 fps), versus ≈10 ms for a standard HDMI cable. The transmitter module itself only needs 6 seconds to re‑sync after HDMI disconnection.


These timing are with the wireless transmitter.


And these with a simple HDMI cable.
Be aware that powering the USB port on these batteries is done by an action on the rear button. Sometime it’s just a press, sometime, you need a long press depending on the brand.

Maximum Transmitter Range
In my reinforced‑concrete environment, I achieved a reliable 5 m range. In clear line‑of‑sight, the kit performs up to 10 m—ideal for multi‑room playback or remote video monitoring. With a Bluetooth keyboard/mouse, you can even control your source device from another room. For a video shooting, it’s clearly better than a 5m hdmi cable that will give you only 3 m usable with the risk of being damaged by people walking on it.
Power Consumption
Both modules draw power via USB from your camera or monitor battery packs:
- Receiver: ~3 W
- Transmitter: <1 W
This low power draw makes it easy for any assistant to set up—simply press the battery’s USB output button to start.


Just don’t forget to unplug them because there is no way to turn it off, so it may just drain the battery if you forget them.


To get these number I used a simple USB measure dongle as you can buy from here.Drawbacks of the Wireless HDMI Kit
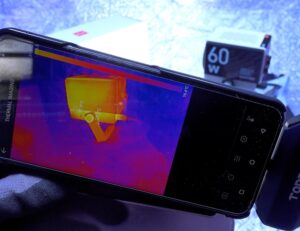
- Heat Build‑Up: After 10 minutes of continuous use, the plugs can reach ~50 °C. Avoid poorly ventilated or outdoor setups in direct sun.

You can check these picture taken after 10mn of transmission.
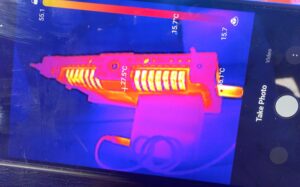

I used this camera module to create such view. - USB Power Dependency: Requires a free USB port on your device battery. You may need to upgrade or add a USB module. Remember to unplug after use to prevent battery drain—there’s no power‑on LED.
Conclusion
I’m thoroughly impressed by the ease of setup, image quality, and versatility of this Wireless HDMI Transmission Kit. It’s an affordable upgrade compared to rewiring or investing in new gear. Perfect for sending a clean feed to a client monitor without cables—highly recommended!

One the FX6, it’s just an extra cable without the need of any extra support. For the monitor, it’s also very small footprint.Mar 15 2025 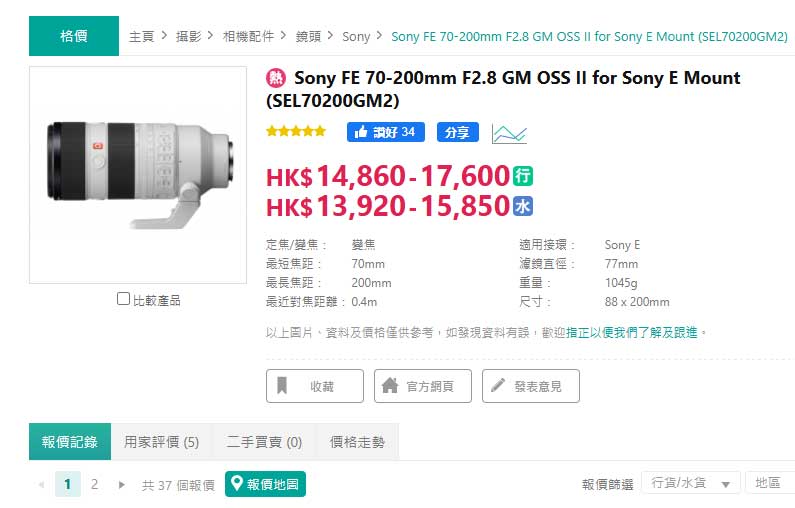

Where and how to buy cheap photo video gear in Hong Kong ?
Why Buy Video Gear in Hong Kong?
The tax rates in Hong Kong are so low that it makes perfect sense to stop over there during an overseas trip. Even when factoring in the extra cost of a hotel, it’s a great opportunity to save quite a bit on brand-new or second-hand equipment.
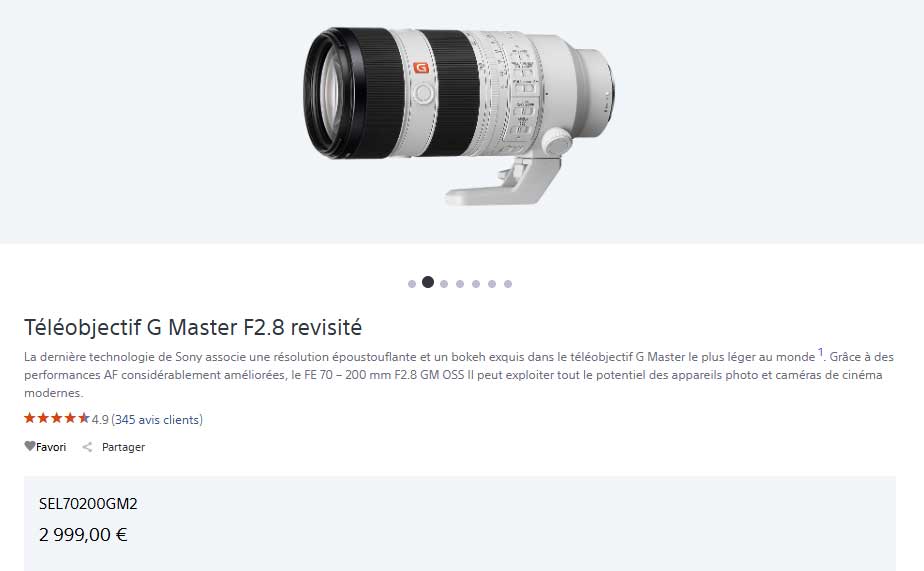

To give a price comparison, the Sony 70-200 GM2 f/2.8 is listed at €3,000 on the French Sony website but is available in Hong Kong for 15,000 HKD (approximately €1,770). That’s a huge difference of €1,200—almost the price of a round-trip ticket between Europe and Hong Kong, which costs around €800.
What About Taxes?
In theory, you should declare the lens upon arrival and pay the tax difference. You’ll need to provide the original invoice, but this requirement applies only to brand-new items. Most shops in Hong Kong are legitimate, so getting an invoice is not an issue.
In France, the tax rate is about 20%, so in our example, 20% of €1,770 is approximately €350. This brings the total cost to €2,200, which is still well below the local price of €3,000. If you choose not to declare it at the border on your way back… well, you get the idea.Buy Online or in a Physical Shop in Hong Kong?
For items like this, I always recommend checking the gear in person. However, it’s completely normal in Hong Kong to use a courier service that delivers the item in exchange for cash.
Services like GoGoVan even offer delivery with a built-in money exchange option for a fee, making the process convenient—but you really need to trust the seller.Where Is the Photo & Video Mall in Hong Kong?
Like many cities in Asia, Hong Kong has a dedicated photo mall called Sim City, which offers a wide selection of second-hand camera gear. While it’s not as large as some malls in China, it’s still a great place to find what you need.
Sim City is located in Mong Kok, and you can easily get there by subway, exiting at Mong Kok Station and walking half a block. You can also use Mong Kok East Station, though it requires a slightly longer walk.
The surrounding area is packed with malls and bustling streets. It’s also very close to a popular tourist spot—the infamous Ladies’ Market on Tung Choi Street, which you’ll likely visit anyway!How to Smartly Buy Second-Hand Photo Gear in Hong Kong
My advice is to check online first on this great second-hand marketplace: Carousell Hong Kong.
However, be aware that scams are common, so use the site mainly to find listings for the item you’re looking for—preferably from sellers located in Sim City Mall. This way, you won’t waste time searching or negotiating blindly. Plus, having similar items available on the same floor gives you better leverage to compare prices and negotiate.Which Language Should You Know?
On second-hand websites, most ads are in Cantonese, but lens model references in English can already help you navigate. Keep in mind that Cantonese is referred to as “Chinese” by locals, but it is not the same as Mandarin, which is spoken in mainland China. In fact, since 2019, speaking Mandarin to a Hongkonger could even be considered rude.
Some individual sellers, especially those not affiliated with shops, may not be fluent in English. However, for all photo mall shops and major websites, English is perfectly sufficient.How to Buy Brand-New Photo Gear in Hong Kong?
While some camera shops are at street level, the best deals are often found in small, hidden offices inside buildings without any signage.
Don’t expect to test multiple cameras before buying or get detailed technical explanations—these shops keep prices low by focusing only on sales and operating in the smallest spaces possible to minimize rent.The Internet Is Your Best Friend for Buying Photo Gear
Once again, you should choose which shop to visit before going.
The best website to check is Price.com.hk. It’s in Cantonese, but if you search using the exact camera or lens model, you can easily find what you need.
I highly recommend contacting the shop via WhatsApp to confirm availability before making the trip.Shop Recommendations
For Professional Video Gear
If you’re looking for high-end video equipment like Lupo panels or Vinten tripods, I highly recommend A&S Broadcast LTD.
They stock all the right imported gear, but their website doesn’t reflect actual stock, so it’s best to contact them via email.For Lower-End Photographic Gear
I was very pleased with Borwin Shop in Mong Kok (三陽數碼).
Located on the 16th floor of a building near Sim City. You’ll need to wait in line for the elevator, and once inside, it’s tucked between a lady’s bag shop and a travel agency—but trust me, it’s a hidden gem.Payment Methods
- They accept cash and credit cards, wire transfer done prior to pick up.
- A 3% fee applies to overseas bank cards, so cash is the cheaper option.
Important Message
I wrote this blog without any commercial affiliation to the shops and websites mentioned.
No one is paying me, and I’ve never received any discounts from them. This is purely based on my personal experience after spending several years in Hong Kong as a production house owner.Feel free to reach out if you have any questions!
Mar 11 2025 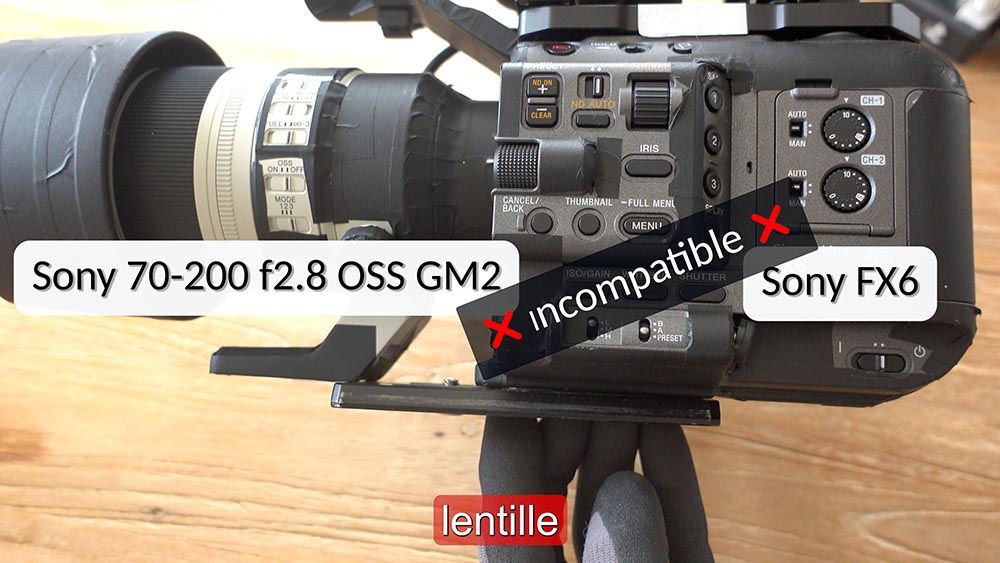

Mechanical incompatibility between sony lens and camera body (FS7.FX6.70-200 2.8 GM2.18-110 4)
What is the issue between cameras and lens on Sony video products?
I have noticed difference on dimension between camera bodies and lens mount, especially with the bottom plate. These difference goes from +0.5mm to -1.5mm, so it’s a large 2mm différence that cannot be explained by mechanical building tolerances
Which lenses and video camera I have tested?
So far, I have been able to spot these differences in size with the new tele lens 70-200 f2.8 GM version 2, the FX6, the older FS7 mk2, and the amazing 18-110 Cine zoom.
None of these have the same distance between the optical center and the bottom plate or plate support.
It would be interesting to check if this issue shows on other Sony product such as this one for example.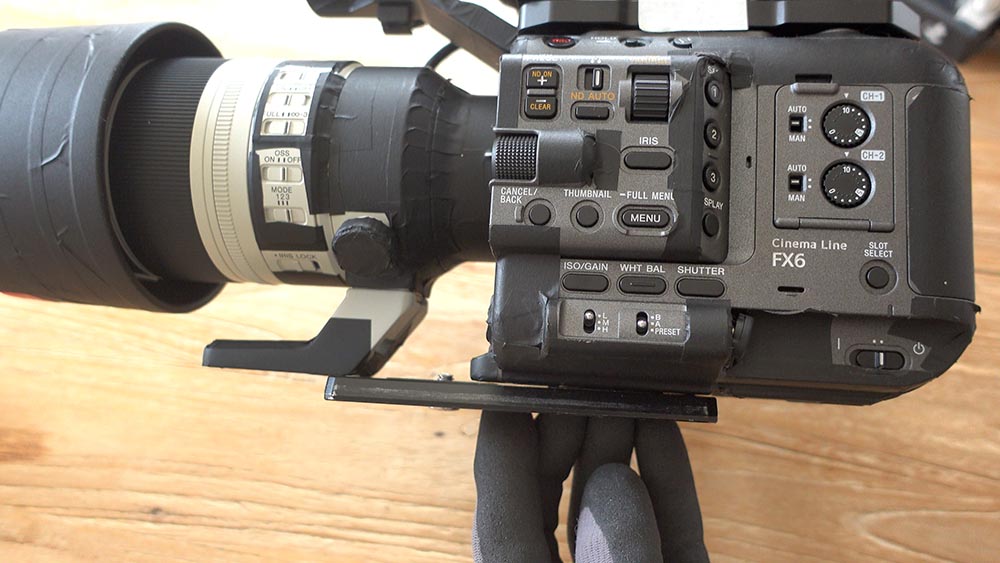
Why this is important for video shooter?For photographer, the collar on the heavy lens is usually the unique support point to the tripod. The camera body is lighter, so the camera hang out at the back of the lens. These gap do not seems important.
But in the video mode, camera and lense are usually mechanically locked together and one millimeter difference is a huge gap to fill.
I usually use a long plate to support both. If the lens gap is shorter, this is an easy fix under the lend support. You can see in my blog post how I do this.
But if the lens is higher than the body, it’s harder to fill the gap as adding some materials under the body may result on a unsecure locking.
This is not what I expect from a camera and lens combo that worth 10K USD !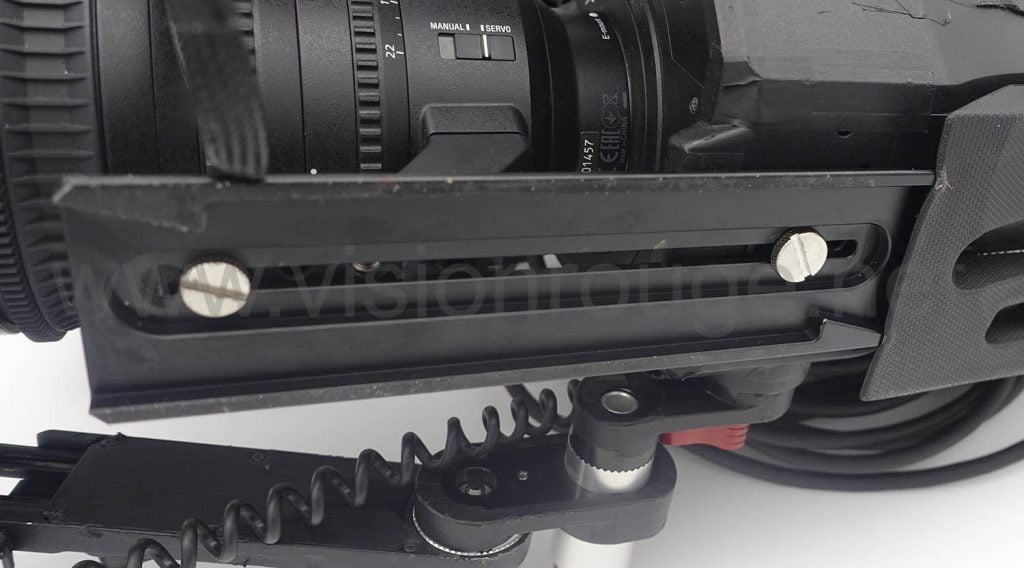

Video to present the issue on sony video products.Here is a video to explain and show the difference in size between different sony product. Some ar older as the FS7, but the brand new 70-200 f2.8 GM Mk II is also impacted. This is quite weird that Sony do not have a standard for this.
I have tried 4 product and all have differences. See it by yourself and try to explain this to me.Let me know in the comment section if you also noticed such difference with other Sony video product and how did you fixed it without the help of huge cage and 15mm rods.
Nov 04 2023 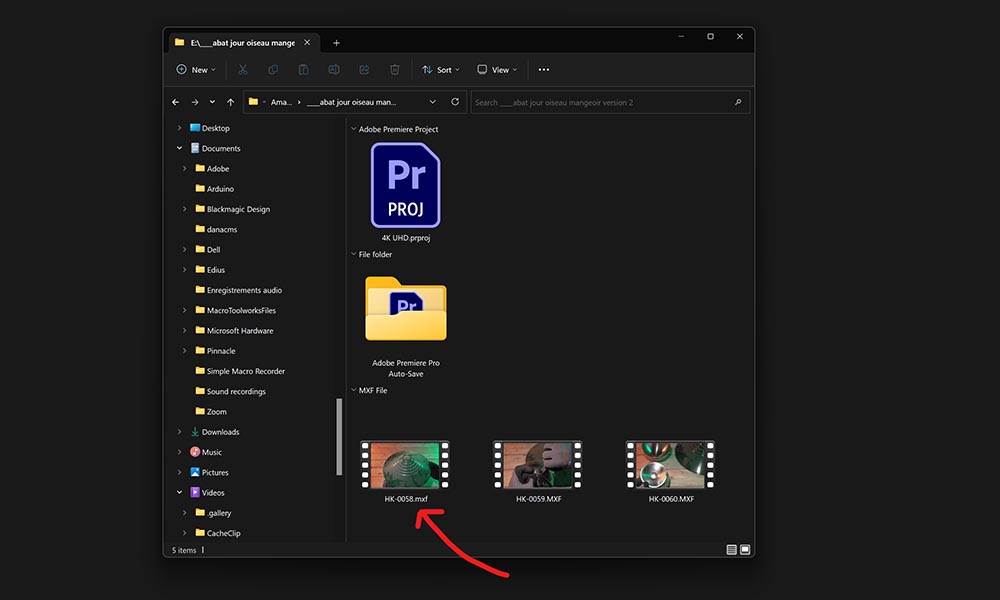

How to Preview MXF thumbnails on FX6 file under Win10-FIXED!
What is the issue under win 10 width MXF file preview?
One thing I noticed when using my FX6 camera, is that I cannot check my footage easily under Windows Explorer with win 10.
All the mxf are shown with the app logo that will be used to open it but I cannot see the actual content except by reading the file.
The other video files created, for example, with a Sony Rx100 camera are displaying a thumbnails with the first frame of the clip.
These clips are supposed to be with the same codec but that’s true that the extension is MP4.Why there is no thumbnails on Windows 10 with MXF files?
It seemed this is a limitation done by Windows do not recognize this particular format. If you rename your video clip recorded with fx6 camera and change the extension from .MXF to .MP4, thumbnail will appear.
It’s one way to fix these chopper but clearly not something you would like to do when you have 100 clips.
You have to understand that the extension is just fuel later and we help windows to select which app to open it but have absolutely no value on the actual content.
You can take any video file and change it to .MOV or .MP4 and it will be played just fine.
The extension is usually hidden in the new Windows version and you need to change this on the option of file explorer if you really want to see the extension being displayed.
If not that will be the local of the thumbnails which can help you to discover what is hidden behind.The software answer: Icaros
There is a freeware which means a software free to use forever that can very easily fix the lack of thumbnails with your MXF video clip.
I have no link with this company but just use it successfully to fix this issue.
I strongly recommend to download it directly from the software publisher and not from another sub website to avoid any bad surprise.
You can have a look here https://www.videohelp.com/software/Icaros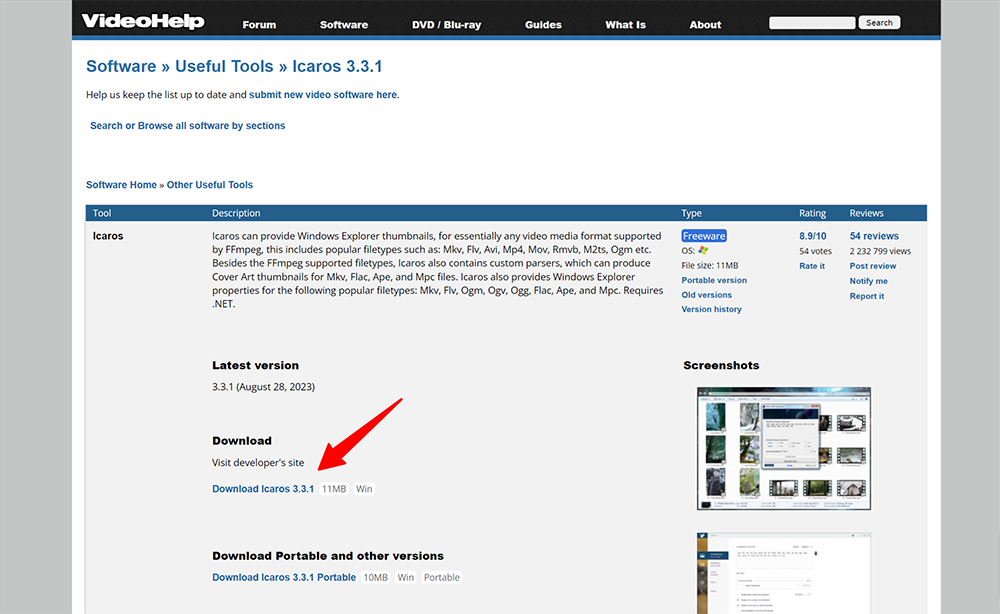

After downloading the software you will need to install it and bypass the big warning pop up that will be displayed by Windows 10 let’s you know this software is not approved by Microsoft.How to add .mxf file to Icaros software GUI ?
After starting this software, it shows a GUI Windows which is a bit uncommon for people to use it for the first time. Everything is off by default and the mxf extension is not even added to the list.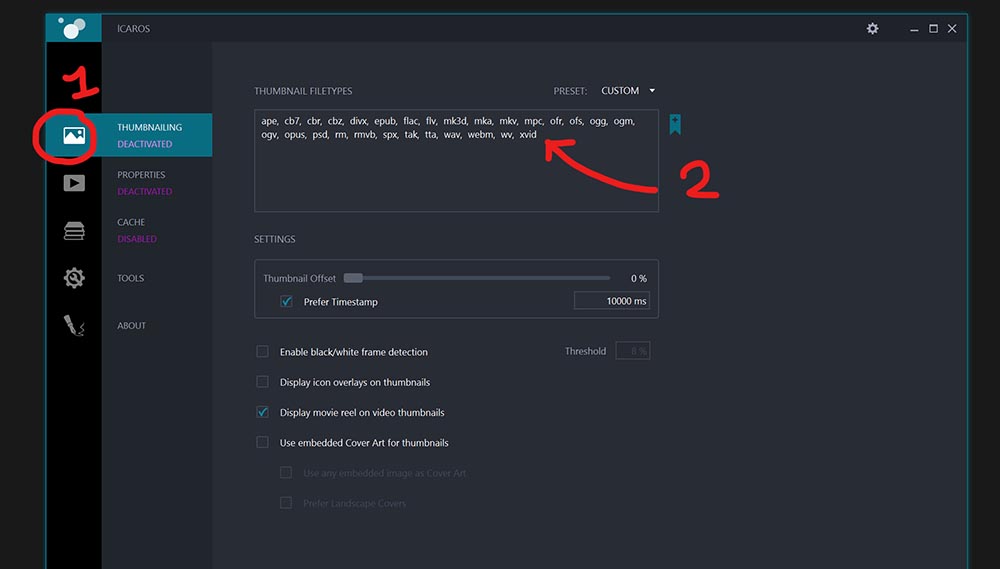

I have to click to the first tab you will see on screen that I called number one, and so you will see a list of file extension this software will work with. And, as you can, see mxf is not part of this game.
You will have to click on the list of extension and the windows will suddenly display all the extension separate by a semicolon ( ; )
Need to add at the end of the list ;mxf yourself. You don’t have to save anything, just had the text and press enter.
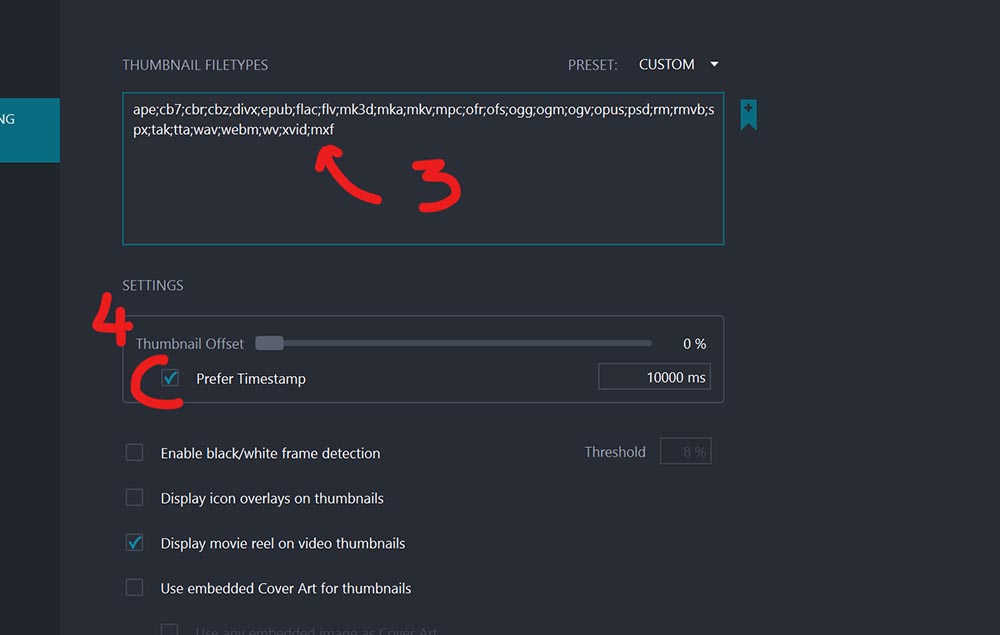

At this time you can even choose which frame you would like to be used for the one to be displayed inside the thumbnails
The last step is to click again where I put my red cycle number five to activate this function.
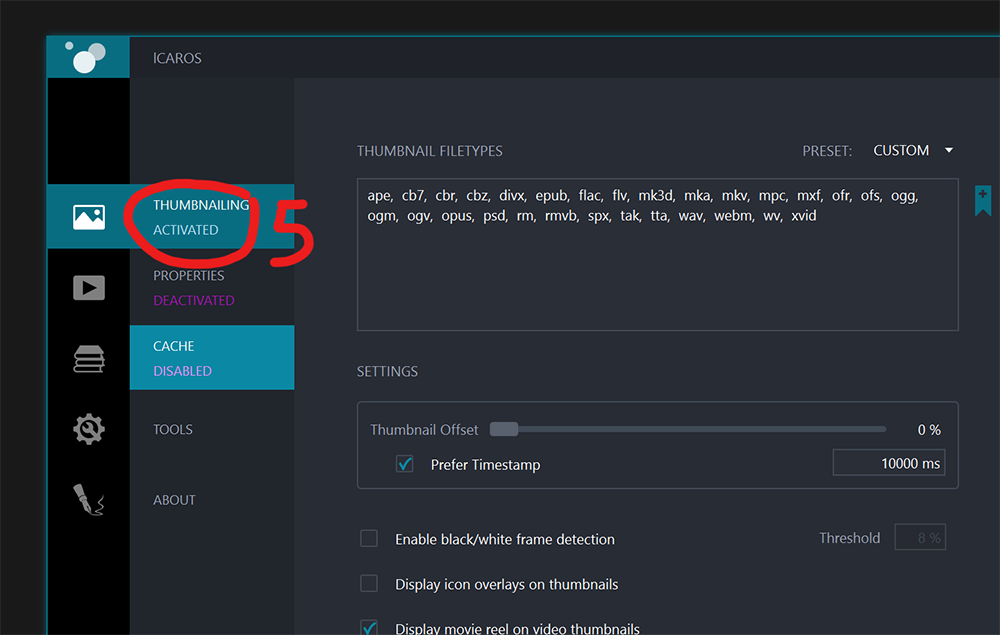
If you have Explorer Windows open you have to close it to open it again.
In case this doesn’t work please restart your computer and check out but it should be just fine. As you can see, I can now have a direct loo at the content of my video clip coming from my Fx6Apr 09 2023 

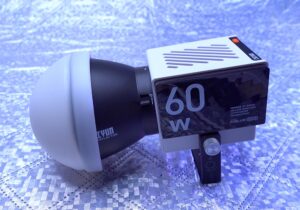
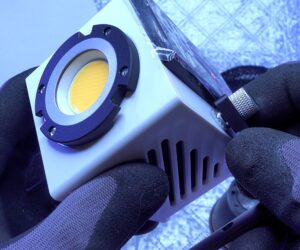
Zhiyun Molus G60 lightweight powerful LED 60 W spot light
🚧 I would like to clarify because it’s not very clear but that the ZhiYun Molus G60 does not have a battery and therefore must be constantly powered to function. It’s quite obvious ZhiYun couldn’t have added batteries with such a lightweight and small size lighting fixture.
✅ This is also not something dedicated to photography because it is a continuous lighting lamp, there is no flash sync, so it is oriented towards video.
Therefore, here is the ZhiYun Molus G60 cinema video LED lamp, 60 W spot for video. (in French)
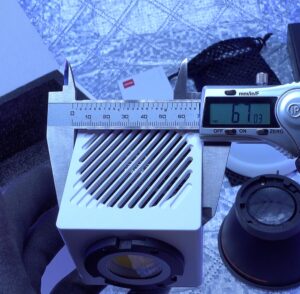
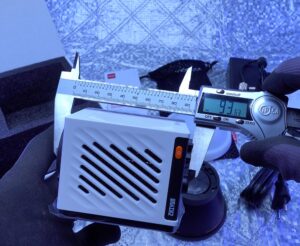
✅ So, indeed, in terms of weight, it’s really ridiculous since we’re at 300 g on the scale. If you’re used to doing interviews with a light placed on an offset bar, it’s absolutely perfect.


When it comes to the size of this item, I recommend checking out the photos below to get a better idea of its dimensions. However, I must emphasize that it is incredibly compact and won’t take up much room at all. This is especially advantageous if you have limited storage in your bag or if you plan on using it in a smaller area.


You can use them as they are without needing any kind of reflector bowl if you need a quick and broad lighting.
✅ Additionally, there are light modifiers possible through a new mount they call YZ. You can also find an adapter for traditional modifiers for purchase and use your entire existing arsenal.
✅ In this package, ZhiYun provides you with 2 options to modify your beam, in addition to using them as they are.

With soft diffuser, or using just the reflector.


You have a parabolic reflector that really allows for the concentration of the beam forward and avoids illuminating too much on the right and left sides. Looking at the drawing on the wall, we can still see a hotter point in the center.
✅ On this parabolic reflector, you can place a kind of rubber half-circle that diffuses light very well. Be careful to place it with a balloon-like shape facing outward and make sure not to place it in reverse, meaning with the rubber part touching the LED.
This diffusion increases the diameter of the LED and is therefore perfect for illuminating a room, for example.


✅ Returning to the topic of power supply, you have a 24-volt AC adapter that can be plugged into the back of the device with a small angled connector.
✅ A small green LED will light up when the voltage is present to assist you during setup and ensure that there is already power at that location. The LED is not very bright, so it should be covered to check if it is lit up when shooting outdoor.


the power supply is almost as heavy as the light.


🎁 This power supply is designed for portability and convenience, as it can be easily stored in a complimentary bag and attached to your foot for added stability during use.
Although it may generate some heat after prolonged use, it is nothing to be worried about.
Moreover, the provided power cord is long enough to offer greater flexibility in positioning the device, measuring over 2 meters in length.


This is the cord for Europe, you will received the one fitting your country.✅ The advantage of this lamp begins with its ability to be powered directly through USB, but a highly powerful power supply of approximately 100 watts that includes the Qc or PD standard will be required.
✅ The major benefit is that if you only have a 15-watt power supply, i.e., a normal USB or a 30-watt power supply, the back screen will indicate your power and only use what is available.
✅ Therefore, you can easily use a Power Bank and connect it to your lamp, and it will provide the power that your USB cable can deliver. Additionally, it will indicate on the screen with a flashing light when you have reached the maximum power.

✅ Unless conducting interviews facing the sun, even at 30% power, the luminous flux is already significant.
🏆 Therefore, having multiple ways to power it is certainly an advantage.In other words, even at a lower power level, the amount of light emitted is still substantial and sufficient for most purposes, except perhaps for direct sunlight. Hence, having various options to power the light source is undoubtedly advantageous.


✅ The small screen at the back is highly readable and simultaneously displays the current power output and selected color temperature.
✅ There are two intelligently designed potentiometers at the back that are not identical in shape. This means that even in the dark, you can immediately tell if you have the button that adjusts the power or the one that adjusts the color temperature at your fingertips.


✅ These buttons are rotary with small notches, but there is also the possibility to push them like a push button to access preset settings. With the power knob, you automatically go from 0 to 50% then 100%, for example.
🎁 During my testing, I discovered that if you press and hold the left button, a new menu will appear. It allows you to choose whether you want the lamp to turn on every time it receives electricity or if it stays off and waits for you to turn it on manually.


Of course, I chose the mode where the lamp turns on as soon as it has electricity because I don’t like running to all my light switches to turn them on again in case someone unplugs something. This is especially true if you place the lamp at a certain height.
✅ As for ventilation, there is indeed a fan on the side that takes in air from above and below to push it horizontally. Normally, you can hardly hear it, you really have to put your ear next to it.
It wasn’t necessarily very hot when I tested it, but I couldn’t test the fan at a higher speed. So I had fun placing my hand on one of the air inlets to block the incoming air, and I actually heard the fans start to spin a little faster and therefore louder.


✅ A few seconds later, they were once again back to a completely inaudible level. Unless you place the lamp extremely close to your microphones, there is absolutely no reason to worry that it will make too much noise even at maximum speed.
✅ I had fun with a thermal camera and it is clear that there is really no heat problem, everything is perfectly managed with the internal heat sink.
✅ As for the lighting quality, I don’t really have the tools to do it like a professional. I went up to the maximum shutter speed and there is absolutely no vibration in the image.

✅ Additionally, there are no unusual hues along the sides of the lamp, indicating that the beam is well-managed and precisely focused. This attention to detail and precision in design results in a high-quality product


🚧 In terms of regrets, one might wonder why they made a white lamp instead of a darker color that would potentially prevent reflections on surfaces like glass.
🚧 The small lamp has a kind of L-shaped piece that allows you to tilt it, but I believe there is room for improvement in the design of this metal piece. It is relatively close to the body of the lamp, which means that when you place it on a stand, if your screw is even slightly longer, it will touch it and prevent you from rotating it 180 degrees. You can solve this problem by placing a washer between the lamp and your stand, but it is not ideal.
🚧 This small lock wheel is really tiny and difficult to grip with large hands or gloves.
🚧 Another point of criticism is the fact that this small holder has notches for an absolutely perfect grip. Unfortunately, the angle at which you tilt your lamp is inevitably fixed, which is not ideal in all cases. The notches are quite large, so there is a significant angle between each possible position.
✅ This issue disappears if you install the adapter for larger diameter bowls, which allows for a linear tilt.


🏆 I must say that what impressed me the most was the lightweight of this lamp and its powerful output. It’s truly something that you can slip into your camera kit and have a fully operational lamp for interviews.
✅ The dual power capability is also something that I appreciate immensely because it means that you can use it even where there is no electricity with a powerful battery charger for your phone.
🏆 It is certainly a significant investment, but honestly, it’s a small lamp that you can use in multiple situations, making it well worth the cost.

✅ I am eagerly looking forward to finding other accessories, such as a lens that would allow me to use these mini-lamps as Dedolights which are specialized lighting devices commonly used in film and video production. The lens could be a condenser lens, which helps to focus and control the light emitted by the lamp. By using such an accessory, I could achieve a more professional and versatile lighting setup.

Jun 01 2021 

Review of the Best precision Screwdriver set!
My Review of the best precision Screwdriver set available so far.
Read below to find the ultimate precision screwdrivers set when it comes to opening something tiny. I did not get money for this review and paid for it by myself. But sometimes, something is too great not to be shared.
The only question you will face after buying one for you is to find who else you will be pleased with this great precision screwdriver set.


You can fix anything IF you can open it
We have witnessed in the past years a clear increase of different shapes when it comes to screwdrivers bits. It looks like each brand does not want you to get something compatible with competition. At the end of the day, you will spend time investing in a precision screwdriver again and again to try to follow the trend. Each box has a different shape and you never know which one to bring when starting a repair job.

That’s a shame because many things can be fixed for very cheap. Here is a great example of a 2 USD fix for your Digipass. But getting into the enclosure is sometimes just impossible without the right screwdriver.No risk of falling all over
The First clear advantage of this 55 piece precision screwdriver set is the way each item is firmly locked into the set box. You can literally flip it over without losing anything. All these are tiny and they could easily slip under the table and end in a place where getting them back would be impossible. This is not the case here.


The only “moving” piece is the magnet that can drop. I have just inserted a piece of paper for it. it can be used directly from the box this way. Really not a big issue.
Also the box is firmly locked with 2 large plastic pad. There is no way that you will loose your precious tools.


55 screwdriver pins available
The Second advantage is to buy once for all. With 55 different screwdrivers bits; you are covered for anything that needs to be screwed or unscrewed.


Here is the list of the different tips.
Hex : 0.9,1.0,1.3,1.5,2.0,2.5,3.0
Nut Driver Size: 2.0,2.3,2.5
Flat head : 0.8,1.0,1.2,1.5,1.7,2.0,2.5,3.0,3.5
Phillips head: 1.2,1.5,1.7,2.0,2.5,3.0
Torx : 1,2,3,4,5
Torx Security: 6, 7,8,9,10,15
Pentalobe: 0.8,1.2,1.6
Tri-point : 0.6,2.0, 2.5
Square: 0 ,1
Triangle: 2.3,2.5,3.0,3.5
TH 0.6 ; 4 Claws Nut driver:2.0 ;
Spanner: 2.0
Iphone Standoff Bit:2.2
Star nutdriver :2.1,2.2,2.6.


I have attached this picture to help you put them back in the right order if needed.Long tips for reaching screws anywhere
There are hundreds of possible precision screwdrivers set available, but almost all of them have very short tips that can be exchanged. The lock is done within a shaft that connects to the tip. Doing this way causes a big issue when the screw is a bit deep and the locking forbids you from inserting the screwdriver. You have the right shape, but simply can’t use it.


In this set; it’s just long enough for every screw you will find on the market whatever the depth they are inserted, almost. If you put the amount of tips available and the fact that they are long; this set is simply the only one on the market, period.


Each tip is 45 mm long. The shape and official designation is engraved on each of the tips.tips are locked to the screwdriver handle
Where other sets have a magnet to hold the tips, this great set has a locking system to make sure they will not fall into the equipment you are working on. There is no gap, it’s firmly static. They are made of alloy steel and I have this set for a year without one rusting despite the very wet weather in Hong Kong.


You have a magnet to even help you remove the screw without losing it. This is a nice add-on to have it always with this set.

Wait, there is more
And a feature I found almost by mistake is that the tips can be extended in case you like. It’s the same way the tip are locked into the screwdriver; another ring let you unlock the full length with the help of a spring.
It can be locked when fully extended for maximum pressure when screwing.


Ultimate set as a gift
Buy it for you first, but you will quickly realize how great this precision screwdriver set is and you may like to offer to others. It’s a nice gift with a 100% chance of getting great feedback later. It will last way longer than any other set you already got.


You can order it directly here on Amazon or copy and past this link: https://amzn.to/3fHg9Zv[ I have paid full price to buy it and have no connection with this brand; I just like this set ]
Nov 22 2020 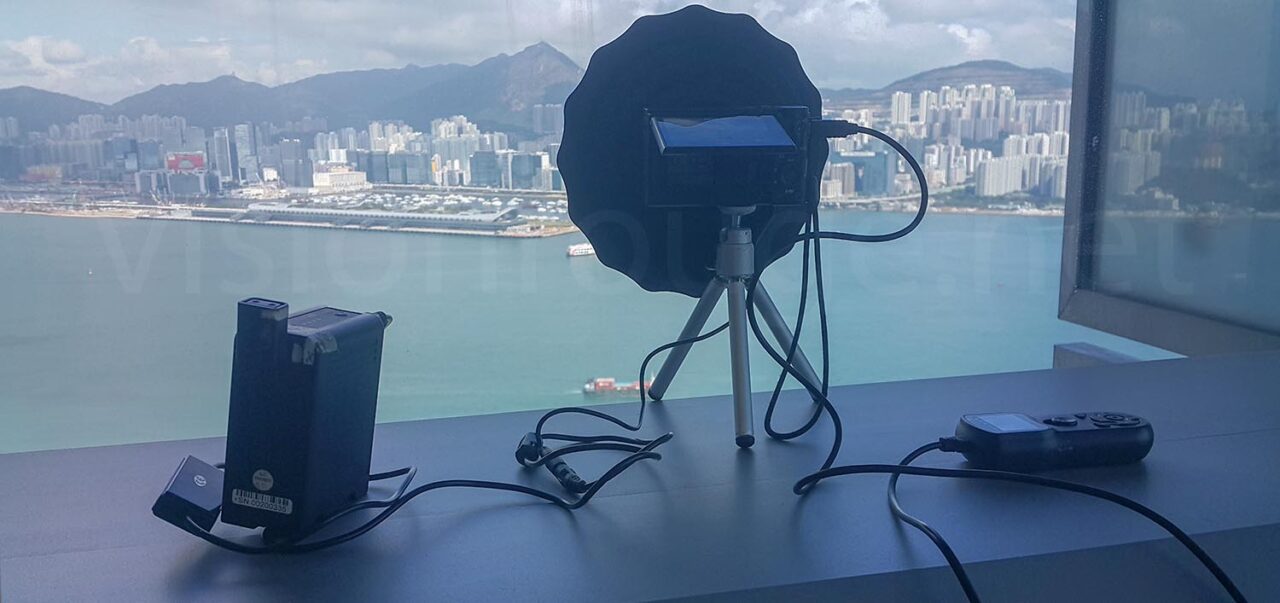

How to create nice Landscape Time Lapse movie: Our tips.
Our tips to create a landscape Time Lapse movie.
I’m sharing here tips to create a landscape indoor Time Lapse movie.
These basic advice helps to start recording landscapes video when you are within the building and outdoors is out of reach. With such a small kit, you can carry it with you and have plenty of short time lapse as this one.
This is based on a test done in Hong Kong during some time off on a shooting assignment. The final video is at the end of this post.


Avoid the light reflecting from behind the camera to your windows.
Windows reflections can be avoided with a simple black curtain right around your lens.
I’m usually using a piece of fabric and tape it to the windows. But I found online a much easier solution.
This piece of black rubber fits perfectly my lens diameter and avoids any light coming from the back of the camera. The window’s reflections are no more to worry about.It’s very lightweight and can be put in a bag very easily. It has a cone per-shape and so is continuously pressing the window.


Lot of power with an external power bank.
Using a USB power adapter offers you a vast range of possible external power banks. In my case, I’m using a Sony BP-U battery that will last for hours.
With a USB adapter, it means your camera can be powered with any phone power bank. In many Sony cameras, you could also just use the USB charging port of the camera. But it’s not possible in my case as I’m using it to control the shutter.


External trigger remote.
I love these little devices and you can find an alternative use there. It’s easier to program than going to the camera menu with some apps internally.
You may want to turn off the camera screen to save power when your time lapse is running, so getting an external control is a must. It lets you adjust the picture frequency without touching the camera and so keep the exact same frame.
In my case, I recorded for 90 minutes with a frequency of 6 seconds between takes.
The camera is a simple RX100 mk3 from Sony. It stills allows a 4K output size and fits any pocket!


Little support tripod.
In order to keep the camera at a right level, a very simple tripod can do the trick.
This way, when doing a corporate job on a hi-rise building, I can simply put this small kit in my camera and grab extra nice landscape time-lapse. There is a little ball head on the top that helps adjust the kit.Camera shooting settings.
As usual; you need to get the focus in manual mode, and a fixed aperture and ISO. The only changing parameter in Auto mode should be the shutter speed that will follow the weather change if it’s not too drastic.
I’m also assuming you are reading the entire picture to determine the picture luminosity.
You can ask to get the rear screen turned off, so there is less power used.
White balance can be let in any mode as the RAW file does not contain this information.


RAW or JPG?
Raw format is a direct read of the sensor where JPG is a calculation done within the camera to get a smaller file.
This calculation is usually poor on a small pocket camera, especially in a landscape picture where you have different areas such as buildings, clouds and sea. These contrasted scenery will be losing details in a small 8 bits JPG format.
Save some space on your card and shoot RAW only.
You will use Photoshop or other to create the JPG on a powerful computer or even just put the RAW in your After Effect time-line.
The ISO should be kept as low as possible as this is where the maximum dynamic range is. RAW will not contain ISO information anyways and only the base ISO is important.Framing a landscape time-lapse.
It’s important to keep in mind that the export may be a 16/9 ratio. The center is usually sharper than the corner, so your main subject should be there even if you crop and reframe after later on.
You never know how things will change. In this case, I could export 2 videos; one with the boats passing by the Hong Kong harbor and another one with the sky only.


Do, test and re-do.
You will fail, you will make mistakes and only by doing yourself you will learn.
Don’t assume reading on the internet is enough to get something great.
As you can read here, it all looks like perfect and easy work to do. But here are the mistakes I made when setting it up.
The glass was not cleaned and you can see the dust mark when I exported the JPG. In my case, I couldn’t, obviously, go outside and clean the windows as I was on the 40th floor buildingSecond mistake was to get a too small aperture in order to get all in focus, but that also helped see more of the dust mark on the windows. I went for F11 but F5 should have done it.
A lens sharpness is usually at the middle part of the extreme lens capability. A F8 aperture for a full frame is most of the time what you should go for. You need to reduce this number if your sensor is cropped. As the front window was very close to the lens, opening a bit my aperture may have dimmed the dust mark.Clouds passing by the mountains in Hong Kong
This is a nice video despite the dirty windows, cloud are very nice movement with a picture every 6 seconds. It have been smoothed within After Effect.
Miniature effect time lapse
Even if all the frame is not interesting, the size of each picture is large enough to export a 4K video and select a dedicated zone.
The frequency is now 5 picture every 5 seconds. there is no smoothing to add to the miniature effect and create this tiny toy view of Hong Kong.Other tips for landscape time-lapse.
Most buildings have a coating on the glass panel. So you really need to shoot straight to the glass and not with an angle. You will start to see artifacts that look like vignetting.
It’s always better to get the clouds coming or facing you. In my case, they are moving on the side, so it’s less impressive.These are the very simple steps on doing a landscape time-lapse when indoor. I hope these tips will help you start your own.
If you like a more professional approach, feel free to visit our time-lapse services in Hong Kong and China here.What do you need to create amazing time lapse ?
Here are few affiliated link to complete these tips.
Many others can work, it’s just a suggestion!Large SD memory card, 256Gb and up
A Pocket camera with input trigger as the Sony RX100
A camera shutter release/trigger with AA battery
Round shaped rubber shade anti glare
USB battery power adapter NP-BX1
Large Power bank with USB Output
Sep 06 2020 

Canon R5 overheating hack. [SOLVED]
Canon R5 overheating hack. [SOLVED]
Time is everything, I was actually writing about all the findings that you could find online on the infamous Canon R5 overheating and the possible hack.
By doing so, something becomes obvious that the camera had some hole in the booting sequence when you are using the “drop power” hack. So is a timer issue can be solved by simply changing the time?
Please read below and don’t forget to click on one advertising to support this hack!
It’s a long article where I try to be as precise as possible.
This overtime hack does not remove the overheat sensor in the camera, it only resets the fake counter that Canon put to limit your recording time and increase artificially recovery time.
And there is even a upgraded version of this hack from EOSHD below with new details and simpler way to do so.The worst camera launch ever: Canon R5 Hybrid lie.
Canon; after teasing that the new R5 DSLR ability to record video for professional work, released a product way below their heavy marketing campaign promises.
It was advertised as a perfect hybrid DSLR, having both a high pixel count for photography and fantastic video capabilities. A big 8K logo displayed on each product announcement.
But at the release, all users noticed that the video capabilities were below any standard in recording capabilities. Most of the time, the video in any HQ mode could not be achieved past a few minutes of recording before the camera locked itself in a “cooling time” for an hour or so.
There is no way to use this camera if you need real 4K and up.
Here comes the Canon R5 Overheat timer and the timer hack to solve it.What is going on with Canon R5 recording limit announcement?
Strangely enough; even if all electronic devices have to stop working if they get too hot, Canon releases almost immediately a very clear chart about the maximum time their camera will work, at best.
This was quite new to get a certitude that you will never record more than a certain amount of video due to time usage, even shooting at freezing temperatures.
Many cameras got recording time limits in the past, but here, the “overheat time” label was kind of suspicious.
The fine print also said it was the maximum you could get and it may actually be less than this.
And something new was also displayed: the overheat recovery time. The chart displays about an hour minimum to get full recovery after overheating, whatever the external temperature.This is the first time in camera history we have such forced cooling time annoucement.


But it get worst in real life usage.
It started to be quite scary when deeper tests were done by real users and not people paid by their product reviews.
When, in all website announcements, the new Canon camera was the new photography king; No one reported about the Canon R5 overheating timer. Even worse, comments were removed by site administrators and people banned for writing about it.
I never experienced such a chaotic product announcement.


On my side, I surfed on the hacking wave by doing a little SEO stunt as everyone else was publishing fake news on product that do not even existed.So what is actually happening?
It shows that the camera overheat lock down is done without any relationship with the actual camera temperatures. Yep, you are reading this right.
It also shows that, in most situations, your recording time will be actually zero minute if you were to turn on the camera prior to any video recording to take pictures or just reviewing previous takes with the back screen.
I know; it’s hard to read, but it’s still inside the Canon spec.
Zero recording possible is below 25 minutes!
That’s to avoid any lawsuit, but quite embarrassing for the users.Why no news coverage either on the overheating or the hack?
Bloggers are paid by brand and audience. They receive either equipment, freebies and free trips by the one they are supposed to write about. (or they hope to )
There is no room for them to be too much out of the brand editorial line. All products are perfect if the brand says so.Here is a screen-grab of a conversation by a blogger calling himself a “journalist”.
It gives you the full view of how twisted these “news” blogs are.
They are only checking the brand’s Facebook page to contact them. There is not one possible analysis on actual facts.
Long story short; they presented a product to cool down the R5 using a fan + peltier module. This product couldn’t possibly work as the issue is not temperature, but time.
Whatever temperature or usage you are doing with the camera, the overheat issue will appear at a certain time (after an hour).
It’s the same with the cooling time. It’s all regulated by a timer and not an actual temperature reading.But still; this blogger will publish a product announcement from something he never saw, never tested and is absolutely useless.
If he were to know about the camera, he would find it ridiculous to claim cooling the R5 will give extra time.There is zero analyses, zero correction to the article afterward and comments are even blocked for readers to express their concerns.
Next time a laboratory will announce on their Facebook page they found a cure for cancer, I know who to send to publish about it!
So be aware of the link between most of the major blogs and their paid publishers.
Funny Facts on Canon R5 overheating.
I will not link to each of this finding, Google is there for you. It’s quite hard also to understand who just analyses facts and who finds them.
But you will be happy to read from EOSHD, from someone who open the camera and did some internal thermal readings, of people starting to reverse engineer the main board. All these findings can be easily repeated and videos to back them.I will also not talk about the low resolution 4K video recording modes that are always possible without any overheating. There are already plenty of cameras with such capabilities. There is not so much to talk about except that it does not make so much sense to hear “sensor overheating” when the same sensor is read in both cases.
- The camera will overheat only when playing with the Wi-Fi menu. With zero pictures taken, your max recording time will be zero after an hour with the menu on.
- The camera will overheat in a fridge by taking a picture every minute during an hour. The body is not even warm.
- The camera will not overheat if you are using an external recorder, but will be extremely hot to touch.
- The temperature displayed on EXIF picture data is accurate and represents approximately the internal body temperature.
- The recovery time is exactly the same, whatever temperatures the Canon R5 is set to cool down.
- The recovery time is insane. It’s more than an hour, very similar to an oven that is designed to keep things warm to cook them. What kind of design Canon did on the inside or the R5?
- Removing the camera battery will not help reduce recovery time.
- Cutting off the camera power without removing the battery (using dummy battery) will reset the overheat warning logo. That starts to be funny, you have to do it before the full overheat situation.
- Removing the internal Battery cell that holds the camera date and time is actually also removing any overheat warning. What?
Some of these findings forced the camera body; some are easier to check but anyone with a brain starts to wonder what is going on here.
What is actually happening when the Canon R5 overheats?
All findings point out that the Canon thermal management is based on time usage and not actual temperature.
There is nothing wrong about that except you should call it what it is; a timer and not a overheating issue.
The first chart also has a column with the condition the recovery time is accurate. That a second trick as any temperature will give you similar time.They limit the time you can record, simply and purely and lie to their customers by blaming temperatures issues.
Even Canon officials have suggested you put a fan to get extra time which will not change anything on the recording time. This is another lie.
Yes camera can overheat but the timer kicks in way before this for no reason.This got even worse when a Chinese camera accessory company decided to offer a “cooling fan kit” to get extra time.
Again, all websites, blogs and so self-declared journalists announced the product without any fact check.
There are simply no ways to reduce the recovery time because it’s solely based on time.6 month later, this Tilta product still never to be found. Thanks Eric for your professional review coming out of your wet dreams only.
With such “professional” reviewers, no wonder Canon was able to get completely fake positive feedback. This is a beautiful world such fraudsters are promoting.New R5 Canon Firmware V1.1
With the release of R5 Canon Firmware V1.1, things start to be a bit more obvious.
Canon decided to tweak a bit their timers and also gave detail about how the real heat sensors are working. It’s a de facto proof of the limitation by time.Again, another shameless event in news coverage where the same websites who said nothing about overheating issues suddenly published the firmware announcement as it was the biggest news ever.
Overall, the recovery time is reduced a bit and the max record time may be also a bit longer. It still does not make any sense compared to real and factual temperatures reading.
The most funny fact from Canon is to explain that they have an EXTERNAL temperature sensor to let you record or not.
I would have thought the actual INTERNAL was the one I should care about. When I’m shooting, I may be moving from outside under the sun, 5 minute later, the camera will be in my bag and I can be at an office desk under air conditioning the next 5mn.It will also be easy to trick this part of the camera even if the internal are still too hot.
But overall, they extended their counter and this is actually also helping this hack. You don’t need to do it every 20 mn (but every 25 mn)Canon R5 overheating hack by simply dropping the power.
I have a first problem with Canon lying about overheating when they just put a recording time limit.
Now, I have a new one with this simple hack. After 15mn of recording video, you will see a fake overheat logo on the screen. If you keep going, it will turn off the camera about 20mn recording total.
But if you literally “drop” the power during recording and connect it again, suddenly, the overheat time is reset to 0.
If you do that every 15 minutes, you can even go for a full hour without any other warning.
Of course, this is not a viable recording option because your recording clip is damaged when you drop the power.
There are some tentative fixes to fix the video files but this is not so much my point.
This test is showing something a bit scary.When the power is restored; There are no actual temperature readings before allowing 15 new minutes of usage? And even during these 15mn, not one single temperature reading?
Or more likely: the camera is totally fine with the internal temperature and the time limitation is completely fake?
This is where I have a second problem.The camera body used with an external recorder is way too hot to be safe for a long time run.
It really looks like they “forgot” to turn on their overheat infamous counter on this one, or forgot to do real heat measurement.
In either situations; this is scary.Is Canon engineering really that bad?
It really seems to look like the team who designed the product itself got scammed by the one developing the software.
The camera seems to not heat so much and you can see a temperature stabilization after a while. This chart is based on EXIF data with a constant recording, almost.


You can see how fast the temperature drops at each card replacement, we are far from one hour to cool down the body.
Another finding is that there are not even any ways to drive the heating part (Processor, Sensor, RAM, Card,) to the external body part. For sure, using an aluminum cage locked to the camera bottom will help dissipate a few degrees.
There is no thermal conduction as they don’t even dare to put any thermal paste.
Anyone dealing with their computer understands that you need to conduct the heat to a zone where it will be cooled down and not keep it at a precise point.Honestly, I will call it a mess of mechanical heat management and an even messier software design.
All the trolls I can read saying that hacking thermal management will kill my camera suddenly get silent when you talk about how hot the Canon R5 is during external recording, approved by Canon R5.
The last sad part is to do a quick check on the published pictures of the board and do a search on the datasheet. Most electronic components have thermal readings and can be easy accessed. So why Canon is not even reading these is beyond comprehension.
One explanation is to develop the heat management software as fast as possible by putting a time limit only and maybe tweak it later?Hacking Canon R5 overheating by hardware.
This camera is a marvel and is able to get a real hybrid, a desire of many photographers. So, despite Canon being lying to the community, there are plenty of fighters to get things done right.
As similar to what happens with Magic Lantern, few teams are trying to gather knowledge on overcoming limitations without damaging their camera.The battery drop and memory cell removal gives some hope that it should be possible to do so.
The idea is to rely on real temperature reading and bypass the timer limitation.
If the fake overheat timer is still running even without battery, it has to be stored or run during battery loss. There are only 2 or 3 components that are still powered without the camera battery, one is RTC and it has to be a EPROM as well.

When removing the 3.3V battery cell, the fake timer resets. It also reset the time and shooting parameters.
If you like to do so, you may need to read about a set of precision screwdrivers post I wrote.
The used RTC chip is a RX8130 CE from Epson and also present on the Canon R6. It has no memory but can have a counter that will keep running during camera power loss. There is an interrupt that could have been used to trigger the time limit.But the real hack below shows that it’s a useless finding. Canon is doing a simple subtraction between 2 times.
(UPDATE) Even water cooling do not reduce shooting/recovery time!
Some crazy folk at DIYPerks decided to go even further and water cool his Canon R5 camera. But, even with such dramatic cooling system; it does not reduce the recovery time or gives him extra shooting time. (!)
This is another proof of completely fabricated timer limitation instead of actual heat management. The video have about half a millions view so far. Not sure I would like to be part of Canon marketing team.
Later he decided to go for more classic upgrade by simply adding a different copper plate in place of the useless one in the Canon R5. This is the same remark we got from August from the fist user who opened his camera and saw how bad the thermal conductivity was done.
With a copper plate a bit larger than the original one he manage to get almost double recording time.
A simple hack to do without opening the camera is to get an external drive instead of the internal CF Express-B card. This way the heat produced by the card is not done internally. This external card can be used in many other camera and also help you reduce the cost of card. You can order it here: https://amzn.to/3wZjEQxThis modification shows another weakness in Canon team: The engineering is simply wrong.
The cost of such part is about 1 USD extra compare to the original one. This hack is putting another shame on Canon.
I would love to hear from these so called engineers/trolls that claimed nothing can be done when we are dealing heat in a small camera body. Please explain me how someone in its garage manage to get twice the shooting time by adding a piece of copper inside his camera!

It’s also pathetic to see the same websites that never acknowledge there was a problem with this camera displaying this proof of concept video.The software way! Bingo!
This is something that was bothering me about this power drop hack. It seems that the camera booting in this case is doing it by forgetting a lot of things. So my big idea is to change the camera time for the next day and drop the battery. When I do time-lapse setup, I know we need to manually turn off the camera cause a loss of power did not save your shooting parameters.
It will show if the day is actually read from the chip or not.
The RX8130 chip has a “date change ” bit that may actually be not written. So the camera will boot and just do a date comparison between the last overheat date.
Here is my test request:


And Guess what?
IT’S WORKING! It’s simple and effective. No clip lost and no need to do it at a certain time. Just stop when you need, Change the date and you are good to go.
Canon, I love you, really…

Here are the message from a magic Lantern user, yourboylloyd, who was nice enough to test on his Canon R6. He will publish a video soon to support the finding.
So, the camera DO a simple time difference between the actual last overheat and the actual time, but as you drop the battery, the time change bit is not read.
I guess the software engineer have applied a filter to not do a time difference if the day is reset, but this is bypass by this kind of boot.
It also shows the RTC do not run a overheat timer when camera is off.Thank you very much for trying.
Of course; you will not read anything about it on the major paid by Canon reviewers. Be aware of these fraudster next time you are try to rely on their biased advise.
How to make the hack easier.
This hack works because Canon does not write all data when power is suddenly lost. It makes sense because the last thing you want to do when power is lost is to write something into your main memory.
When you are removing the camera battery, a little switch is telling Canon that the power will be lost soon, so it has little time to save actual parameters. It includes ISO, aperture and this infamous counter among other things. Each time you are turning off or removing the battery, the camera is doing such.
One way could be to get something to push this switch when dropping the battery, but this is not practical.
The best is to get a dummy battery inside the camera body powered by a second battery on the cage itself. So you just have to disconnect and reconnect again. It’s as simple as this!
You have to keep the battery door closed on the Canon 5R, of course.


Also, turn on and off the camera before doing the hack once. So your current shooting parameters are saved.When you power on, go to time/date, add a day or so, “drop power” and you are good to go.
You can order these by using Google with the search keyword “Battery Mount Plate DR-E6“. Here is a selection on Amazon: https://amzn.to/3z5DefR .And the Canon R6? updated firmware? Next step?
Well, it’s confirmed that the hack is working with the Canon R5 firmware V1.1 and the R6 on this day, September 6th 2020.
So, yes, you can update and keep shooting with no fake overheating timers.One remark: This hack is turning down the “overheat” blocking flag. It does not remove any heat sensors or bypass them.
Photographers have been reporting another overheat icon during long photo sessions; so there is thermal management based on temperature anyways.
I will strongly suggest to not overdrive these in a possible future hack.The second important point is about shooting duration
The counter is not blocked and will keep popping up every 25/20 minutes. So you will never be able to do a one hour non stop recording.
This hack reset the counter to zero and gives you 20 mn of recording. If you are planning an interview, make sure to reset it prior to start recording.
If you already have recorded 19mn and just pause, the timer will appear at the next take just after one minute.In short, here are my hack, step by step
- Power the camera with a external battery and close the R5 or R6 battery door (you can also do the screw trick if you like)
- Record video until you see the overheating logo, or even until the camera shut down.
- Turn OFF the camera by using the power button so your recording parameters (ISO and so one) are saved.
- Turn back the power ON.
- Go to the menu, Change the time of the day to +3 hours at least (or add a day).
- Drop the power by disconnecting the external battery.
- Wait 30 seconds or even less.
- Put back the external battery. The overheat issue should be gone. (if not, you may actually be in real overheat situation), try in 10mn…
Extra step to put back the time: You can do this after step 8. This have been confirmed working by dellfonic from MagicLantern forum.


- Turn OFF the camera using power button. [this is the extra step]
- At this time, the “overheat flag” is now written into memory.
- Turn back on the power with the power button. The camera is now booting from a regular boot.
So if you have no more warning here, the camera is absolute fine with temperature. This not a “special boot” anymore.
And the beauty of it; you can now push back the day as the actual day.
So with this extra step, all your clips are even with the rel timestamp.Disclaimer on hacking the Canon time limit.
Overheating is an issue that need to be considered seriously. But I have confident that Canon have put enough “real” temperature sensors to actually stop the camera if it needs to be stopped.
The overheating issue is also possible in regular picture mode and the logo is a bit different on screen, btw.If you do the extra steps to put back the real time and date, your Canon R5 is booting from a cold start. Which means Canon have to be reading the temperature there. There is the normal way of starting the camera.
Overheat do not appear when recording with external recorder and I don’t see a drastic temperature change because you are doing it internally.
But still, please try this at your own risk.
Having a cage that connect to the bottom of the camera will help dissipating few heat. Adding Peltier module may also be a good way. This time, you are on your own.
Turning off the power is supposed to be harmless is there is no active recording. Most of the time-lapse controllers I’m using are doing such battery powered control sequence. They did not suffer any damage after years being turned off and on this way more than 20 time per day.I will be interested to receive comment from Canon. And see how the block this on the next firmware. Of course.
Please click on one advertising below if you can to support this quest! It’s about 25 cent per click, long way to go before I can buy a coffee!
And do a link to visionrouge.net website if you like to use this article content.
Overall, It’s quite crazy that I found how to hack a $4,000 camera during my free time only by reading and personal analyses.
I even don’t have a Canon R5 or R6 body to test, so I have asked users to do this for me to validate my findings.
If you like to hire me for your next shooting or software development…Whats is next for Canon to cripple again the Canon R5?
I guess it’s quite simple for Canon to block this hack. They just need to write the overheat time in EPROM when the event occur, and not just when the camera is about to loose power.
They may also want to periodically write the camera real time usage using a counter more than a time difference. The RTC extra counter are here for that.
This way, they will limit the usage of their camera to protect their cinema segment.But if they are smart enough, they could also see the R5 as a turning point in the industry, as they did with the Canon 5Dmk2.
The Canon R5 is a marketing mistake and shows how reviewers are blinded by a brand communication.
If Canon was to apologize by unlocking the true potential of their camera, it will simply be the best hybrid you can buy. Even adding some extra USD to get a firmware mod will not stop people to buy it. Right now, all this mess is embarrassing from a customers point of view. there is 0 pro that will be using the video functionalities as Sony have much better offer.There is also a readjustment to be made by all these Youtubers or so self-called journalist about the content they are publishing. It’s important that they disclose the real way they got their information and link with the brand, or not. Let see if they prefer come out clean on this fake overheating communication or bury themselves in deny.
This Canon R5 is a technological marvel and no other brand did such. Sony is far behind in AF performance + high pixel count and 8K possibility.
Little contender as sigma suffer from poor AF and lack of lens offer.
I’m looking forward to see how Canon will implement the next firmware to make a move on buying one. And I think I’m not the only one.
I also already have other ideas on the next possible way to hack it again if they block this software loop hole.UPDATES: It’s even simpler that I thought
EOSHD personal findings shows that simply removing the battery is also working depending on your firmware.
It’s great and suggest Canon did not write the time if the battery door is open.
It suggest they are writing the new time only when you turn the power button, but not when the battery door is opening.This is tested with Canon R5 ALL Firmware versions until V1.1.1 and Canon R6 with new firmware V1.1.1.
Canon R6 user’s with firmware V1.0 still needs to use the external power supply option as I described above.
I will suggest to upgrade your R6 to this new firmware anyways as it offers longer recording time anyways.Here is the new shorter sequence to hack the timer.
- When camera overheat logo appears; Go to the menu, Change the time of the day to +3 hours at least (or add a day).
- Drop the power by opening battery door and remove the battery, do not use the camera power button.
- Wait 5 seconds.
- Push back the battery and close the door. The overheat issue should be gone. (if not, you may actually be in real overheat situation), try in 10mn…
- You can now put back the real time in camera menu and shoot again
You can do these optional steps before dropping the battery to save your current camera / lens settings.
- Turn OFF the camera using the power button, your recording parameters (ISO and so on… ) are saved.
- Turn back the power ON.
That’s a great way to see how a community can work around a fix to remove fake limitation for commercial reason.
And I guess someone at Canon will have to explain to their board how such simple hack is unlocking the full potential of theses cameras.If it’s not working; some users report that you want to try it again but remove the battery right after you change the date and pressed OK. Do not wait between [OK] and opening the battery door.
How to really increase recording time on the canon R5?
After you are done playing with this hack, you have now in hands an amazing camera and reducing heat will be your next target.
Adding a cage around the camera body will help to dissipate the heat if you screw it firmly from the bottom plate. Smallrig have a nice one with 3 points on the bottom to help make a bridge heat. You can order it here on Amazon: https://amzn.to/3cky06g .
Another option to reduce the camera temperature to help recover from real overheat is to go for the CFExpress-B dummy system. It will also help you reduce storage price by using cheaper SSD than Expensive CFExpress card.
And final step is to get plenty of extra Canon battery cause the R5 is now way more power hungry that the previous 5D iteration. This aspect is also completely avoided by bloggers paid by Canon, of course.
Let say that the 5R is using 4 time more battery than the Canon Mk4 for the same usage. You got warned!
I will strongly recommend using the new canon battery LP-E6N from Canon itself. These battery can be charge within the camera body. Trust me, this may be a life saving. I lost a charger once when traveling. There is a dual batteries pack to be order on the Canon official store. They will last longer and be safer to use on your camera. I went cheap once and one time the camera little fuse just blow by using cheap Chinese branded. I was down for one week without a camera; waiting to be fixed. I learned my lesson.
But, if you still like to play cheap; go for 3 of these nice orange set. So, you can charge all you batteries at once when back to the office and the nice color help you find them when they drop on the floor!Sep 03 2020 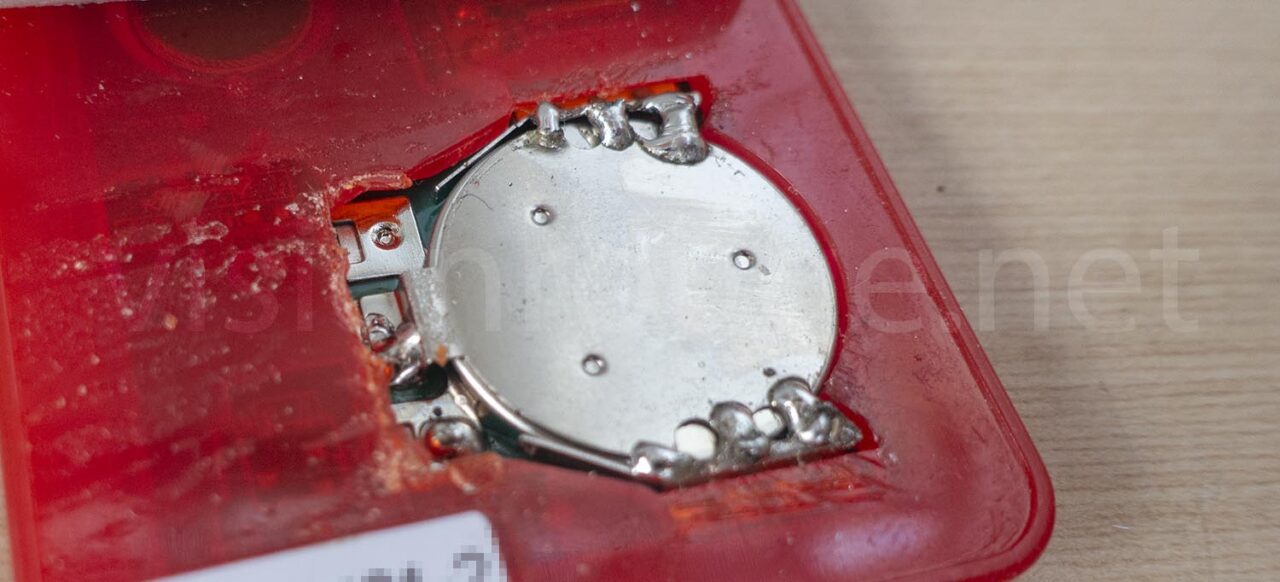

[Fixed] Digipass battery replacement.
Digipass battery replacement [FIXED]
Please carefully follow these easy steps to successfully operate a Digipass battery replacement.
My 3.3V cell token dongle provided from HSBC needs to be replaced. Even if I only use it twice a month during the past 2 years and for about 20 seconds; it already displays the infamous battery low level.
The Digipass screen is showing the scary “bAtt 02” message.


According to HSBC website; this means only 2 months of time left. If temperature drops, it may actually be way less than this.
Mine shows the following week the “Batt 00” message without any use in between.Option zero. The classic : Trash it -> Order a new one.
We are now under a society where a device runs out of battery, the only proposed option is to order a new one and send the current one to trash.
It’s a wrong business model to start with. Similar to Canon did with the R5 where limitation is part of the original design.
But with Covid 19, most of the physical bank services are closed and going out should be reduced to a minimum.
One replacement possibility is to receive it by mail with an uncertain delivery time. You don’t go out, but someone will do it for you.Worst; my company address being located in China, I will need to go there to pick it up, which is simply not possible at the moment. This kills the entire idea of online-banking if you can’t remotely do your bank operation.
The second option would have been to go to one local corporate bank branch and request a new device.
You need to come back again a few weeks later to pick it up. You will be charged extra for this service. (It’s more expensive to go yourself pick it up then getting it delivered due to HSBC policies).
But due to the pandemic, this is again something not recommended to do.
You also need to put in perspective the time and money spent on traveling back and forth when health advice is to limit your outdoor time as much as possible.I went to all these steps before and there are also quite few phone calls to give in order to activate the device. My main point is that changing a full device, with all security steps and trips that will include it is quite insane when we are just talking of changing a token device battery.
Why can’t this be done in an instant as any cheap calculator? Why do not include a tiny solar panel to make sure we can always get connected?
Step one, What is inside the HSBC bank dongle device?
As usual, Google will be the best way to do research. I’m looking for past experiences and pictures of previous HSBC dongle tear-down.
Many videos showing how the token generator looks from the inside. The most important information is the fact that losing power, even for a few seconds, will void the device.
It shows pretty much all you need to start doing it on your side. The mobile security keypad is on one side and the battery cell on the other side.
The battery is a CR2016 coin cell working under 3.3V.
I’m not sure what is the HSBC digipass power consumption at sleep, but it should not be low after only 2 years.
The exact security name is “Digipass 270”.What are the risks when replacing the Digipass 270 security authentication device?
In the worst case scenario where you battery replacement fails, you will have to order a new one which is exactly the same scenario you are facing anyways.
CR2016 or such 3.3V coin cells are about 4USD and widely available around the corner or online here. If you fail your teardown or battery connection; you will be down on this item and your time.
The main issue is to lose the battery power for even a few seconds or do a short-circuit. It’s a very weird design to get a battery holder but no way to replace the battery.
There is a RTC internal clock that may stop or get reset if the power is lost.


I would suggest their engineer use a simple battery back directly soldered to the board to save money as the enclosure shape does not allow any replacement either.
In a wider perspective; not including a tiny capacitor to let the user replace the battery within a minute or so is also a weak design.
I guess they have a great market with so many bank accounts that will re-apply for a new device every 2 years. Whatever the cost for the planet as soon as they are making money.Step two, What are the options to fix the bank dongle battery?
It’s obvious that the device should never run completely out of power, so you will need a backup battery to take over during the time you are patching the original battery.
If you wait too long and there is no more display on the screen; it may be too late to use this fix.
One possible option is to plug another 3.3V battery in parallel, either the same CR 2016, or a larger CR2032 (or whatever +3.3V power source, actually).
But when you do so, you may not need to remove the original dead battery! you are already done fixing it this way. You could tape on the back of your dongle the extra power pack and keep rolling for a few years this way.
The second option starts the same way by putting a backup battery, breaking even more the casing and exchanging the original one, and finally removing the backup.
It’s up to you to go both ways. The full replacement will give you more power as the old battery will drain power from it if you keep it in place.Step 3, prepare digipass battery backup.
You can put there any 3V battery pack. Even put 2 x AA battery holders and link them in serial.
In this digipass battery replace example, I will use 2 similar CR2016. One will be attached to get a backup during the time I will slide the new one.
![Digipass battery replacement [FIXED]](https://www.visionrouge.net/wp-content/uploads/2020/09/Digipass-battery-replacement-FIXED-300x141.jpg "Digipass battery replacement [FIXED]")
![Digipass battery replacement [FIXED]](data:image/svg+xml,%3Csvg%20xmlns=%22http://www.w3.org/2000/svg%22%20viewBox=%220%200%20300%20141%22%3E%3C/svg%3E "Digipass battery replacement [FIXED]")
I need to make sure I do not lose power when crushing the bank dongle enclosure, You need solid solder points per cable.
Do not overheat the battery when soldering.Step 4, Peel the sticker on the back of the device,
There is almost nothing connected to the back, so a simple blade should suffice to lift it.
![Digipass battery [FIXED]](https://www.visionrouge.net/wp-content/uploads/2020/09/Digipass-battery-FIXED-300x148.jpg "Digipass battery [FIXED]")
![Digipass battery [FIXED]](data:image/svg+xml,%3Csvg%20xmlns=%22http://www.w3.org/2000/svg%22%20viewBox=%220%200%20300%20148%22%3E%3C/svg%3E "Digipass battery [FIXED]")
The original specifications states that the bank authentication pad is waterproof IPx7 (1 meter during 30 min).
Peeling the sticker on the back may void that amazing capability.
![bank dongle battery replacement [FIXED]](https://www.visionrouge.net/wp-content/uploads/2020/09/bank-dongle-battery-replacement-FIXED-300x165.jpg "bank dongle battery replacement [FIXED]")
![bank dongle battery replacement [FIXED]](data:image/svg+xml,%3Csvg%20xmlns=%22http://www.w3.org/2000/svg%22%20viewBox=%220%200%20300%20165%22%3E%3C/svg%3E "bank dongle battery replacement [FIXED]")
As you can easily see, even if the battery is held on a removable metallic enclosure, the plastic around it forbids you to do so. There is not really a logical explanation there.
On mine, the plastic cover avoids me from seeing the actual connector. One some videos I found, it was a bit more open.

One part of the job is to grid a bit of the plastic to get access to the main connector on the board.
I’m using such plier as it have a flat bottom, so you can really cut very close to the cell.
Be very careful to not let your blade touch the board or short circuit the connector by touching plus and minus poles.
You can at this point confirm the voltage drop on the old Digipass battery.![token dongle battery replacement [FIXED]](https://www.visionrouge.net/wp-content/uploads/2020/09/token-dongle-battery-replacement-FIXED-300x146.jpg "token dongle battery replacement [FIXED]")
3.3Volts is full, 2.9V is empty according to these nice bank people.
The regular calculation is a 10% drop which is 2.7V, not 2.9V.
I’m using an old and solid Fluke multimeter. If you like something that you will keep 30 years, there is now the Fluke 115that should be similar to this one. you can have it online here https://amzn.to/2SpdbQt .
You need one with the bar meter so you can see the voltage fluctuation. A cheap but not so bad options is something from China that is not a simple EOM rebranded product. UNI-T have it’s own factory and many acceptable product. You have a nice multimeter to buy online here https://amzn.to/3vnz6VE . It have the NCV function that let you know if a wire is powered just by approaching the meter to the cable which is quite useful.Step 4 Connect your backup power
This is the delicate point. Hopefully, the power coming from the coin cell is done with large metallic connectors and are easy to access.
You need first 2 larger holes to access to the two pins connector that are located on the bottom of the cell.
Here is how will look your backup 3.3V cell.
![token dongle battery [FIXED]](https://www.visionrouge.net/wp-content/uploads/2020/09/token-dongle-battery-FIXED-300x153.jpg "token dongle battery [FIXED]")
![token dongle battery [FIXED]](data:image/svg+xml,%3Csvg%20xmlns=%22http://www.w3.org/2000/svg%22%20viewBox=%220%200%20300%20153%22%3E%3C/svg%3E "token dongle battery [FIXED]")
These connectors have a mechanical and electrical function. Do not overheat to avoid them flying away…
You may need to connect one positive and one negative cable in any order you like.
These little tips are part of a simple cable set from my Arduino crew. You can’t go wrong having this set in your drawer.
To be better safe than sorry, I actually wrote where is plus and minus to avoid stupid inversion. Trust me, I went there before.
I’m a big fan of using camera tape, which is very similar to masking tape. I always have a roll to mark my tools and other remarks when my head is focusing on other things.
![Digipass bank [FIXED]](https://www.visionrouge.net/wp-content/uploads/2020/09/Digipass-bank-FIXED-300x167.jpg "Digipass bank [FIXED]")
![Digipass bank [FIXED]](data:image/svg+xml,%3Csvg%20xmlns=%22http://www.w3.org/2000/svg%22%20viewBox=%220%200%20300%20167%22%3E%3C/svg%3E "Digipass bank [FIXED]")
I also put the coin cell in a plastic bag to avoid touching anything.
Success! You can check now if your device is still working. If you still see the low power error message, something is not right.
If all is working fine for me, you may want to put the back sticker again and tape it with masking tape until the next 3 years replacement process. This is the easy way to get it doneStep 5, remove the low power coin cell.
This step is optional but better for a long duration fix. It consists of grinding the metal enclosure to let the old coin cell go out of the dongle.
The full metallic plate is linked to the positive 3.3V of the cell. Make sure you don’t shortcut anything when doing this operation.
You can use a plier as this one for such. It have to be very thin at the to to just lift the metal a bit and cut it.
![Digipass bank token [FIXED]](https://www.visionrouge.net/wp-content/uploads/2020/09/Digipass-bank-token-FIXED-300x149.jpg)
![Digipass bank token [FIXED]](data:image/svg+xml,%3Csvg%20xmlns=%22http://www.w3.org/2000/svg%22%20viewBox=%220%200%20300%20149%22%3E%3C/svg%3E)
The cover opens up when lifting it up very gently.


You can now flip the backup coin in place or put another one. make sure it does not touch the plus and minus connector when doing so.
The same attention is necessary to push back the new battery. Do not use metallic pliers as you will connect the plus and minus together.
This fiberglass reinforced plastic pliers may be overkill on this project, but still a great tools when dealing with battery or solar panels.


I’m just using the cardboard to slowly push it inside.
The last operation is to make sure it does not move anymore, either with extra soldering or simply tape it.
![bank token battery replacement [FIXED]](https://www.visionrouge.net/wp-content/uploads/2020/09/bank-token-battery-replacement-FIXED-300x150.jpg "bank token battery replacement [FIXED]")
![bank token battery replacement [FIXED]](data:image/svg+xml,%3Csvg%20xmlns=%22http://www.w3.org/2000/svg%22%20viewBox=%220%200%20300%20150%22%3E%3C/svg%3E "bank token battery replacement [FIXED]")
You can now remove the backup battery wire.
Congratulations, you just managed a full battery replacement on your bank identification device.


You save yourself 20 phone calls asking you 5 new passwords, at least 2 trips to the bank corporate branch, one month wait and less plastic in the trash tonight.
Please dispose of the old Lithium coin to a dedicated bin for recycling.
The final product looks like it just had a good dinner.![Digipass battery replacement [DIY]](https://www.visionrouge.net/wp-content/uploads/2020/09/Digipass-battery-replacement-DIY-300x136.jpg "Digipass battery replacement [DIY]")
Side note on this security dongle battery replacement post.
Big thanks to these who put their own experience disassembling their bank token generators, it has been a great help here.
Compass, HSBC and many other banks are using this same digipass token generator.
The company producing this “use and trash it” is Vasco, which is now called “OneSpan”.
You can download the product presentation from Vasco here.
It seems Digipass 205 and 260 batteries can also be fixed the same way, I guess many more bank dongles are powered the same.
It says a battery should give you about 5 years of use. My HSBC security log-in device started to display the low level battery message after less than 2 years.Another way to get rid of this security bank dongle device would have been to use the HSBC app instead. Unfortunately, it does not install on Android rooted devices like mine. I have other bank accounts with other bank apps and HSBC HK is the only one with this limitation.
This DIY battery hack is quite simple and presents 0 risk of arming yourself.
If you have different models, you may need to open it with a tiny screwdriver more than just peeling the sticker.
I have invested on a very very nice set to basically open any device I can find in front of me. I posted a review here because it’s quite surprising offer for the price.
You can order it directly here on Amazon or copy and past this link: https://amzn.to/3fHg9Zv
At worse, you will be touching the plus and minus of the battery and the experience will be over.
Feel free to comment below and, please, just click on the google Advertising on top of this page to thank me if this was helpful for you. 5 seconds of you time for 5 cent in my pocket for new tools!
Update on April 2033: My token is still up and running! much longer than the original one.
What do you need to fix the infamous battery error?
You are in the middle of nowhere and no way to get these simple item?
Time to order from my affiliate link and a great way to thanks me!CR2016 battery cell
Simple iron soldering station
Cutting Pliers
.
Aug 24 2020 

Les Commentaires et Reviews
Retrouvez en une seul page les différents commentaires postés sur Amazon.
Mes Commentaires et Reviews Amazon
Voici une liste de reviews et commentaires honnêtes d’outillage achetés et utilisés pendant plusieurs mois. Je mets ce contenu régulièrement à jour.
Certains articles ne sont pas recommandés, d’autres vraiment conseillés. J’essaye de vous faire partager une expérience réelle avec les alternatives possibles lors de vos travaux à la maison ou au jardin.
Bonne lecture. N’hésitez pas à commenter ou poser vos questions à la fin de la page. Vous pouvez aussi cliquer sur les bandeaux publicitaires pour supporter cette page. Merci.Test Outillage:
Perceuse Bosch GSB 16 RE
Disqueuse GWS 9-125 S Bosch review et son capot de protection Bosch GDE 125 EA-T et son cache poussières Bosch 2-605-210-224
Ponceuse girafe Einhell TC-DW 225
Coffret Foret Mèches Béton DEWALT SDS+ Dewalt (DT7935B-QZ .)
Foret Béton DeWalt XLR de 14 SDS+ (DT8941-QZ)
Scanner mural Bosch Professional D-tect 120
Rabot Bois Stanley Stanley 5-21-122Couture, machine à coudre:
Pièce détachée Singer, Roulette caoutchouc remplissage canette
Cuisine:
Ultime Spatule bois et silicone
Bricolage plomberie:
Robinet d’arrêt 3 voies – F 3/8′ – M 3/8′
Douchette de bidet
SOMATHERM, Robinet d’arrêt 3 voies
Pommeau de douche cascade.Perceuse Bosch GSB 16 RE
Ceci est ma troisième perceuse Bosch. Et je pense avoir trouvé mon maître: le modèle GSB16 RE.
Tout d’abord, je précise que j’ai déjà une visseuse pour les petits travaux et qui fait parfois office de perceuse. J’ai aussi un perforateur donc mon besoin se situait entre ces deux extrêmes.

Une de mes perceuse précédente avait fumée lors d’une utilisation en ponçage, donc il me fallait un peu de puissance mais souhaite un objet qui reste maniable et donc peu lourd.

On achète une perceuse, mais ensuite, on s’en sert parfois pour faire autre chose que des trous dans des conditions idéales.

Ce modèle réussit sur ces 2 plans.


La puissance est de 750 W de pour un poids acceptable de 2,2Kg. Sincèrement, plus lourd que ça et il devient impossible de travailler en la tenant d’une main.
Avantage de Bosch par rapport à la compétition.
# Un long fil d’alimentation


# un système anti-pliage du fil d’alimentation qui évite de l’abîmer quand on pose la perceuse (Voir Photo).


# Commande de changement de sens de rotation des deux côtés de la perceuse.
# Poignée de support avec un collier à encoche qui ne va pas tourner dès qu’il se desserre un peu.
# Mandrin à serrage manuel, donc plus de clés à perdre et qu’on ne retrouve jamais.
# Vitesse Réglable très progressive mais avec une fonction sympa. Si on bloque le bouton en marche forcée, la vitesse mini est vraiment faible, donc on peut réaliser du travail d’horloger dans du bois par exemple.
Fonction percussion qui ne s’enclenche pas dès qu’on secoue la perceuse. Là c’est du Bosch.

# A puissance équivalente, elle est plus légère que les modèles à batteries.
# Elle est livrée dans une belle boite même si c’est toujours un peu compliqué de tout faire tenir dedans.
Les défauts qui m’ennuient.
Il n’y a pas d’encoche à l’arrière qui permettait de la serrer dans une montant de perceuse a colonne. Il ne serre désormais que sur le col et non en 2 points.
Le système auto-serrant du mandrin a des ratés, Si on ne sert pas trop fort, le foret peut glisser lors du perçage. Et là, il semble bloquer, on ne peut plus ouvrir les mors de nouveau.
Il faut en fait faire tourner un poil à l’envers pour récupérer le serrage.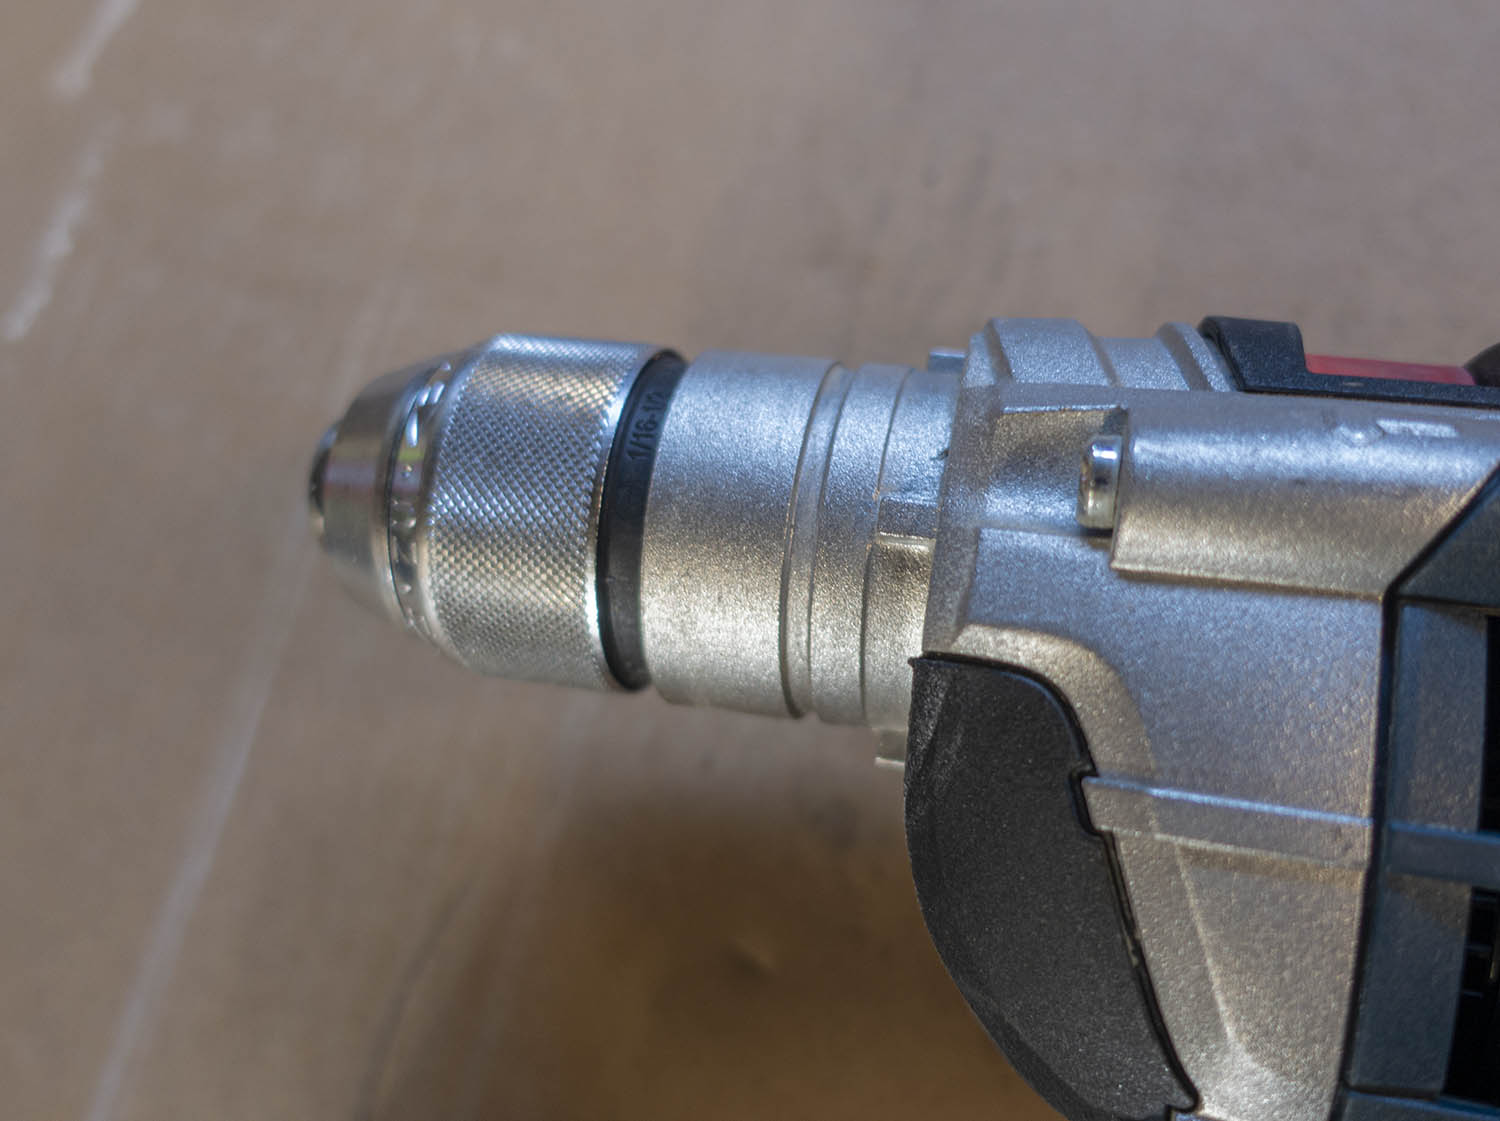

Je l’ai depuis 6 mois et je retape entièrement une nouvelle habitation, donc c’est un usage plus intensif que du bricolage du dimanche.
Je l’utilise pour le bois, le métal et le béton quand je ne veux pas porter mon perforateur. Elle s’en sort quand même très bien dans du béton, mais je conseille de viser des forêts de bonne qualité.
Vous trouverez chez Amazon des qualités différentes chez Bosch. Ça ne sert à rien de reculer pour finalement craquer: Il vous faut de bonnes forêts et cela a un coût.
Ce coffret en promo sur Amazon regroupe tout ce dont vous avez besoin pour le béton en une seule fois https://amzn.to/3xyDCT3 (Lien Amazon à copier/coller dans votre navigateur) C’est la version “Robust-Line”.
En plus, tout tient dans une boite donc c’est facile à transporter d’un coup.
Oui, je rachèterai exactement la même perceuse si besoin était.DISQUEUSE GWS 9-125 S Bosch review
A lire avant achat! Commentaire complet après 6 mois avec la GWS 9-125 S
Une meuleuse ou disqueuse est un outil multifonction et ce modèle Bosch GWS 9-125 S est absolument parfait.
Elle est suffisamment légère et puissante pour la plupart des travaux. On va appeler ça de la polyvalence.
J’ai aussi un modèle énorme pour disquer les murs. Donc cela complète parfaitement pour tous les petits travaux de la maison.
Mais elle est bien puissante et découper un escalier en acier ne lui fait pas peur.

Il y a deux facteurs nouveaux pour moi comparé à mon ancienne disqueuse qui est finalement décédée après plusieurs années.

Le carter de protection en métal est très facile à bloquer dans n’importe quel angle. Il est très solide!
Donc vous pouvez changer facilement de position pour évacuer les étincelles où vous le souhaitez.
Il ne glissera pas non plus car il y a des nervures tout autour de l’axe.
Je conseille vivement d’acheter le carter de protection compatible. Attention il y a deux modèles chez Bosch et celui qui est compatible est à commander sur Amazon ici https://amzn.to/3r3LN7p (Lien Amazon à copiez/collez dans votre navigateur) à un super prix. Ne perdez pas de temps et commandez le avec cette disqueuse. Ça devrait d’ailleurs être proposé en kit ensemble. J’ai mis la photo en référence mais ça n’est pas vendu en standard.
Il est très simple de visser et dévisser les poignées pour l’avoir parfaitement en main et ne pas fatiguer.
Le deuxième avantage énorme de ce modèle est la vitesse de rotation variable. Cela vous permet de monter toutes sortes d’outillage dessus. Vous pourrez l’utiliser pour poncer ou couper d’autres matériaux au lieu de vous limiter au béton ou au métal.

L’axe central est au standard multi-marque donc vous pouvez monter à peu près n’importe quoi et utiliser des produits d’autres marques.
Oui je rachèterai la même disqueuse si besoin est. C’est 100% efficace.
C’est du Bosch bleu (PRO) et pas forcément beaucoup plus cher que des marques alternatives qui pourraient mettre votre sécurité en jeu avec des serrage d’outils approximatifs.
Étant super polyvalente avec sa vitesse variable, vous allez l’utiliser plus que vous n’y pensez, donc le petit plus de puissance avec ce model de 900 Watts n’est pas superflus.
Attention toutefois a ne pas mettre un outils lourd et une faible vitesse car vous aller cramer le moteur. La puissance total est due à l’inertie de rotation.J’ai choisi ce modèle après avoir lu les commentaires et étais inquiet des personnes ayant décrit des “pannes” après quelques heures d’utilisation.
Comme d’habitude, il faut quand même laisser reposer un peu le moteur de temps en temps et l’utiliser de façon intelligente. On ne peut pas acheter un produit à ce prix et le laisser tourner 8 heures par jour en forçant dans du métal. Il faut rester logique.
Je l’utilise depuis 6 mois. Elle est en parfait état.
Le seul bémol concerne le bouton on-off maintenant standard sur plusieurs produits Bosch PRO. Il est un peu “pousser + presser” en même temps, ce que je ne trouve pas pratique.
D’un côté, ça doit être une histoire de sécurité. Un coup à prendre, sans doute.
Commentaire sur Capot protection Bosch GDE 125 EA-T
Compagnon idéal pour meuleuse Bosch GWS 9-125 S si vous coupez du béton ou du carrelage.
J’ai acheté ce carter Bosch GDE 125 EA-T après avoir hésité avec des modèles de marque alternatives pour diminuer le coût.
Oui, c’est cher, mais au final je ne regrette pas.
MONTAGE:
Cela ne se monte pas si facilement, en tout cas pas avec le modèle avec lequel il est pourtant recommandé.
J’ai l’excellent meuleuse Bosch GWS 9-125 S que je recommande vivement car elle a une vitesse de rotation variable.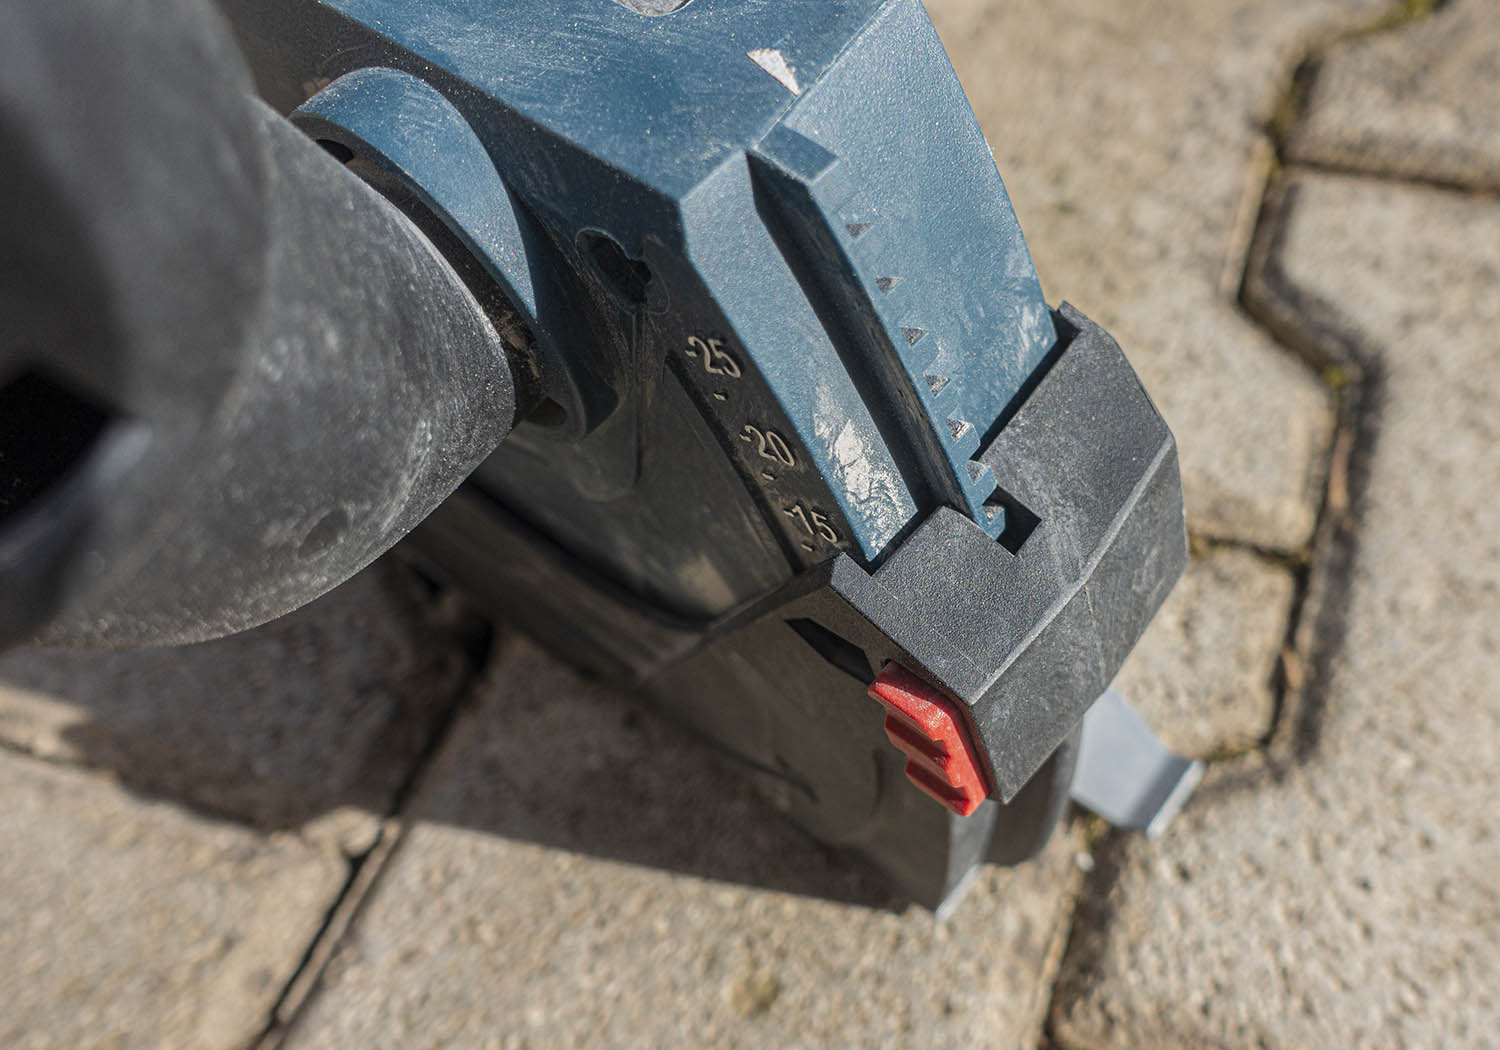

Elle est disponible sur Amazon ici https://amzn.to/36sl9eT (Lien Amazon à copiez/collez dans votre navigateur) à un super prix.
La meuleuse d’angle a un petit capot en métal qui peut facilement tourner autour de l’axe pour changer la position de coupe.
Avec ce capot, le loquet d’ajustement touche le capot et cela empêche une rotation dans certains cas.


UTILISATION:
La poussière est vraiment réduite, mais surtout quand la lame de scie est rentrée entièrement dans le mur et que le sabot du capot est bien en contact avec le béton.
Donc, il est préférable de bien choisir son épaisseur de coupe et de presser sur le bouton rouge pour l’indiquer sur le capot de protection.
Ensuite, c’est du bonheur et il n’y a vraiment pas grand chose qui passe.

Cela permet aussi de guider la lame pour être plus perpendiculaire au mur.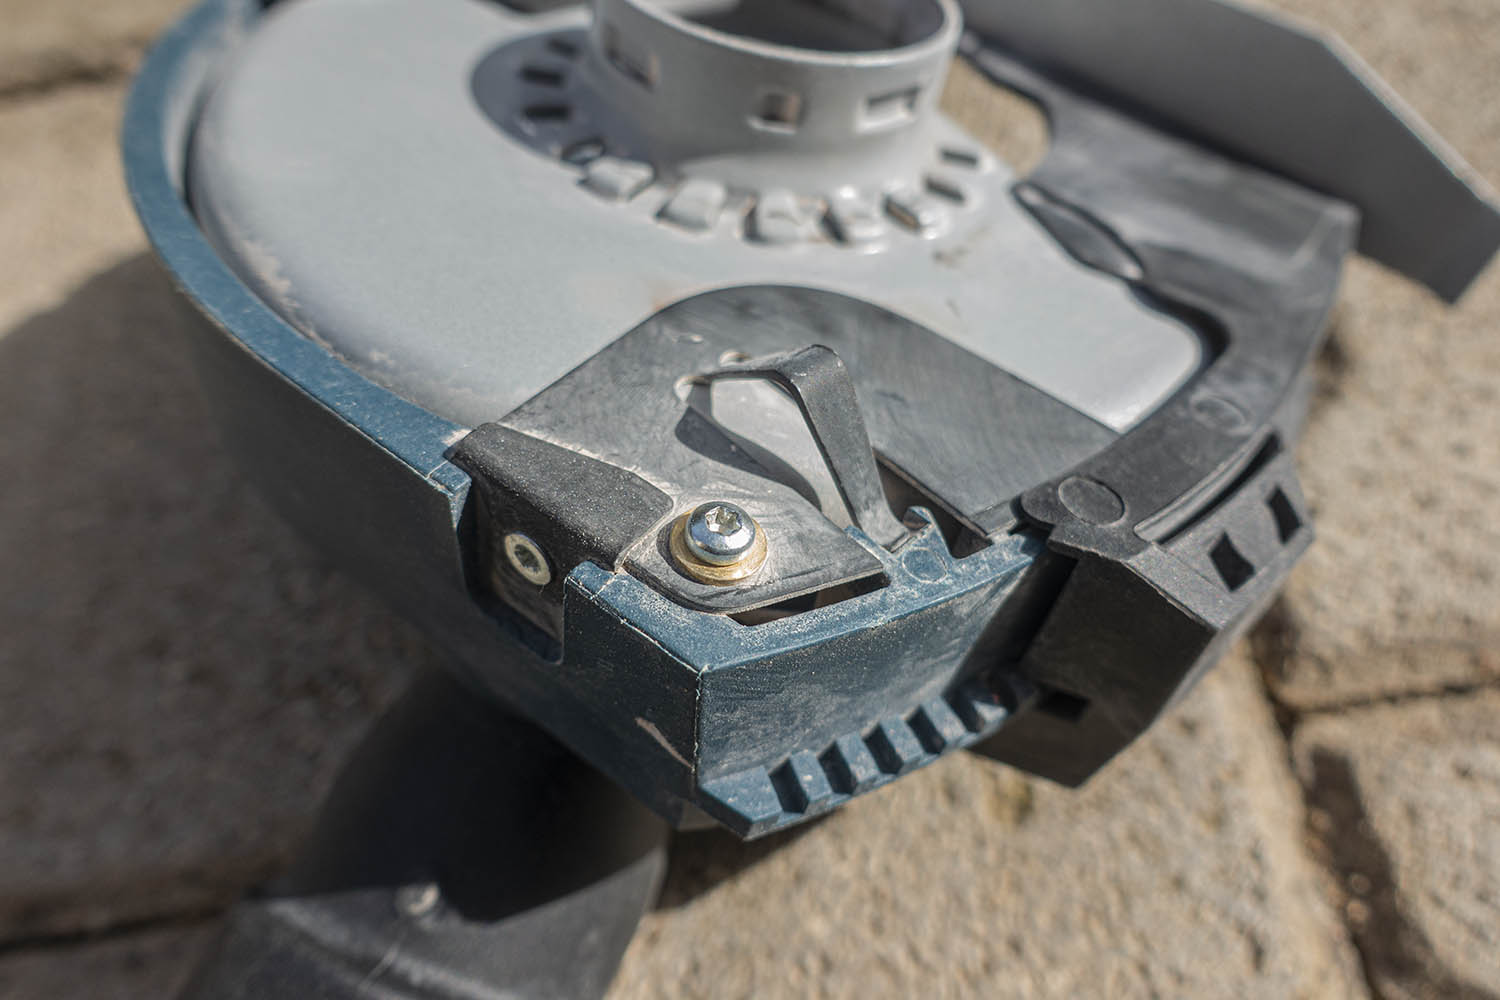
CONCLUSION:
Il y a deux petits défauts.
# Si vous ne choisissez pas la profondeur maximum (donc inférieur à 25mm), il y a de la poussière qui s’échappe par le guide d’ajustement.
J’ai simplement placé du scotch de protection peinture pour boucher ce trou.
À la profondeur maxi, les deux parties s’en cliquent parfaitement et il n’y a plus de fuite.
# Apres 10mn dans le béton, il y a de la poussière fine un peu partout dans le capot ce qui est normal. Mais cela rend l’ajustement de la hauteur compliqué car il va avoir tendance à bloquer le bouton de réglage qui est un peu grippé.
La sortie aspirateur est bien solide et reste en place quand on choisit un angle.
La sortie Aspirateur est de diamètre standard, ENFIN!
Cela réduit drastiquement les étincelles et poussière.
Une super sécurité!Je l’utilise depuis 6 mois.
Oui je rachèterai le même si besoin est. 100% efficace et moins cher sur Amazon que dans les magasins de bricolage qui ont exactement le même! (quand ils l’ont).
Je pense désormais que les produits alternatifs seront clairement moins bons.Commentaire sur Bosch Hotte aspirante avec couronne de brossage
Ça devrait être obligatoire de s’équiper d’un carter de protection avec la superbe meuleuse Bosch GWS 9-125 S si vous poncer mur et sol en béton du béton.


Bien qu’il soit indiqué comme compatible dans la description de l’annonce Amazon https://amzn.to/3gD7xDk , il n’est pas compatible (et de loin) avec la disqueuse BOSCH GWS-9 125.
Le diamètre intérieur est complètement différent.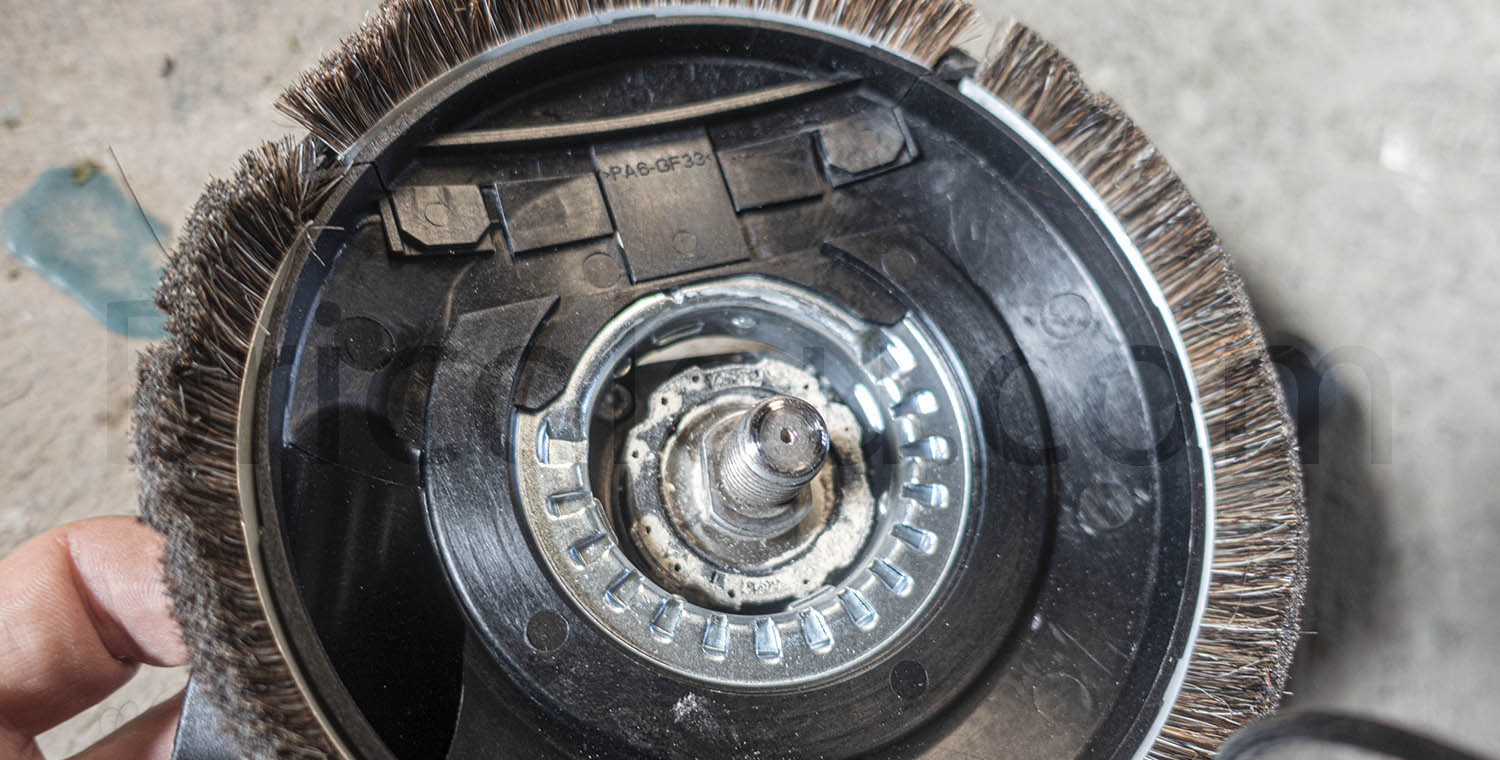

Le produit est livré dans une simple boîte en carton avec un logo Bosch.
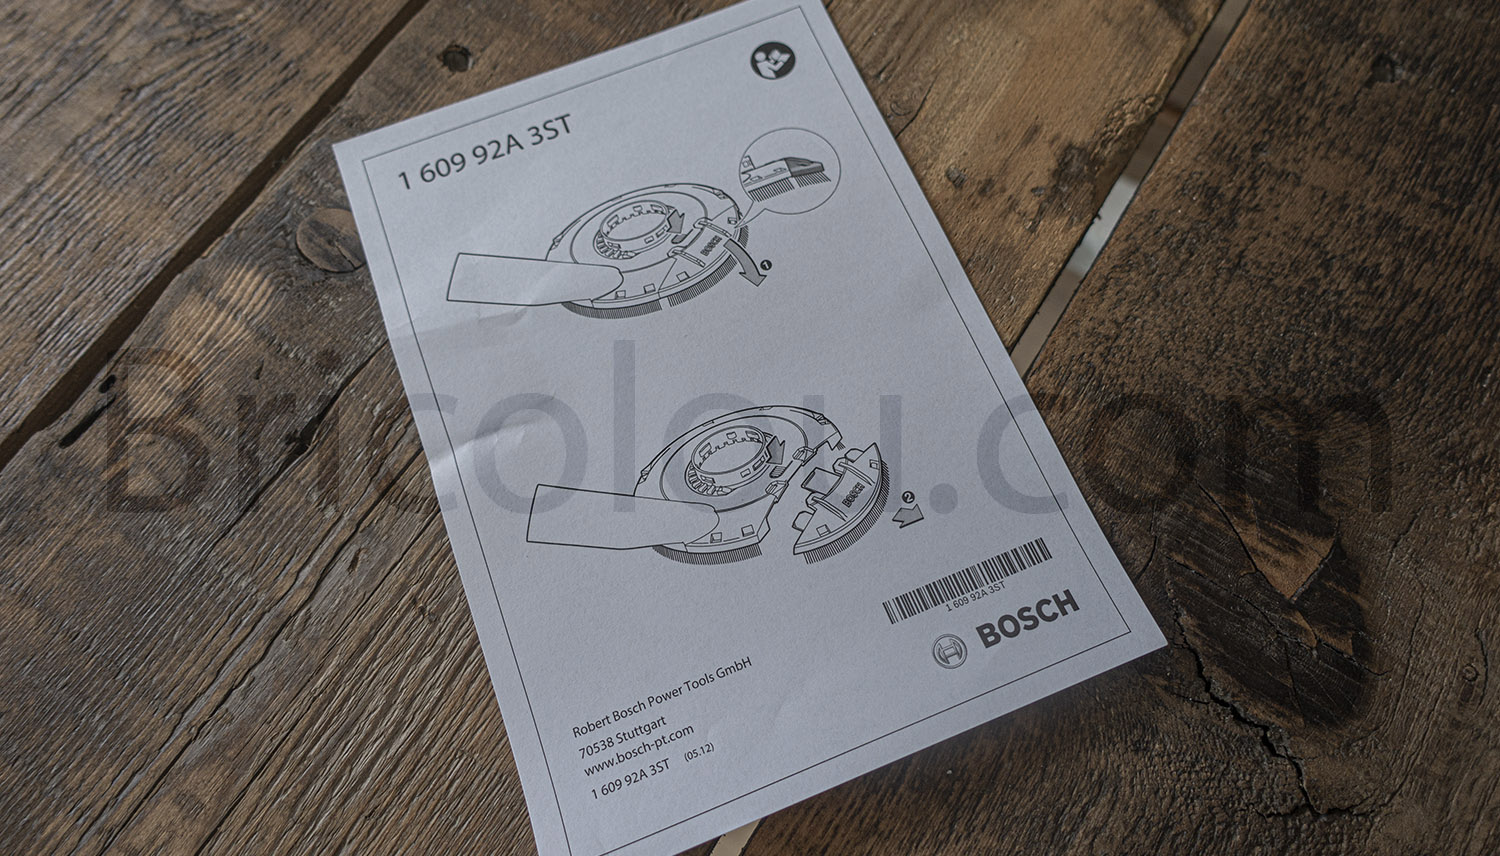


La liste des modèles possibles indique un compatibilité avec les meuleuse d’angle GWS 8, 10 11 et 14 uniquement.

Ne pas se référer à la description.Du coup, je conseille aux possesseurs de la magnifique GWS 9-125 S de se tourner vers ce produit disponible sur Amazon https://amzn.to/2UFQgBb (Copiez/collez ce lien Amazon dans votre navigateur) car il n’y a simplement pas de produit Bosch disponible pour la GWS-9 qui couvre entièrement la lame.
J’avais pensé l’utiliser pour surfacer du béton et éviter la poussière partout.
Le produit tel quel semble bien, le diamètre est parfait pour les disques de surfaçage diamant.
Les petits poils sont là pour faire le raccord avec votre mur et il est possible d’en racheter séparément s’ils sont trop usés.
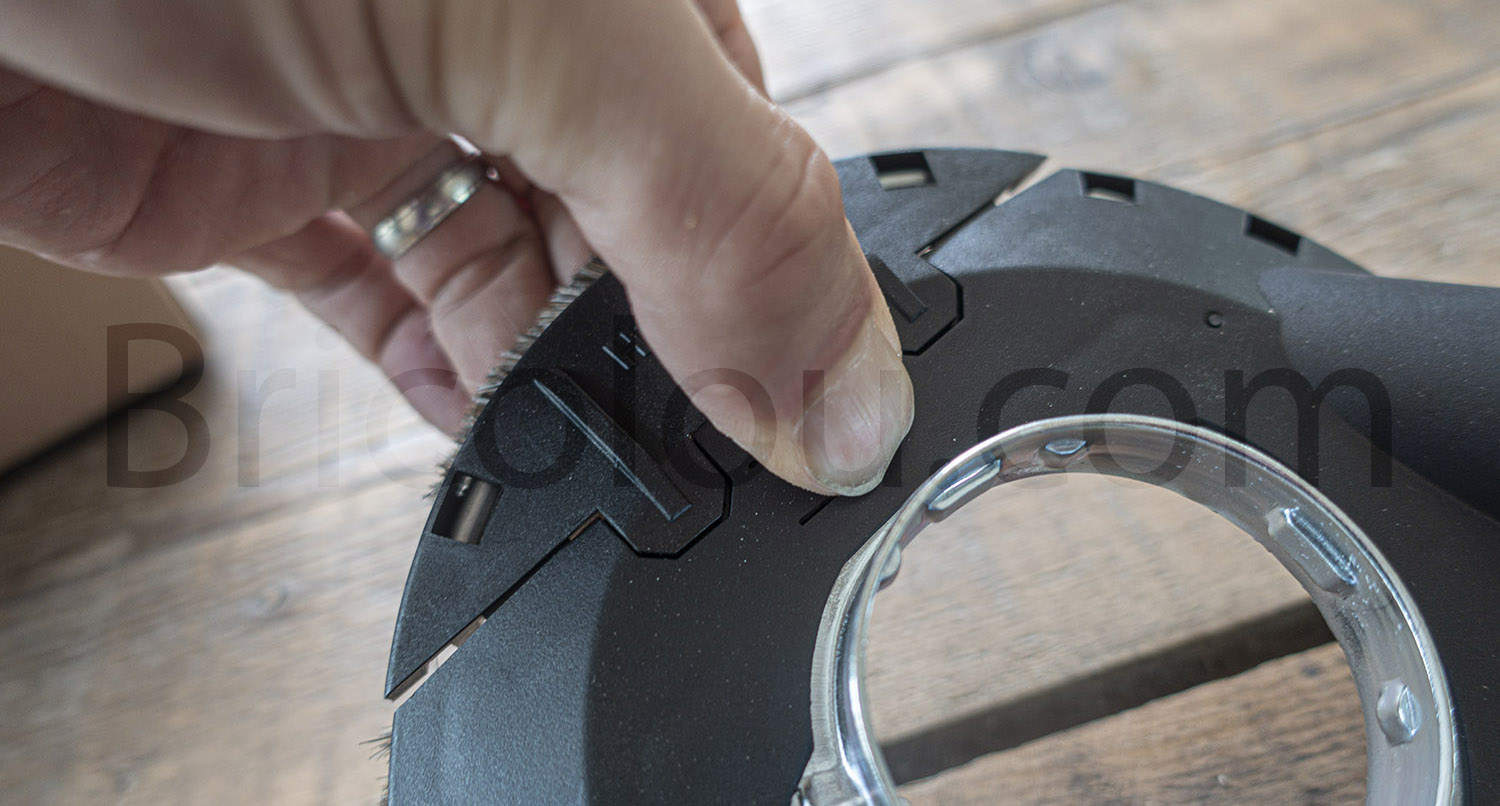


Il y a une partie qui s’enlève avec des clips, mais il faut vraiment forcer pour les débloquer.Je pense qu’avec la poussière de ponçage, ça doit être encore plus difficile après 10mn d’utilisation.
L’embout pour l’aspirateur est d’un diamètre standard pour une fois, merci Bosch.


Donc un produit inutile si vous avez une meuleuse Bosch GWS 9-125 SPonceuse girafe Einhell TC-DW 225
Pour être honnête, je ne connaissais même pas le nom de ce produit une semaine avant de le commander.
Je refais ma première maison et me trouve devant une montagne de problèmes à régler un par un sans trop savoir comment m’y prendre.
J’avais un plafond à ragréer et des murs en béton brut.
Après quelques recherches sur internet et pas mal de galères à tenter de faire un truc propre à la main, j’ai décidé de donner ma chance à ce produit.
J’ai choisi une balance entre le bas de gamme et le super pro n’étant pas sur de l’utilité et performance.
Je découvre du coup la marque Einhell qui se trouve quasiment exclusivement en vente sur internet.
Après déballage, quelques tests et réglage, le chantier plâtre a été réglé en une semaine. (!)Cet outil est simplement fantastique. La référence exacte est TC-DW 225 et disponible à l’achat sur Amazon ici https://amzn.to/2UGyJbL (Copier coller ce lien dans votre navigateur)
Il permet de rattraper vos coups de taloches un peu maladroits et d’avoir tous vos murs et plafonds parfaitement plats sans trop de poussières et de sueur.
Il s’agit d’une ponceuse avec de très large disques articulés sur un long manche.

C’est difficile pour moi de le comparer à un autre produit, mais voici ce que j’ai aimé ou pas sur cette ponceuse girafe.
– La longueur du manche peut s’étendre et est parfaite pour des plafonds à 2m50 de haut si vous mesurez 1m75 comme moi. Ce n’est pas idéal si vous êtes plus petit ou avez des plafonds plus hauts. Vous allez devoir “pousser” pour poncer, donc pensez à surélever votre chantier.
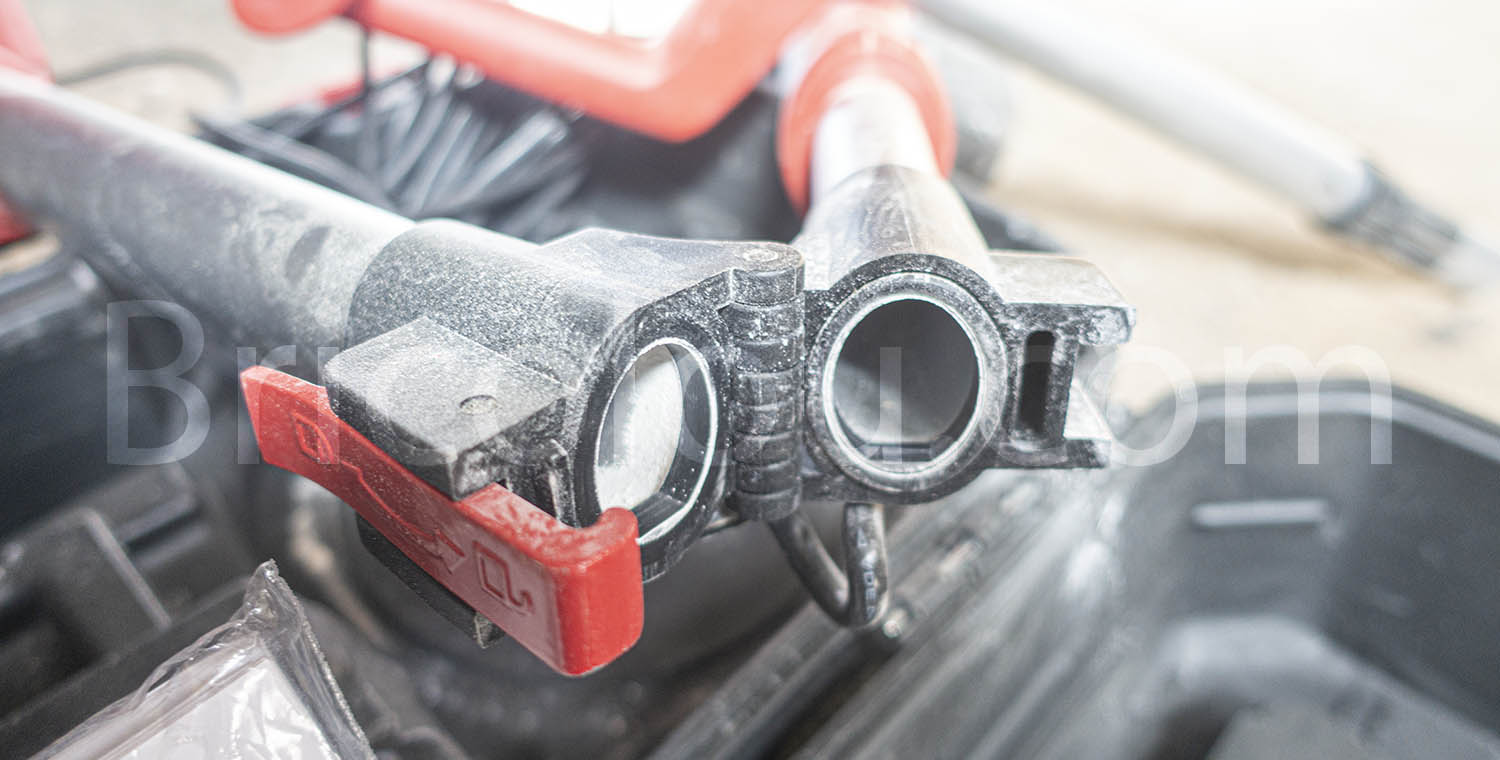


– Le variateur de vitesse est très bien, je regrette juste qu’il n’y ait aucun marquage sur la molette. On ne sait pas si on est à pleine vitesse ou pas au démarrage.

– Ce modèle n’a pas d’aspiration propre et donc doit être branché sur un aspirateur PUISSANT.
– Le tuyau de raccord pour l’aspiration est super mou et long; c’est très bien car il ne vous ralentit pas dans votre progression.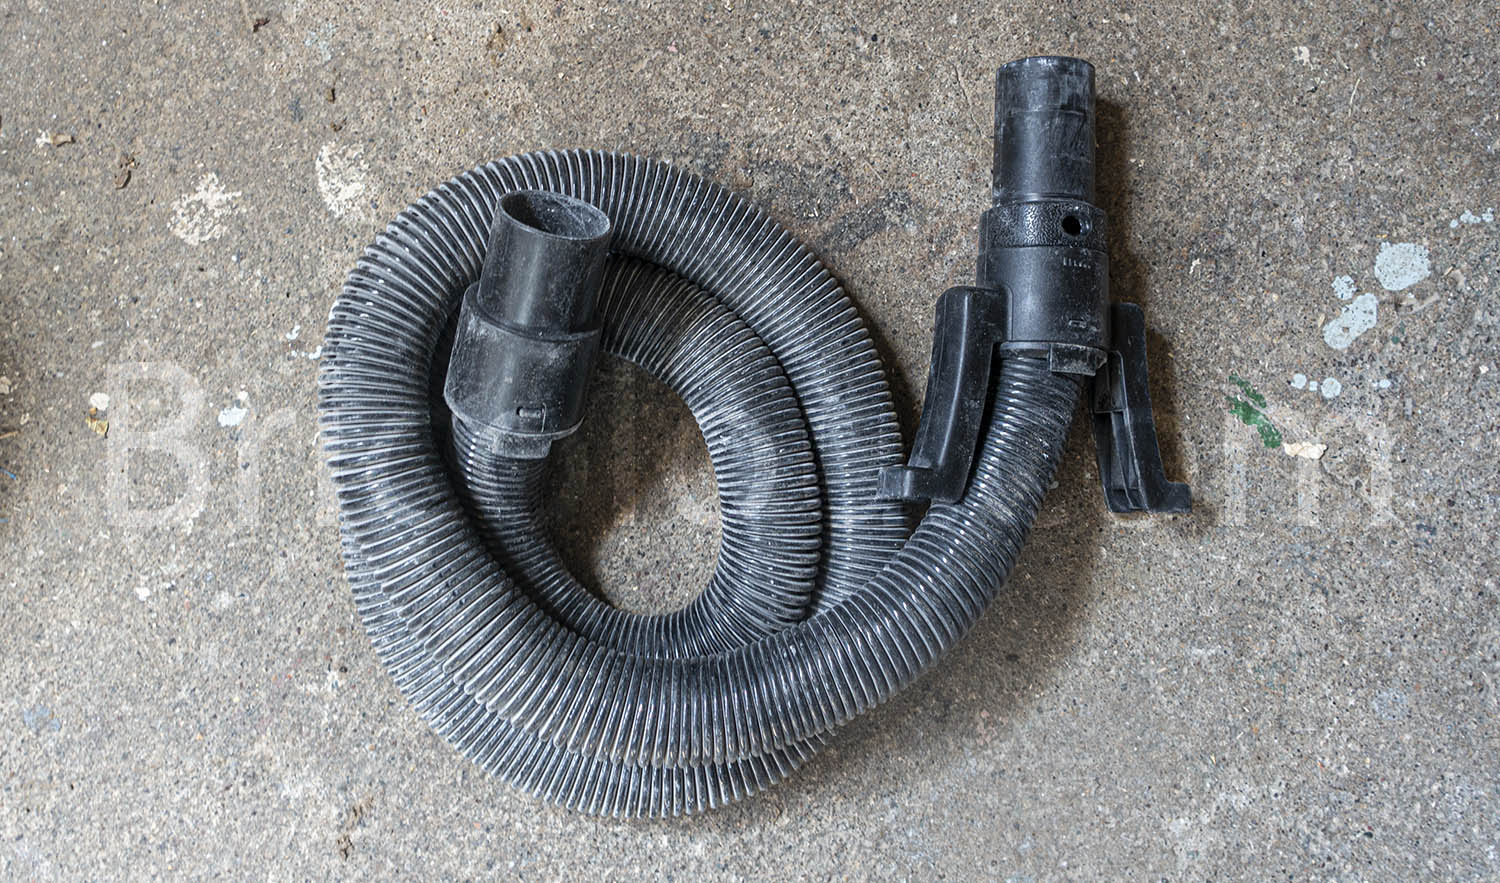

– Le câble d’alimentation est long, c’est sécurisant.
– Je ne trouve pas ça très bruyant, car comme il y a un aspirateur en plus en marche, vous porterez sans doute des protections auditives. (Mon aspirateur est plus bruyant)
– Il n’y a pas de d’éclairage sur la tête comme sur certains modèles concurrents, donc il est conseillé de prévoir un spot à placer le long du mur pour bien voir les endroits à rectifier en créant des ombres.

– Le plâtre ne bouffe pas trop les disques d’origine, j’ai utilisé ceux fournis avec la machine mais conseille fortement d’avoir un jeu d’avance en 60. Il suffit d’un clou qui dépasse dans le mur pour déchiqueter un disque en 10 secondes. Vous avez des disques compatible sur Amazon icihttps://amzn.to/3xzJds7 (Copiez/collez ce lien Amazon dans votre navigateur). Les trous d’aspirations correspondent parfaitement.
– Je regrette un peu de ne pas avoir choisi un autre modèle de chez Einhell qui propose la tête triangulaire en plus. Cela permet de bien finir les coins, tant entre le plafond et mur que mur à mur.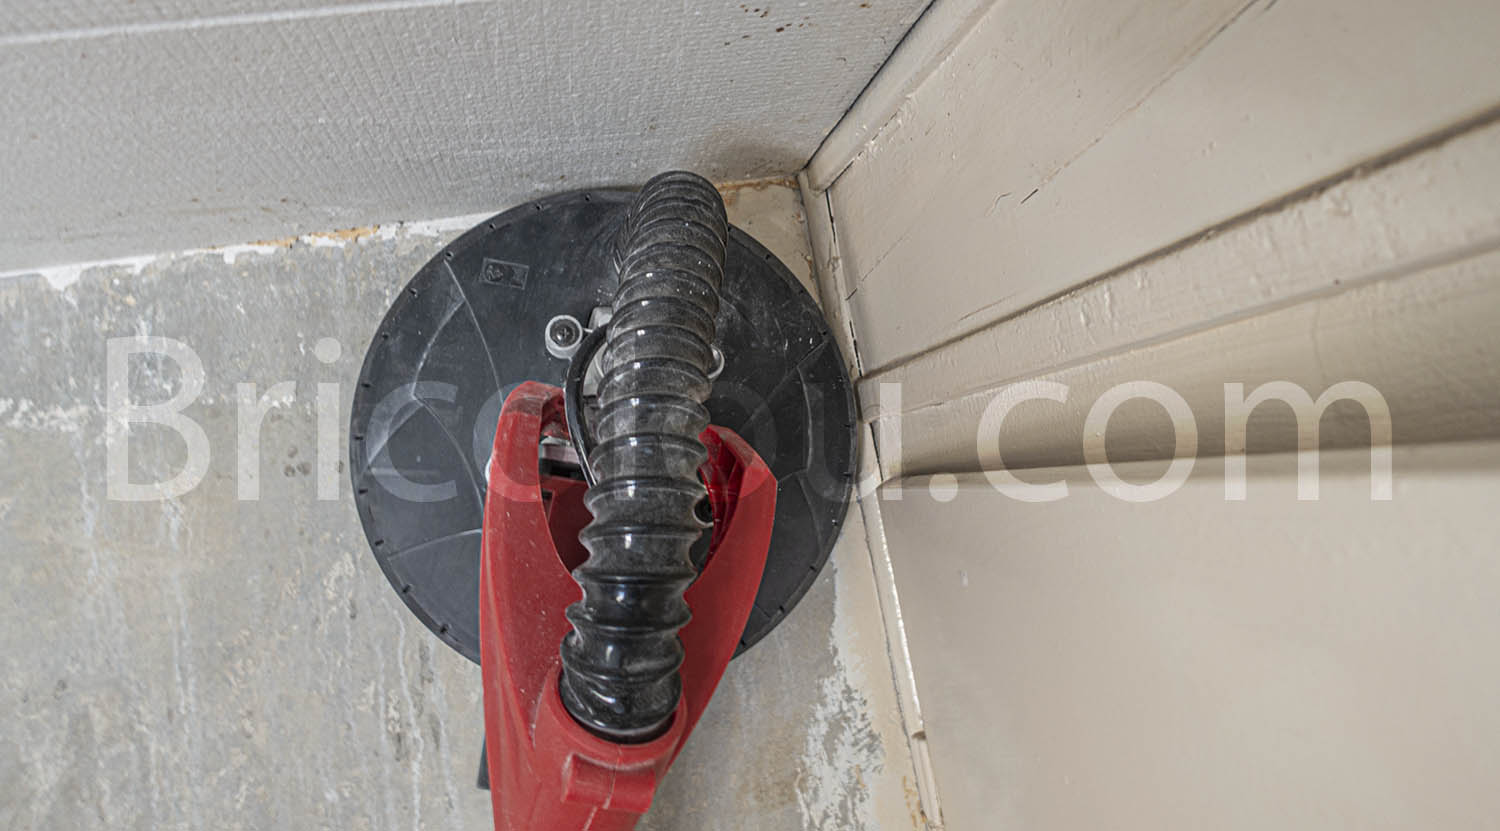

– Les poignées sont solides et bien placées pour pouvoir porter l’ensemble dans plusieurs positions et ne pas fatiguer.
– Le bouton marche peut rester enclenché pour utiliser ses deux mains sans tenir la poignée centrale.
– La boite est solide, mais il faut bien tout démonter pour que cela tienne dedans. Bonjour le plâtre qui vole à ce moment la.


– Les disques de ponçage s’accrochent avec du scratch qui n’est pas très solidement collé. Donc il faut les changer doucement.

– La tête est bien articulée de façon souple (Pas de point durs) et le moteur est monté sur ressort pour éviter des saccades.
– Le poids est complètement acceptable.Donc oui, recommandée 100% pour avancer rapidement et proprement sur votre chantier.
Je l’utilise depuis Janvier 2021 et fait plus de 60 mètres carres de plâtre avec.DEWALT – Coffret Foret Meche Beton SDS+
Ok, C’est marqué Dewalt dans une belle boite Jaune de 10 Forets Pour Béton appelée DT7935B-QZ.


Il y a en fait 10 mèches de 7 dimensions différentes, dont 3 mèches de 6…
J’aurais préféré deux de 6 et deux de 8. C’est presque impossible de le savoir avant de les recevoir ceci n’étant indiqué nulle part.

La boite est solide et bien grosse. La photo où il la met dans sa poche en accroche sur la présentation Amazon est un poil trompeur; il vous faut de très grosses poches quand même.
Les forets s’encliquent dans une mâchoire en caoutchouc dans la boite. C’est vraiment bien, facile a graisser ensuite!
Maintenant, au niveau qualité, c’est très moyen. On reste dans des produits bricoleurs avertis pour 10 trous par ans.
Je suis tombé sur de la ferraille au deuxième trou et ça a bien chauffé. J’ai préféré attendre un peu pour finir mon travail.
Dans les points positifs; Les pointes ont une mini pointe qui aident pour bien se centrer au départ.

Avec un perfo de 1,500 Watts, c’est pas si facile que certains voudraient bien l’annoncer. Toutefois, on avance doucement mais sûrement.
Maintenant; pour le prix, c’est sans doute bien mieux que la qualité made in PRC de base.
Les forets sont gravés “made in Germany”.
Si vous souhaitez la vraie qualité pro DeWalt, il faut plutôt vous tourner ici https://amzn.to/3r6stpZ (copier ce lien dans votre navigateur)
Vous remarquerez la différence d’une pointe avec 4 nervures au lieu de 2 en carbure massif.
Un peu comme des différentes gammes “verte” et “bleue” chez Bosch.
A 25 Euros les 10 forets, vous êtes dans le bas de gammes chez Dewalt; pas de surprises.
Je ne regrette pas mon achat car c’est un bon début.
J’achèterai toutefois en remplacement les version XLR SDS-Plus la prochaine fois.
Mise a jour Mai 2021:
Je suis tombé sur ces foret SDS de la marque Presch qui sont quasiment au même prix mais ont les 4 tranchants par foret comme les Dewalt XLR. C’est peut être une solution intermédiaire!
Visibles sur Amazon ici https://amzn.to/3kaaiOL (copier/coller ce lien dans votre navigateur)Foret Béton DeWalt XLR de 14
A la recherche de la qualité ultime…
Bon, après avoir acheté du DeWalt bricolage, j’ai décidé de tester la version super maxi pro pour ce gros diamètre de perçage béton en monture SDS.
Tout d’abord, oui, l’annonce est bien un DeWalt malgré le nom tronqué en première ligne. La dénomination officielle est: DT8941-QZ.
Il est compatible SDS et SDS plus.


Fabriqué en Allemagne comme tous les forêts Dewalt.

Tout comme Bosch avec ses couleurs Bleue pour PRO et Verte pour bricolage du dimanche, DeWalt propose plusieurs gammes de produits. Ici ils les appellent XLR.

Ces forêts ont 4 pans en carbure pour une meilleure durabilité mais surtout un perçage précis et facile, même lorsque le béton contient des ferraillages.


Dans mon cas, il s’agit de percer une dalle pour y inclure des cheville métal afin de tenir une rembarde de balcon. Je n’ai pas le droit à l’erreur avec ce diamètre et l’ajustement doit être aligné avec le balcon.
Résultat parfait!


Il y a une pointe pour centrer au départ.
Merci Dewalt.

La prochaine fois, j’achèterai directement cette gamme plutôt que de galérer au but du deuxième trou avec un foret qui fatigue déjà. Il y a un coffret complet en vente sur Amazon ici
https://amzn.to/3hsYN3g (Copier le lien Amazon dans votre navigateur)Comme référence, voici une tranchée pour pousser mes câbles électriques réalisée uniquement avec ce foret.
Comme il y a 4 pans; il ne saute pas a droite a gauche et donc permet d’avoir un travail très propre. Clairement, mon prochaine achat est la version SDS Extrême 16mm de ce bijou.
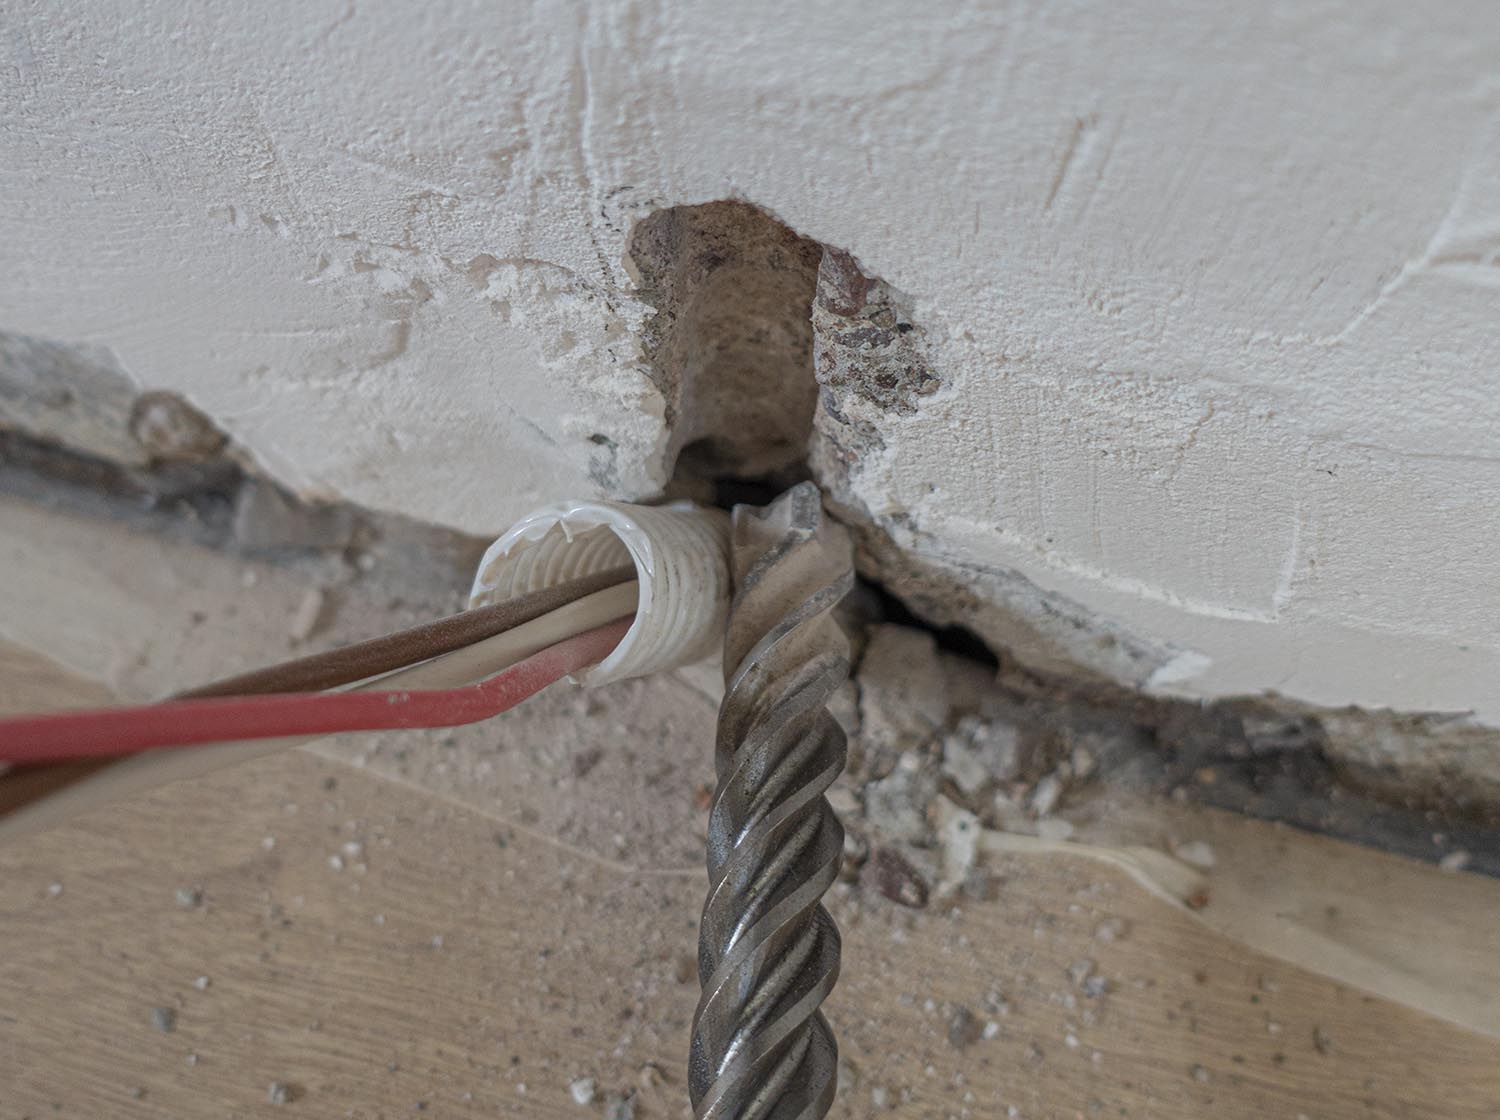

A acheter d’urgence plutôt que d’attendre de massacrer ses murs.Bosch Professional Scanner mural D-tect 120
Enfin un scanner qui fonctionne.
J’ai acheté le Bosch Professional Scanner mural D-tect 120 à la suite à l’acquisition d’une maison à retaper. N’ayant pas ni plans électriques et ni béton, je voulais être sur de mes perçages et découpes béton.
Je voulais disquer 2 murs entiers, donc n’ai pas trop le droit à l’erreur.
Ayant déjà acquis un autre model plus économique, le Bosch Professional Détecteur mural GMS 120 disponible sur Amazon ici: https://amzn.to/2TVznlK (Copiez/collez ce lien dans votre navigateur) dont je ne suis pas du tout content. Les détections sont très approximatives et plutôt trop sensibles.
Il clignote en permanence même en présence uniquement de bois. Je pense que Bosch aurait dû le peindre en vert plutôt qu’en bleu. Enfin…
Je n’ose imaginer ce que les modèles de marques alternatives vont vous donner!Donc, voilà le nouveau maître à bord à qui j’ai confié ma sécurité et c’est enfin le produit que je recherchais.
Oui, c’est cher, mais ça marche presque à 100%.
Dans mon cas, tout est en béton armé, donc il y a des faux positifs mais c’est normal.
Il faut bien lire la notice qui explique comment se placer le long du mur pour ne pas faire antenne avec son corps. Les commentaires négatifs ont dû sauter cette étape cruciale.Il m’a aidé aussi à suivre les rails métalliques sous des panneaux de plâtres. 0 % d’erreur.
Il est solide et aucune rayures sur le socle, bien que je l’ai frotté sur les murs en béton.

Livré avec 3 piles bâtons, la forme du réceptacle à pile le rend compatible avec les batteries rechargeables Bosch.
Avec des piles, je n’ai jamais eu besoin d’en changer les 3 mois d’utilisation.
Je ne regrette pas mon achat. 100% recommandé.
Et même mieux, je l’ai revendu une fois la cartographie faite sur un site de petite annonce et presque récupéré mon investissement de départ.
Donc il n’y a aucune raison de reculer devant l’investissement pour sa propre sécurité. C’est Bosch et sa valeur à la revente est importante.Rabot BOIS Stanley Stanley 5-21-122
L’efficacité simplifiée: le rabot bois 5-21-122 de Stanley.
Avoir un rabot a bois est un minimum quand on bricole un peu. Ce modèle est la norme et celui que j’avais toujours vu chez mes parents.
J’en ai finalement acheté un pour moi et ne suis ni surpris ni déçu.

Ça doit faire 30 ans que Stanley offre ce produit sans modifications et ça n’est pas pour rien. C’est de l’alu, solide et qui ne va pas rouiller.
La poignée (jaune sur la photo) peut se détacher pour être mise de façon inverse et modifier le geste de ponçage.

L’évacuation des copeaux est facile avec une large ouverture. La lame se place correctement à plat et ne bouge pas car serrée dans du métal.
Une autre option possible est de penser à ce modèle plus en plastique de chez Stanley aussi. Il est en vente sur Amazon ici https://amzn.to/36rgcmH (Copiez/collez ce lien Amazon dans votre navigateur) qui est plus léger et moins cher si votre budget et limité.On peut facilement changer la lame. Le blocage est très solide avec une vis réglable en métal.
Le surface de rabotage est plate pour un super rendu.

La lame appuie bien sur toute la surface des bords donc votre limage/ponçage est vraiment propre.
Oui je rachèterai le même si besoin est. 100% efficace et moins cher sur Amazon que dans les magasins de bricolage qui ont exactement le même! (quand ils l’ont).
BAGUES DE ROUE DE PNEU EN CAOUTCHOUC pour SINGER
Un poil trop large pour ma singer Harmonie, mais facilement modifiable
J’ai récupéré une machine à coudre d’occasion en parfait état, mais les parties en caoutchouc avaient bien vécu.
Cet objet est le pneu de la petite roulette qui appuie sur le galet de remplissage des canettes.
Donc il doit être parfaitement rond et avoir le bon diamètre pour rester en position.
J’avoue que la description de l’article n’était pas très claire sur Amazon, mais à ce prix, j’ai décidé de le commander pour le tester.
Ma machine est une Singer Harmonie 100 de 20 ans.
Il y a deux pneus par sac.

A la réception, j’ai noté qu’ils sont en fait trop larges pour moi. Je peux bien le monter à la place de l’ancien, mais le diamètre extérieur est trop large pour rester en position quand je veux remplir une canette. (Voir Photo de comparaison)
En ayant deux et perdu pour perdu, j’ai simplement décidé d’en limer un pour essayer.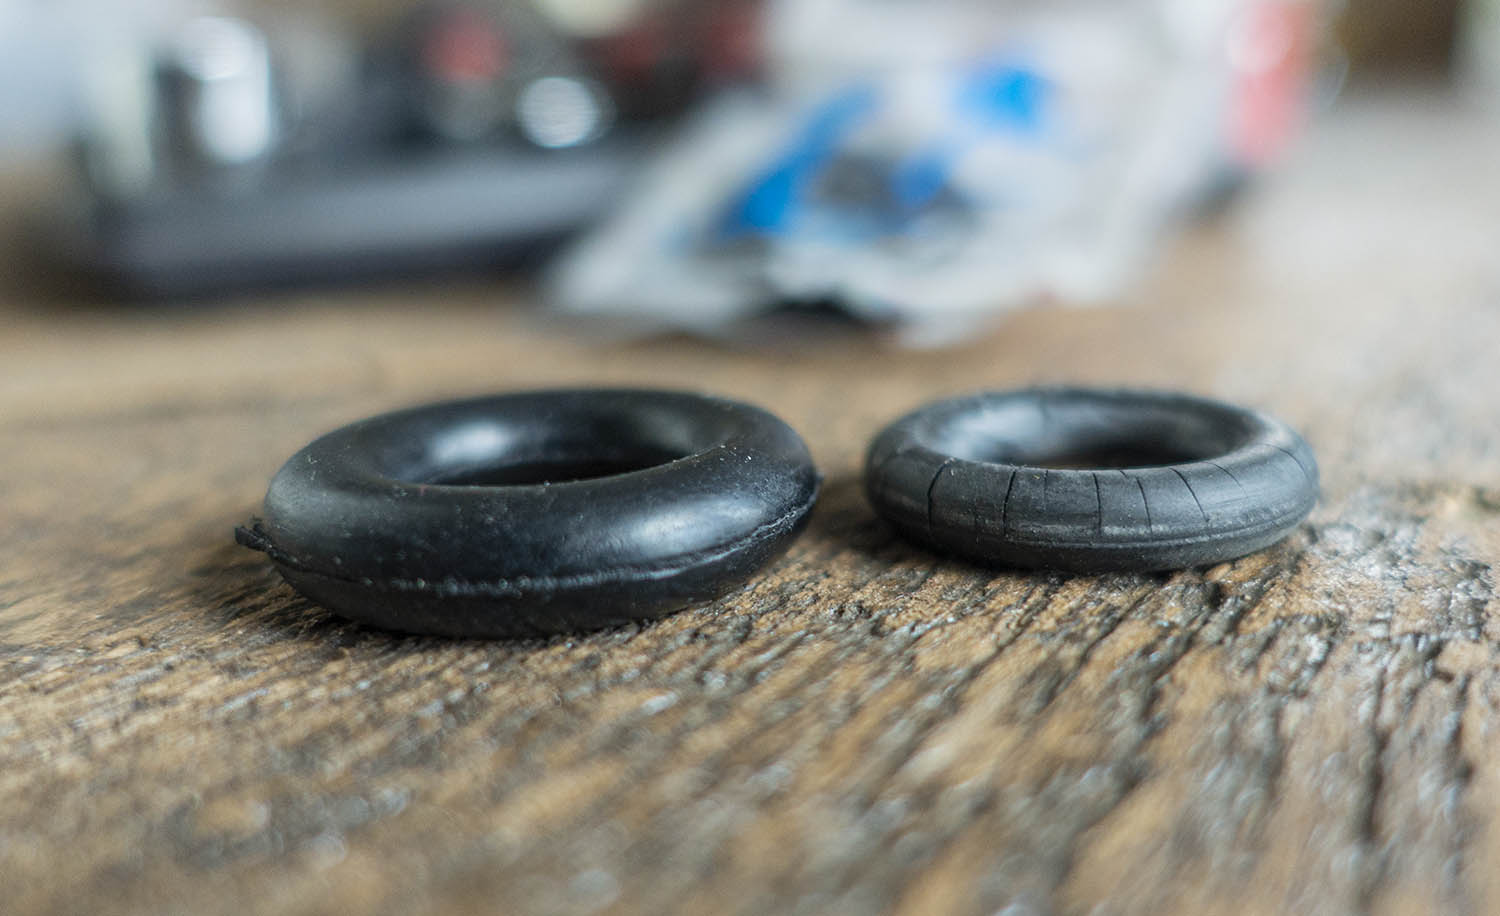

J’ai monté l’axe sur ma petite visseuse et utilisé une simple lime à métal.
En 10 minutes, j’avais enlevé assez de caoutchouc pour que la roulette reste en position canette.
Désormais, cela fonctionne parfaitement.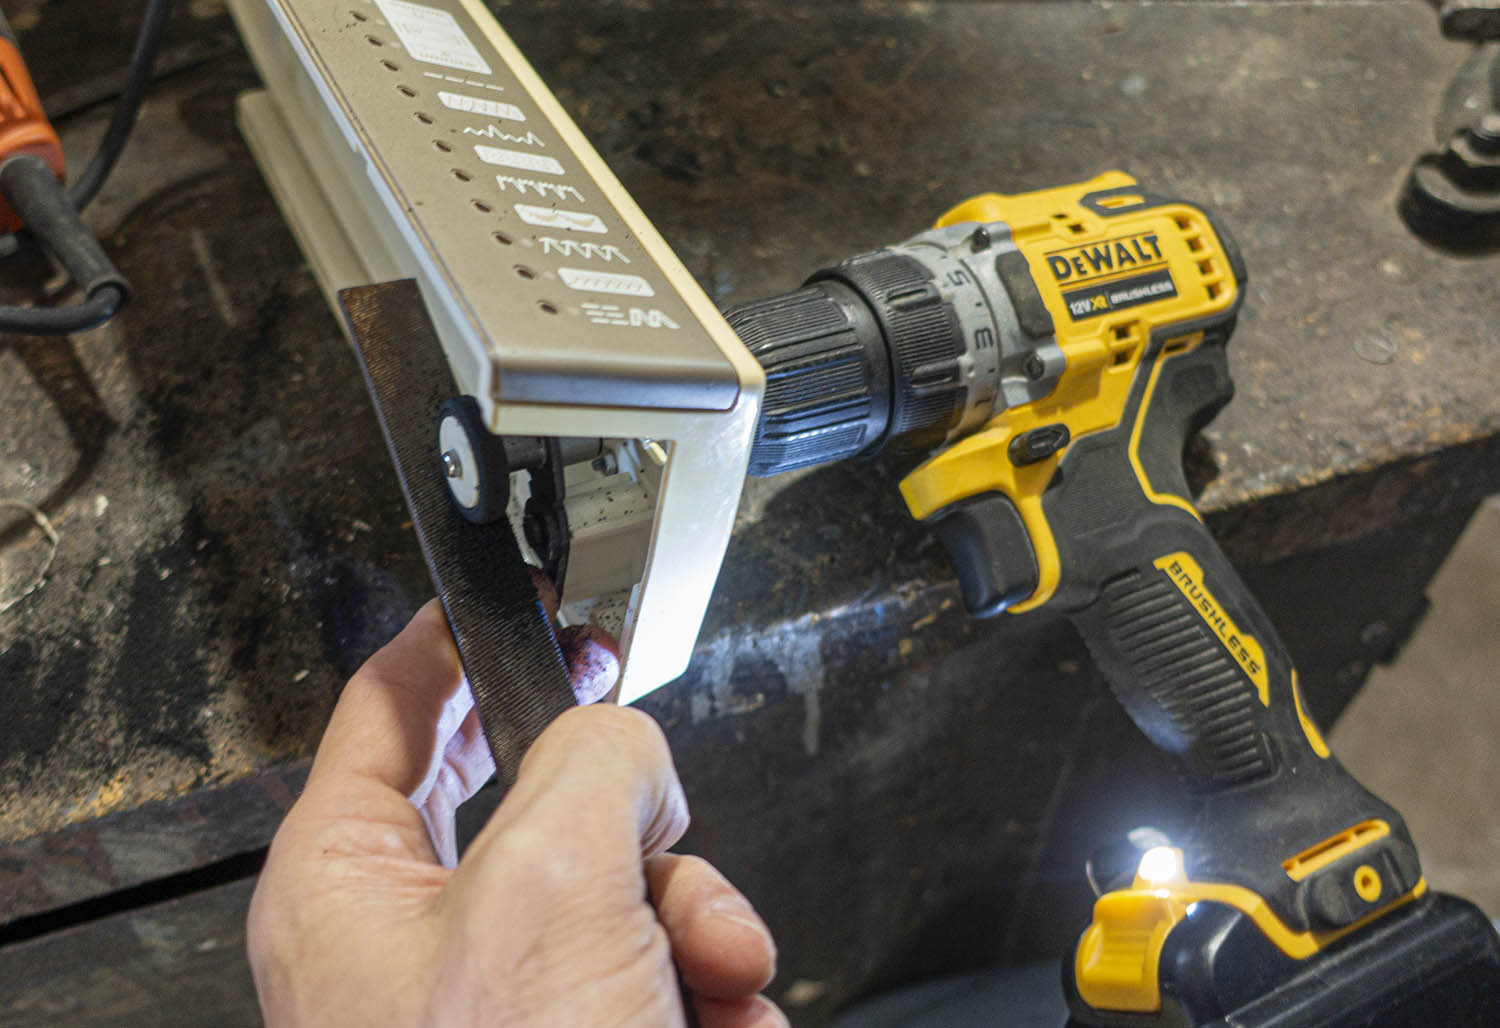

J’ai aussi acheté des canettes en plastique pour cette machine à coudre. Elles sont arrivées dans un sac de la même marque. Donc je recommande vivement cet article et cette marque si vous avez une Singer Harmonie 100.
Les canettes en plastiques compatibles peuvent s’acheter sur Amazon ici https://amzn.to/36u9goI (Lien Amazon à Copiez/collez dans votre navigateur) à un prix ridicule.Conclusion.
Pas forcément adapté à toutes les machines Singer, mais il est simple d’en modifier le diamètre.
Comme il y en a 2 dans le sac, vous pouvez faire vos essais sans risque.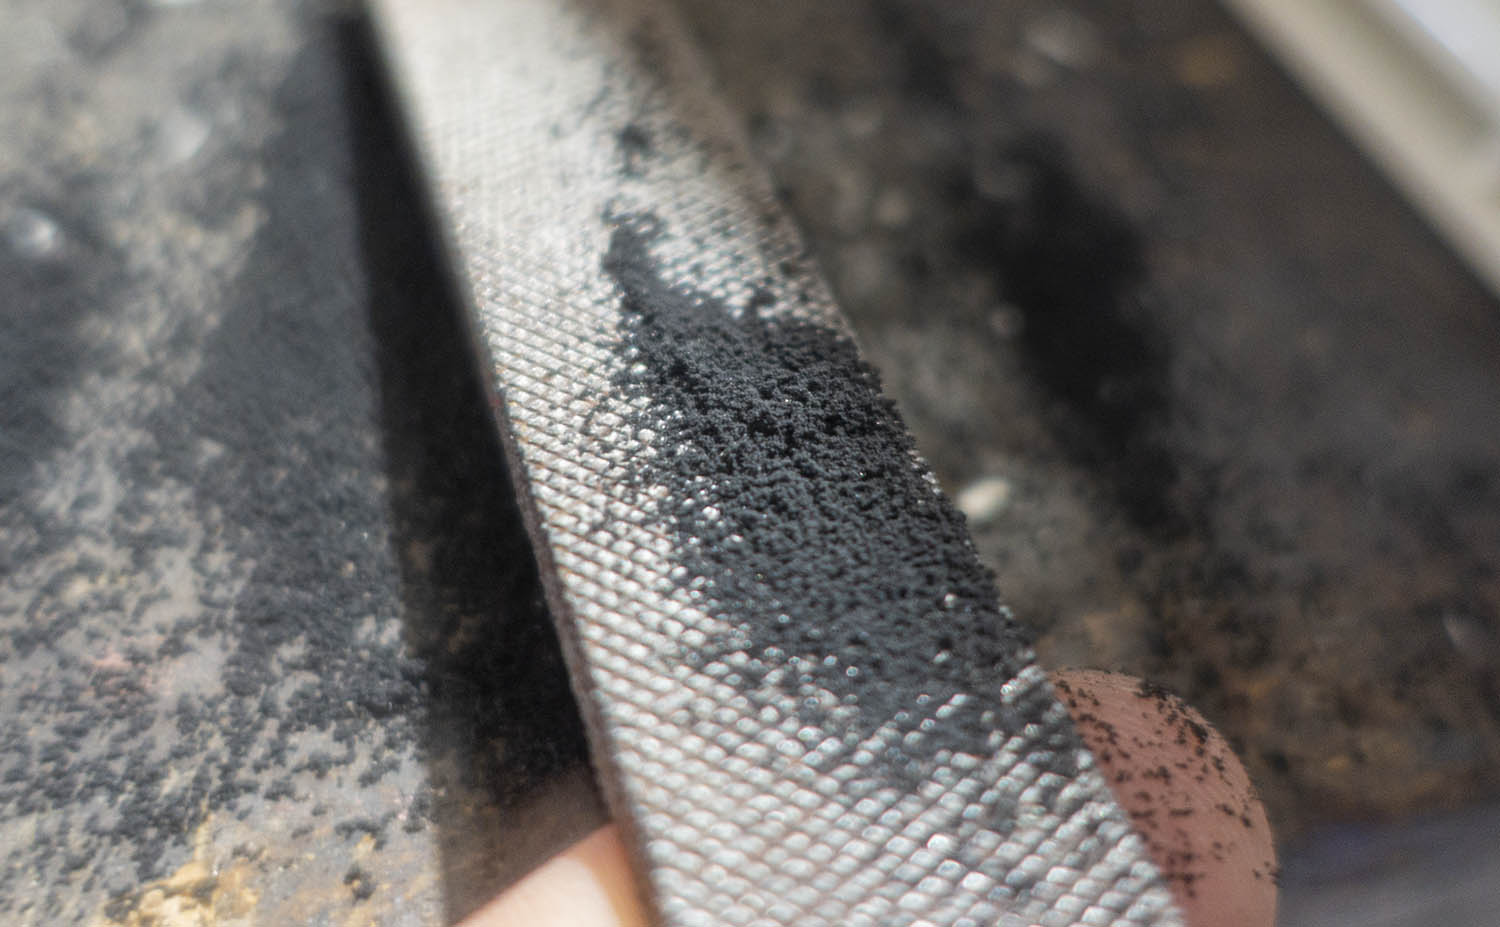

Pour le prix, c’est vraiment parfait.Spatule bois pour la cuisine
Il y a des choses qui sont importantes pour cuisiner et une spatule silicone en fait partie.


Cela permet de racler correctement les plats pour faciliter le nettoyage et éviter la perte. Cela permet d’étaler correctement une couche de sauce tomate sur une Pizza…
Il faut donc qu’elle soit souple et ne craigne pas la chaleur dans la casserole.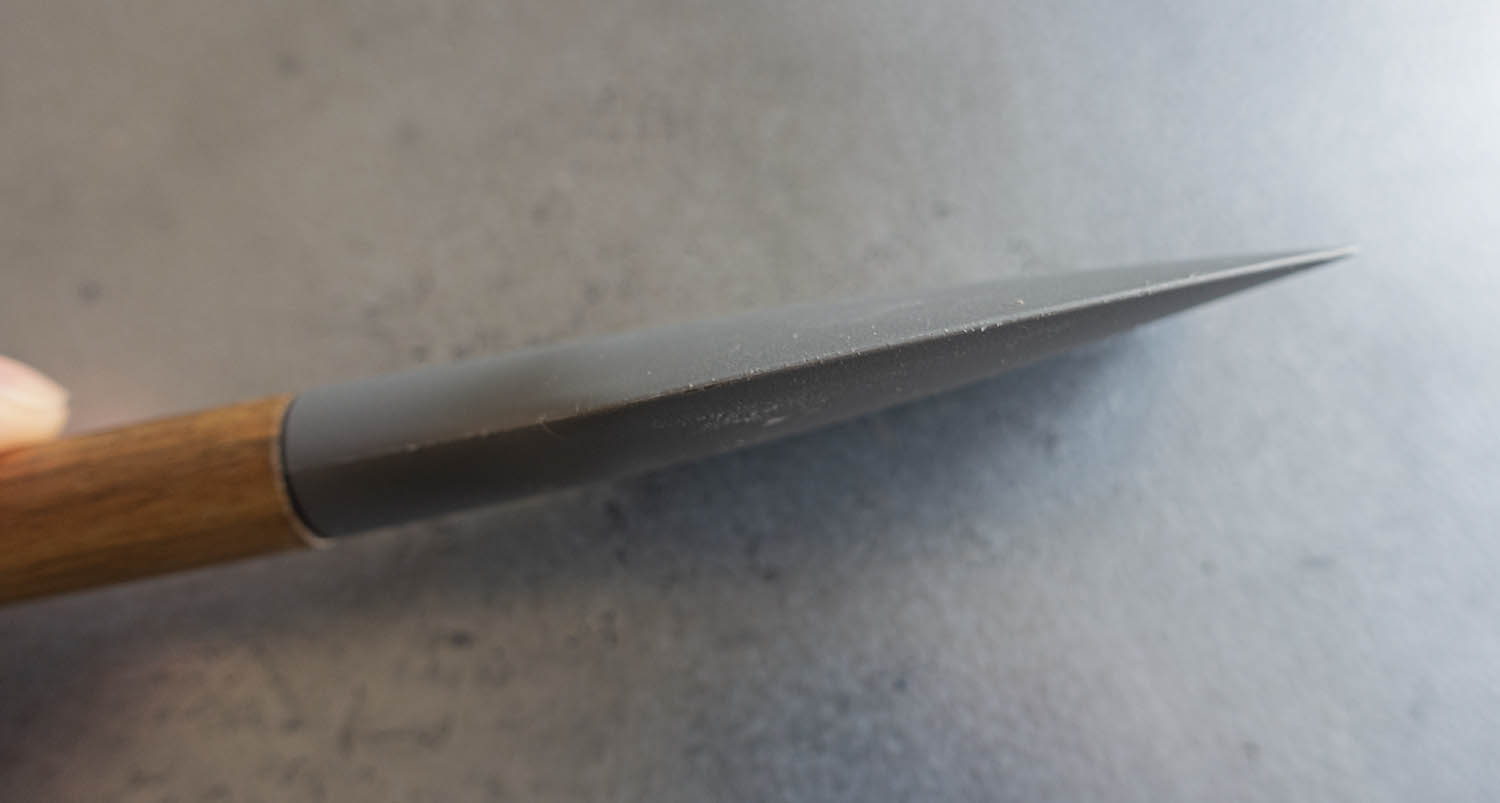

Et bien, finalement, après avoir acheté un équivalent pas cher chez une enseigne de cuisine qui a littéralement fondu au contact d’une casserole; c’est encore Amazon qui m’a bien aidé avec ce produit.
En plus, c’est un manche en bois qui reste joli dans la cuisine.
Du coup, je vais acheter d’autres produits de cette marque les yeux fermés comme leur spatule pour cuire et retourner les aliments que vous pouvez acheter sur Amazon en suivant ce lien https://amzn.to/3r048SE (Lien Amazon à Copiez/collez dans votre navigateur). Ils propose aussi une mini passoire et spatule toute plate.

La taille de cette spatule lui permet de rentrer entièrement dans un pot de sauce pour en récupérer le maximum.

Le manche est en bois vernis ce qui va lui permettre de rester propre et facilement lavable aussi.

Le motif du bois est unique, ça change du plastique.
La tranche est super fine et précise.
Avantages:
Elle est souple pour vraiment tout récupérer et peut rester sans souci sur le gaz (dans la préparation en train de chauffer).
Elle est facile à nettoyer, même après avoir étalé de la sauce tomate, il n’y a pas de décoloration.
Elle résiste aux fortes températures.
Elle est quand même plus écolo que celle 100% plastique.

Inconvenient:
Aucun. Je l’utilise depuis 2 mois.Robinet d’arrêt 3 voies – F 3/8′ – M 3/8′
J’ai acheté ce robinet d’arret 3 voies en remplacement d’un autre modèle qui a littéralement explosé lors du serrage…
Ce modèle est d’une pièce unique et non un assemblage donc moins sujet à la destruction si vous serrez un peu.
Bricoler sous la cuvette des toilettes n’étant pas toujours très facile; c’est un plus certain.
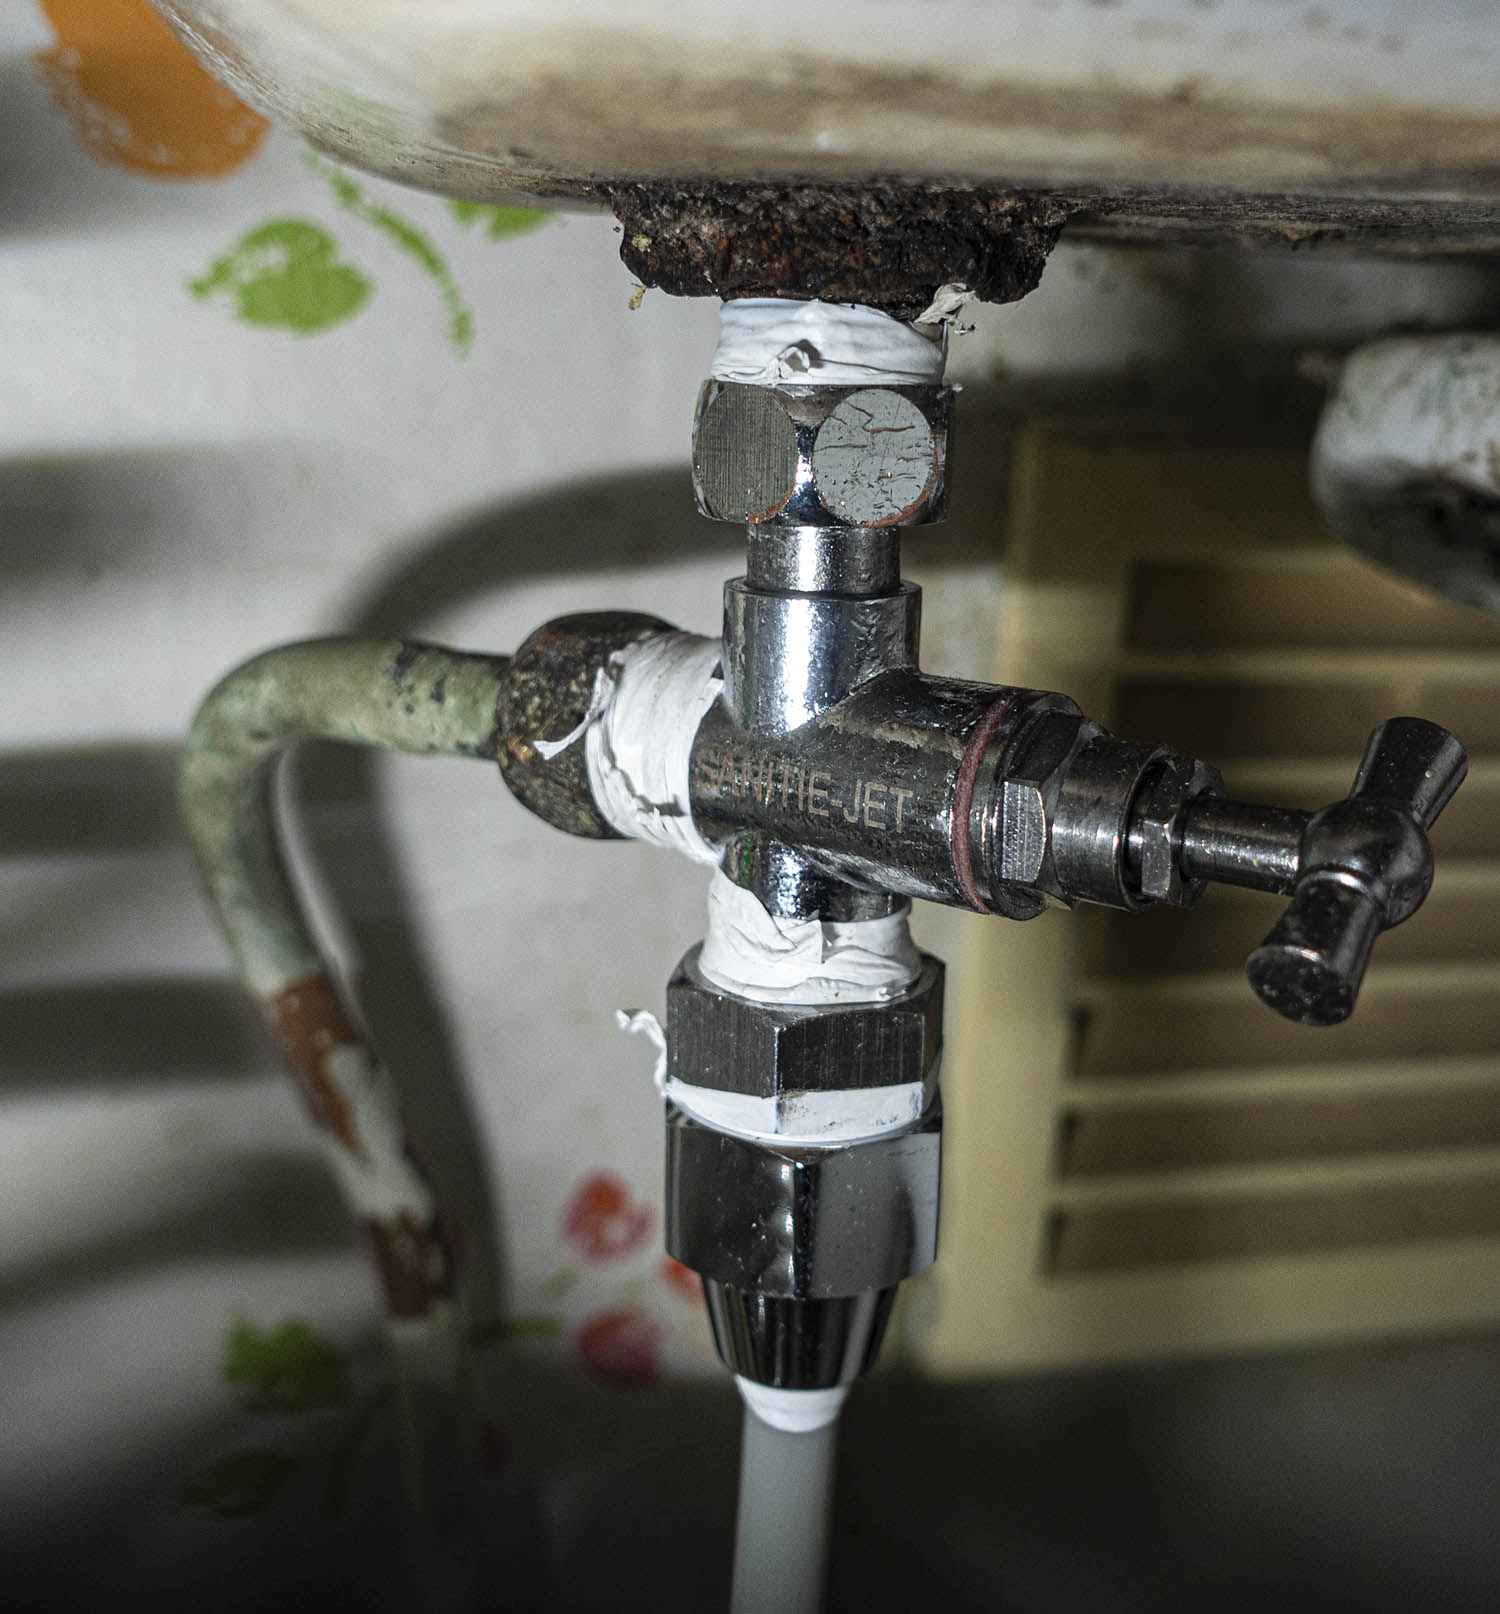

J’ai branché dessus cette super douchette https://amzn.to/3huQUdt (Copiez/collez dans votre navigateur), Cela fonctionne parfaitement.
Le robinet coupe en même temps l’arrivée d’eau pour la cuvette et la douchette.
Il n’y a pas de fuites.
Comme il reste à 90 degrés, il n’y a rien à modifier dans la tuyauterie. Le trou supplémentaire sert à brancher la douchette. Il se retrouve devant ce qui est parfait.
Je conseille 10 tours de PTFE avant assemblage, bien sûr.
J’avais déjà pré-assemblé au calme sur un étau la douchette pour ne pas passer trop de temps cassé en deux à 4 pattes.Oui, je rachèterai le même si besoin est.
100% efficace et moins cher sur Amazon que dans les magasins de bricolage qui ont exactement le même!
il ressemble au modèle de chez NOYON & THIEBAULT, donc je pense que Sanitie-Jet le distribue simplement sous sont nom.Douchette de bidet
Douchette à main installée en 30 secondes!
Le jet est doux avec un effet douche. Il y a plein de mini trous en cercle ce qui évite un jet trop intense.
Franchement confortable à utiliser.
En plus, la gâchette est progressive donc vous pouvez choisir un peu le niveau de puissance.J’ai pris la version 1m50 (59″) ce qui est vraiment bien.
Le tuyau étant torsadé, cela correspond plus à 70 cm utile sans tirer comme un fou. Il ne repose pas par terre au repos. Avec une longue torsade, cela diminue aussi la pression ce qui est plutôt un avantage.
Le connecteur est de type 1/2. Attention, les robinets”toilettes” sont souvent en 12×17 donc il faut un adaptateur (ou le bon robinet)
Il n’y a pas de fuite.J’ai remplacé mon robinet simple par celui-ci qui a une sortie supplémentaire: https://amzn.to/36qyO63 (Copiez/collez dans votre navigateur) ,
Cela fonctionne parfaitement. Le robinet coupe ensemble la cuvette et la douchette. Comme il reste a 90 degrés, il n’y a rien a modifier dans la tuyauterie. Le trou supplémentaire sert à brancher la douchette.Il y a deux bémols:
-le support de douchette à placer sur la cuvette est un peu trop large et cela “pend” un peu chez moi. (Voir photo)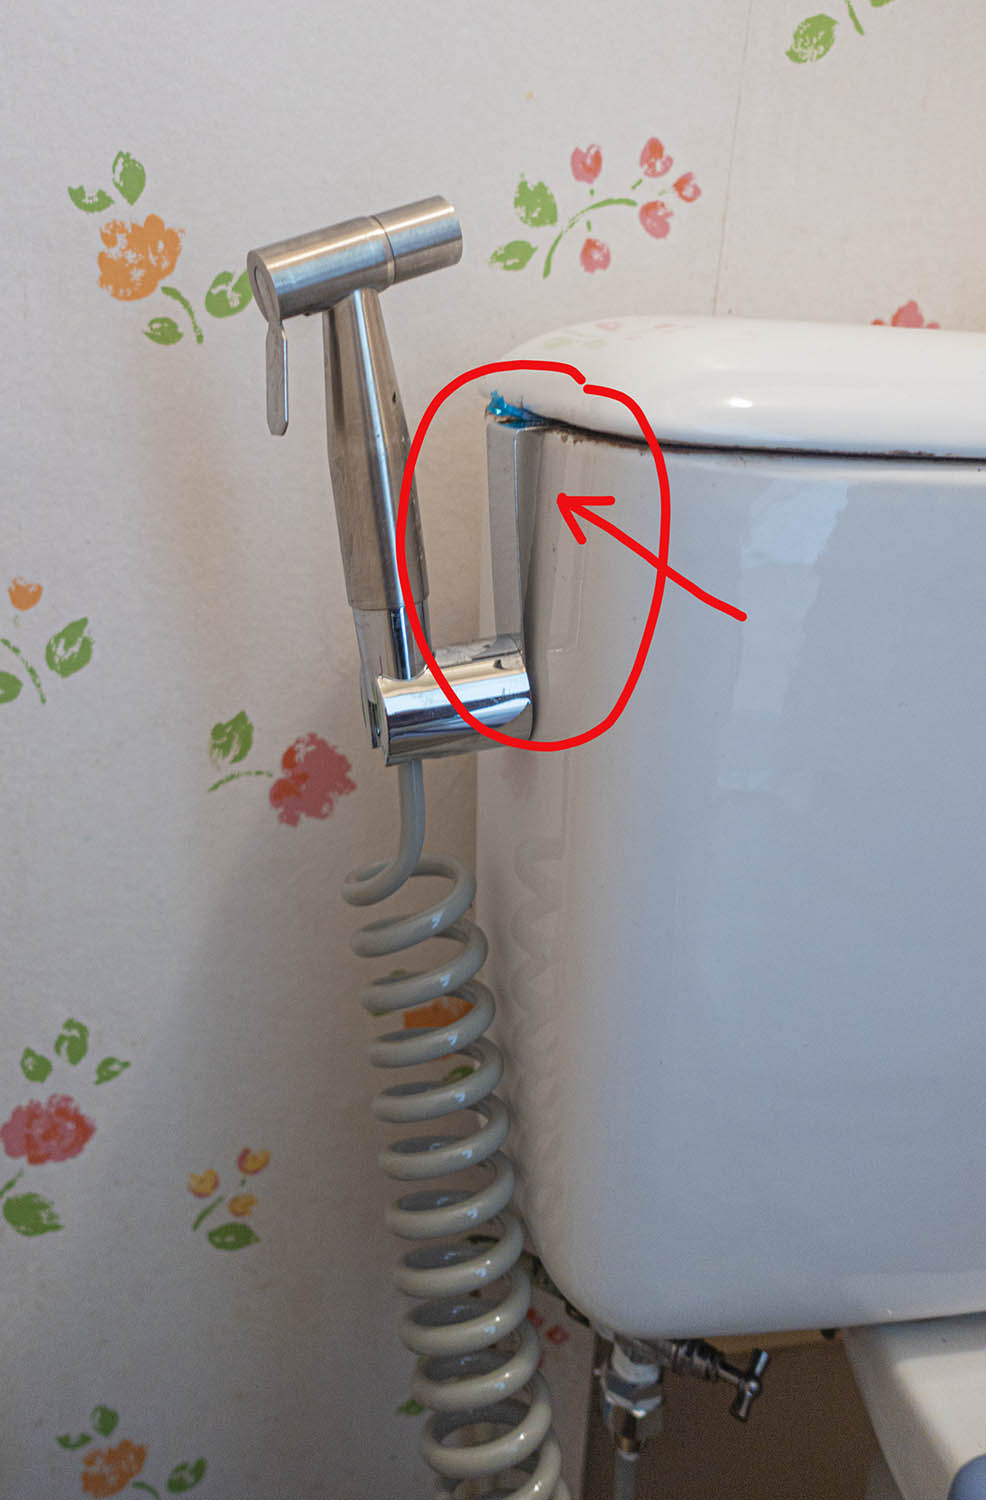

-Beaucoup plus discutable est le fait que le support est trop étroit pour tenir la douchette correctement. Là, je ne comprends pas. Comme si ces deux pièces n’étaient pas faites pour aller ensemble. Après plusieurs mois d’utilisation, ça n’est pas si grave. Je vais refaire mes toilettes de toute façon et créer un mini support en alu plus tard.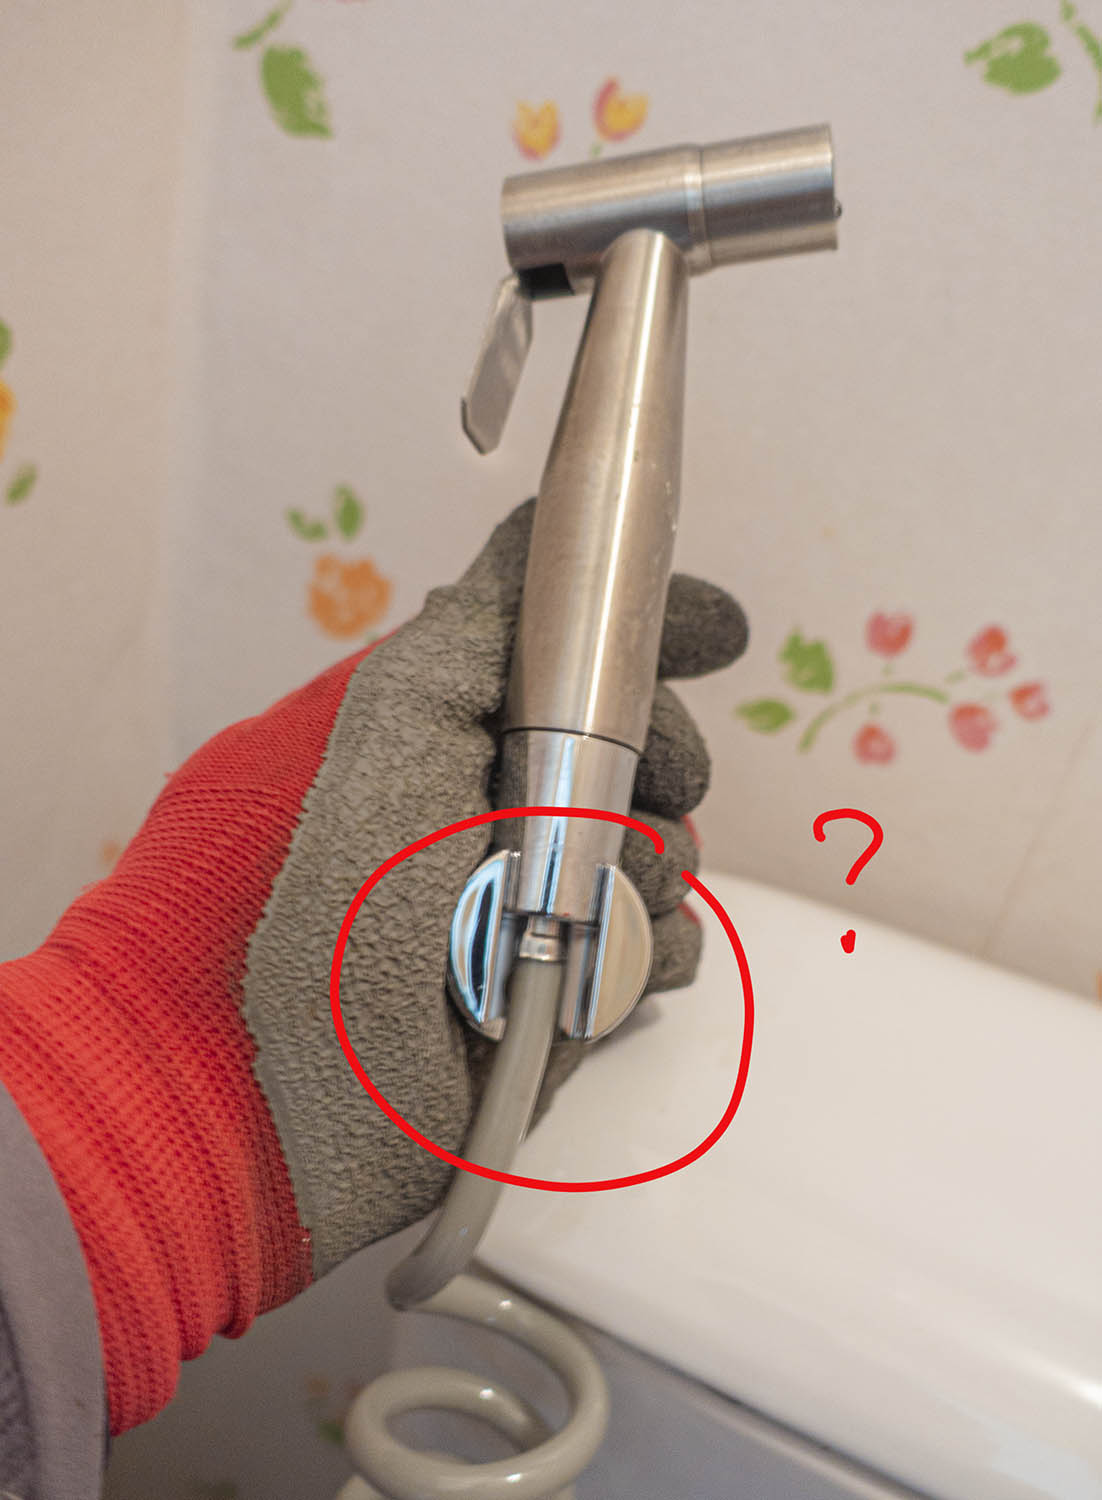

SOMATHERM, Robinet d’arrêt 3 voies
Comme beaucoup d’autres clients mécontents, mon robinet Somatherm à finit a la poubelle.
Peut être que j’ai serré un poil trop fort, mais bon; à 4 pattes sous la cuvette avec 5 cm d’accès, ça n’est pas toujours facile à doser non plus.
J’avais pourtant presque tout préparé à coté (monté le douchette et les joints PTFE sur mon établi 0 avant de commencer le spectacle de contorsion. C’est dommage.
Je voulais l’utiliser pour brancher une douchette et avait besoin d’une sortie supplémentaire. Ce robinet 3 voies était donc parfait. Comme il reste à 90 dégrées, il n’y a rien a modifier dans la tuyauterie. Le trou supplémentaire sert a brancher la douchette.
Pour bien comprendre le fonctionnement; Le robinet a une entrée et 2 sorties. Donc quand vous fermez celui-ci, il coupe complètement les deux sorties en même temps.
Au final, j’ai recommandé un autre model sur Amazon qui était, en plus, moins cher ici: https://amzn.to/2UBJsnZ (Copiez/collez dans votre navigateur) et ne peut être plus content du résultat.Les liens de comparaisons qui vont bien
En tant que Partenaire Amazon, je réalise un bénéfice sur les achats remplissant les conditions requises.
Pommeau de douche
Au choix, 29 euro en soit-disant promotion sur le site marchand au Canada.
Transformez votre douche en un véritable spa avec Cascade ! 🚿 Inspirée des Centres de Thalasso, la centrifugeuse interne multiplie la puissance par 4 procurant un profond massage. 💆♀️ Les 300 MicroJets® filtrent l’eau et mettent fin aux irritations dues au calcaire.
La grosse blague. Comme si le calcaire ne passait pas par les trous!
C’est juste un produit à 12 Euros avec un autre nom que vous pouvez trouver sur Amazon ici
Toutes les photos sont identiques, les commentaires et descriptions sont tous bidonnés, à la limite du ridicule.
“Cascade, société française au capital de 1000 Euros.”
Il faut quand même oser!Donc économisez directement en choisissant le produit original proposé ici.
Pommeau douche à voir ici
Jul 11 2020 ![Canon R5 Overheating issue [FIXED] SLFA-R5](https://www.visionrouge.net/wp-content/uploads/2020/07/Canon-R5-Overheating-issue-FIXED-SLFA-R5.jpg)
![Canon R5 Overheating issue [FIXED] SLFA-R5](data:image/svg+xml,%3Csvg%20xmlns=%22http://www.w3.org/2000/svg%22%20viewBox=%220%200%20800%20309%22%3E%3C/svg%3E)
Canon R5 Overheating issue [FIXED] : SLFA-R5
[FIXED] Canon R5 Overheating issue : SLFA-R5
The Canon EOS R5 and R6 have just been announced and many video bloggers noticed a quite stunning limitation on the recording capabilities when reading Canon announcement.
Even in a 4K 30p, at a low room temperature of 23 degree Celsius; the camera should overheat and shut down.
The Canon R5 was supposed to be a perfect balance camera able to serve cameramen and photographers with a limited investment in one unique body.
But this overheating issue raise a large concern among the videographers audience to check if this will be the camera they actually be able to use for a paid job where they can’t control the pace.Which recording modes are impacted by overheating on the R5?
According to Youtubers who never touch the camera; it seems that not only 8K, but all recording modes except pixel binning have overheating issue.
It’s even worst for 4K mode than 8K as digital compression is kicking in.
The camera will shut down for about 20mn after 20mn of non-stop recording.
It’s getting stronger after this as the next forced stop is coming only 10mn later.
It’s not clear for now if adding an external recorder will remove or ease this limitation.What can you do about the Canon R5 overheating issue?
The first obvious way to remove this overheating bricked issue is to not shoot any video: period!
It’s simple to avoid pressing it by mistake as there is a dedicated recording button.
You can add some masking tape on top of the red dot push button to make sure you will never hit it. This way, the camera will never overheat.
The downside could be quite annoying as no filming can be done either. That’s quite a choice to make.


The picture mode will just keep working fine.You can also ask your clients to plan their interview on refrigerated room and get few extra recording minutes.
Here come the cooling fix: The SLF-R5
Any video camera these days come with an active cooling to solve this issue.
It’s quite obvious that a fan will be needed at one point to push the air inside the camera. On this particular case; the answer came as a extra slice of cooling device to be added to the camera body.
The device will not remove water sealing capability. All other video cameras do have such fan and do not accept to be used under the rain.On the contrary; the SLF-RA Canon R5 cooling unit use waterproof fan and the electronics is not in the possible path of water.
The device include 2 rubbers part to keep the original part of the camera from getting wet. As a classic sandwich bread; it is to be installed in-between the camera screen and the sensor.For copyright reasons; we can only put a picture of the box for now.
![Canon R5 Overheating box [FIXED] SLFA-R5](https://www.visionrouge.net/wp-content/uploads/2020/07/Canon-R5-Overheating-box-FIXED-SLFA-R5.jpg "Canon R5 Overheating box [FIXED] SLFA-R5")
![Canon R5 Overheating box [FIXED] SLFA-R5](data:image/svg+xml,%3Csvg%20xmlns=%22http://www.w3.org/2000/svg%22%20viewBox=%220%200%20800%20478%22%3E%3C/svg%3E "Canon R5 Overheating box [FIXED] SLFA-R5")
What is the cooling slice device?
To cool down the electronics, an extra layer need to be inserted inside the camera to support forced air path. The air intake is under the camera to hold it without blocking the vent.
The fresh will circulate in a S shaped path to follow all the processing unit and is sent back to the bottom to extract the extra heat.
Most of existing cage will be compatible with the add-on.
Please be aware that the extracted air may be extremely hot. Such high temperatures can start melting the paint of your rig. If you are planing for a long hand-held shot; we advice to wear gloves similar as the one you use for removing baking tray in your oven.
This SLFA-R5 cooling path is directly powered by the camera itself but do not impact so much on battery life. The overall consumption is only few extra watt.
The unit have a temperature sensor and will be activated only if the temperature approaching the shutdown limit. The standby current is almost negligible.
One downside is the extra space this slice will bring to the camera body. The Canon R5 is already 1 cm thicker than a Sony Alpha R7. The device will had an extra 5mm to that. It may be hard for photographer with small hands to keep getting a grip to the camera with the cooling module in place. Please make sure you can firmly still hold the camera in a secure way. If you are suffering from arachnodactyly; the new SLF-RA device is designed for you.Here is the how your Canon R5 body will look like with and without the SLF-R5 cooling device.
How to clean from dust the SLFA-R5?
As any device with fan, and depending on the shooting environment, dust may come inside the cooling path reducing it’s effectiveness.
It’s recommended to clean it time to time, especially after using your camera on polluted area.
The operation is quite simple and consist on using only water without any cleaning product. The fan are waterproof and can even run under water at reduced speed.
As the camera is water-sealed, you can directly put the camera under a simple warm running water. It’s better to do it with the camera turned on and with a water around 40 degrees Celsius, so the fan will be activated.
This way, its will ensure the entire cooling system is clean.
![Canon R5 Overheating issue [FIXED] water](https://www.visionrouge.net/wp-content/uploads/2020/07/Canon-R5-Overheating-issue-FIXED-water.jpg "Canon R5 Overheating issue [FIXED] tap water")
![Canon R5 Overheating issue [FIXED] water](data:image/svg+xml,%3Csvg%20xmlns=%22http://www.w3.org/2000/svg%22%20viewBox=%220%200%20800%20436%22%3E%3C/svg%3E "Canon R5 Overheating issue [FIXED] tap water")
According to our sources; a new upgraded version is in test in a undisclosed location. It take a regular water hose input and output to get continuous water cooling for conference and convention coverage.
Another hose will get the hot water out and can be connected to existing piping. If you are into green renewable energy; you may want to use this high temperature water for SPA, steaming bath, coffee maker,…Does the fan bring any noise or shake?
The SLFA-R5 is designed to keep the noise impact super low. It’s composed of 2 small fans that spin at different speeds and direction.
This way, the noise generated by one fan is canceled by the second one.
As the air intake are located under the camera body, it will not generate any audible noise.If you are planning on shooting in phone/portrait mode, the noise may get higher, but video camera are not designed for people that can’t flip a screen with their hands anyways.
The vibrations issue are solved in the same way. One amazing feature this cooling device brings is an extra stabilization steps.
As the 2 fans are rotating at high speed,; they are acting as a gyroscope. Any small movement will be automatically corrected in-body.
This feature alone can be the best selling point.

How to install the Canon R5 cooling slice?
The best and preferred way is to use any dedicated and approved maintenance center. The operation will take about 20mn to install the extra slice to your Canon R5. You can also ship your Canon camera to any of the authorized centers.
Another way is to order the SLFA-R5 device and install it yourself. The unit come with a clear description how to mount it. The overall process do not required specific precaution.
It consists of removing the back of the camera, insert the cooling slice and put it all back together.
This operation will necessitate the removal of about 352 tiny screws, all with different sizes. You will need to replace with longer one provided withing the package.As you may understand, this manual operation will remove the Canon warranty.
We strongly recommend you to come to the approved maintenance center and let professional doing the fix for you. That the same kind of professionals that mess it up at the first place, so you can trust them.What is the cost and availability?
The SLFA-R5 is already available and come at a low USD 499 price per unit. It will enable you to shoot 4K/8K without any time limitation due to overheating.
You can order it today or contact any authorized centers to get it installed during opening hours.This is not a camera software hack and the 30mn recording limit per clip is still active.
The SLFA-R5 model is also compatible with the R6 version of Canon DSLR as well as the upcoming R8 and R9 models.What SLFA-R5 stands for?
The SLFA-R5 is the first of a long list of cooling device to come. With global warming getting worst; the list of place below 23 degree Celsius temperature is reducing everyday.
The name came after a Google search to make sure it will not compete with another existing product.SLice FAn for Canon EOS R5 is the first idea that came to the designer mind. It took about a year and half to get with the exact name.
“As a slice of salad in an burger; this extra layer to your camera body will bring you freshness for years to come.”What else?
Please keep a link to this article if you re-post it.
This is obviously a satirist post and do not represent any product (for now).
This is what happens when a camera brand is focusing on specs and do not think that people will actually shoot any video for real with it.
Canon or Sony name are copyrighted.If you actually wants to shoot without this limitation, I found the real way by changing the time and dropping the battery. You can read the real R5 time hack here.
VisionRouge is a video production company based in Hong Kong and China, specialized in corporate communication and time-lapse system design.
Feel free to connect with us if this dedicated SEO boosting post interested you!Jul 09 2020 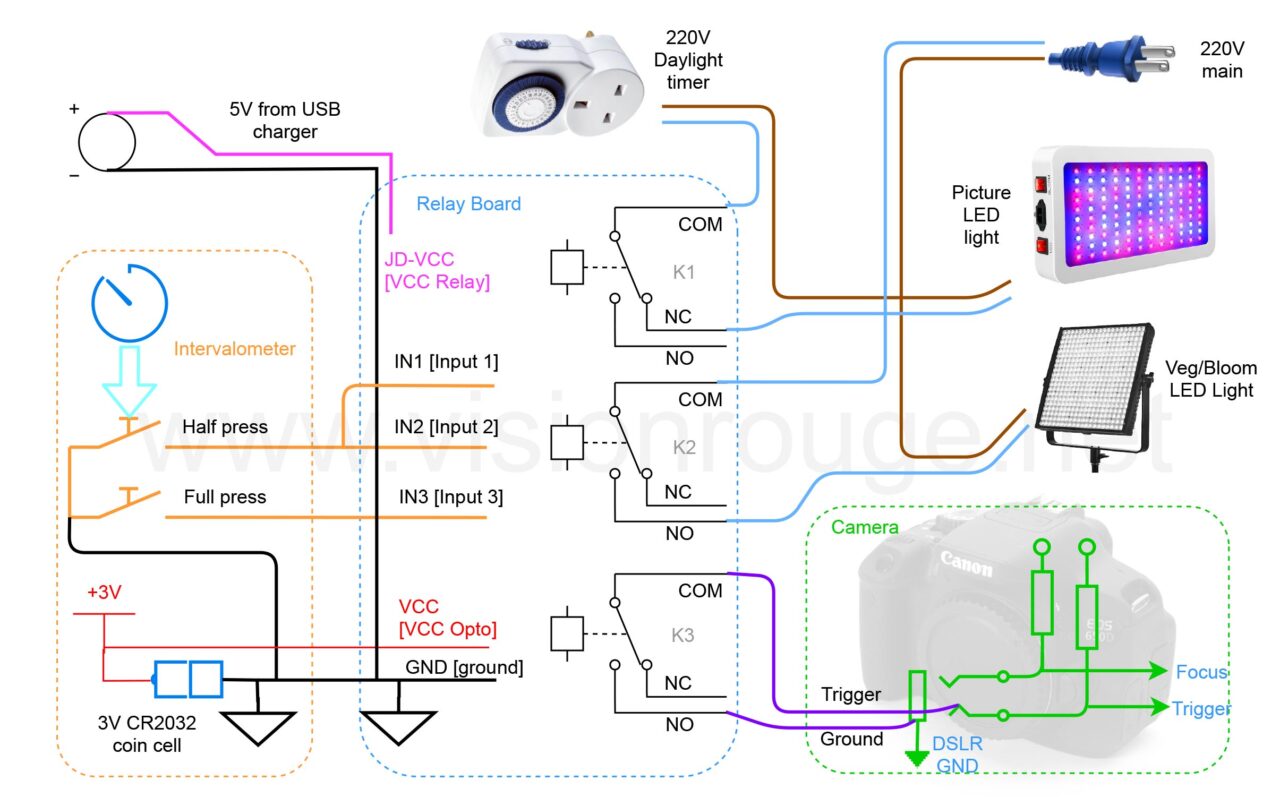

[DIY] Built a grow/bloom plant time-lapse photo studio
[DIY]Create your studio to film grow and bloom plant time-lapse video
How a simple and cheap shutter remote controller for your photo camera can pilot a full studio lighting with few external component?
How can we achieve a day/night sequence as well as getting a nice growing + blooming plant time-lapse?
What kind of lighting we need for the growing part and the picture part?
There are many ways to achieve a plant growing studio, but I wanted to get one as simple as possible to reach a larger and cheaper result. I did not find so much online, so decided to write about this simple DIY time-lapse system.
This DIY plant time-lapse setup is based on a very simple intervalometer hack that you need to read first. Clearly, a simple Arduino or raspberry Pi would have done great, but many don’t even know how to program it.
The veg/bloom lighting I have choose is described here with the mod you may want to do.Plant time-lapse growing photography principle.
To do such photography, you will need a completely dark room and a growing lights.
At desired interval, a camera shutter should be fired but the lighting will have switched to something with a much better color rendering than the growing light.
The room should be dark so only you can decide to get the exact right lighting, for the growing, blooming and picture time.
With only one kind of light source, the flower will also direct its grow to it.
I’m will describe first the kind of lighting you may need.Later, the way to connect to your camera and finally some tips on the camera and lens you may want to get.Growing vs blooming light color
All plants, almost, goes from different phases.
The growing part is usually done within colder environment and a need for more blue color.
Blooming is happening faster in a warmer temperature with a red oriented light spectrum.On top of this, you will need to have nights simulation for your plant to grow the right way.
Depending on your project; you may want to get the ability to choose one from the other.
For example: the growing part is tricky as the plant will move in many directions, while focusing on the blooming only seems easier.On a creative perspective; blooming is usually more impressive than growing, so you want to check if you actually need a real “growing” lighting system or more a blooming light.
You may want to ask your local flower shop to get the bulb before they open; carry them in a low temperature bag until your setup is ready to shot. You will turn on warm yellow light for this phase (and even a bit of warm water to them too). The plant may open in the following hours!It’s also interesting to notice than blooming can happen in few hours and may don’t need the dark night time. So I have separate this remote part as well.
As a single LED can only produce one specific spectrum, you need many kind to cover it. Some LED called “COB” actually have many small LED together to create a full range of frequency. In my simple setup,
I have opted for a array of light.

Here, you have some infrared and ultraviolet led that do not produce visible light for the camera to catch it. But your flower will.#Blue color for grow
During the growing time; the plant need a bit more blue. Don’t over do it either, but a 20% to 25% is the most commonly accepted. This is what most of specialized shop will sell you. To your eyes, it will look a bit purple/blue lighting. It’s called plant growing light.
#Red (+BLUE) color for bloom
When you feel you need to speed up the flower opening; more red need to be added. It do not mean that blue should be removed, but you have to think about a mid June sunny day compare to a cold February. These light have a red/yellow color when turned on. Actually, the white LED contain enough blue. It’s usually called full spectrum light.
This is an example of full spectrum light I will be using that have the full spectrum + a bit extra yellow.


This particular one can be order online on this shop, but others will work too. I love the fact that it’s lightweight and easy to disassemble.#High CRI white for picture
During the picture time; you need to get the maximum flat light response for the camera sensor. A high CRI rated LED light is necessary. It’s quite unlikely your growing light will have such (and of course, neither your growing led). CRI stands for Color rendering Index. 95 is considered as good.
For this project, I choose a light I have been using quite a lot on many shooting for it’s compactness and power. It’s a ring composed of 300 LED that can be dimmed. It accept a large input voltage from 10V to 18. I will add the milky diffusing filter to it. It’s a magnet that is holding both together. As the flower will be quite close to the lighting, you need something quite soft.
The ring shape color will also avoid any unwanted shadows as the idea is to do a shot from the top of the flower bulb.
You can order this light fixture here if you like this one.

VEG/Bloom Switching mode lighting fixture
Some lighting have even both mode and you can switch one to another depending of your flower age.
Usually, each part need different led to cover the light spectrum. It’s specific to LEDs as they are very precise on dispensing a specific color. There is no for example a real “white LED”; it’s always a Green+Blue+Red chip enclosed together. The power of each channel is controlled to give a specific spectra only.
If you are focusing on the flower blooming, it may not be recommended to go for the growing lamp you can easily find online but focusing on something which have more red/yellow/white LED than blue.
The LED I have automatically switch from one mode to the other if there is a 2 seconds loss of power. This is absolutely not what I need, so I have rerouted the power to get it working only in the maximum power mode: Blooming mode. You will need to open the light fixture, please unplug from power to do so. And here is my new set of precision screwdrivers that you surely will love!


LED or High intensity discharge (HID) or fluorescent
The answer is super simple: LED all the way.
On this time-lapse studio setup; you will have to switch lighting at each picture, so it’s absolutely necessary to use a light that accept to be turned on and off without damage. LED are perfect for this. It also need a fast response time to be able to switch as fast as possible from one or the other. HID light will need few minute to reach full spectrum as well as fluorescent tubes.Blooming / growing light max power.
As all your lighting will be controlled with the relay board, you need to respect the maximum power they can control.
Be aware that you may read 2 different power on your growing plant light fixture. Some brand are displaying the power equivalent to boost their number. The actual electric power consumption is lower and you need to care about such only.
I will think that a growing light of 200 Watts is way enough per flower bulb! I have 2 x 45 W in my setup for a unique bulb.
The Rule is quite simple: P = U x I.
Power in Watts = Voltage x Intensity.
So if the relay display 250V, 2 A; it means it can commute 500W of power, purely resistive load.


As you are running a time-lapse plant growing studio; it’s quite unlikely you will need a lot of power anyways. One single flower do not request 1,000 W of light!
I will also choose a lighting fixture WITHOUT internal fan to be able to turn it off and on without a “loading” effect. The power supply with LED should already make your load not fully resistive, so, no need to play more with this.
I always try to get a 20% factor as safety. If my relay is said to control 1,000W; I will not be using it for more than 800W.Disclaimer.
This DIY home studio will include many different current and electric power. The 220V or (110V in the U.S.) can kill you, so it’s important to have still a bit of electric knowledge before putting all together. At the same time, plant needs water. Please build your studio according to safety requirement to avoid any potential problem.
Don’t rush anything, built it step by step.
All camera will have their power supply and may be connected with the same shutter cable. It’s important to respect the right wiring to avoid potential ground loop. On my power supply, there is no ground, but some may have..What do you need to create your plant grow photo studio?
Here is the list of element you will need:
-> Shutter release camera controller + Relay board, based on the hack described in this post.
-> 24 h timer plug to simulate night/day if needed.
-> Camera + lens + large 256 gb memory card + power supply (you can run on it battery, but a real plugged power supply adapter will let you run it forever. On this project, I did not use Sony or Panasonic trigger remote, so only Canon or Nikon camera can be used.
-> White LED lighting for picture time. (I’m using a LED ring around my lens for perfect light without shadows), you can find them here, but others will work too.
-> Growing / blooming light fixture depending on your desired plant blooming video. I prefer 2 stripe on each side of the pot, so the flower keep growing in the middle of these. You can find a similar led growing panel available online.
-> black/white cloth to cover the wall of your studio and get a final time picture standing out.
-> a bit of your time!


As you can see; there is nothing hard to find or which need any software. The camera shutter remote will be the brain of the setup. It have already a screen + input buttons; so my hack is only a way to distribute the output to different power.Build your growing plant DIY studio
The way it will work is quite simple.
Let’s explain step by step.
Here is a basic time-lapse setup: one camera + one intervalometer.


Now, we can have the same setup, but all will run on external power supply.
This is to run it forever.


In this new setup, we are adding the relay box that can also control the lighting.
At regular interval sequenced with the trigger remote; the full lighting will switch from Veg/bloom mode to picture mode; a picture is taken few second later.
The remote activate 2 relays:
– one for the camera shutter release to take the picture
– one for the lighting swap between grow/bloom and studio picture.
I have assume your shutter duration will be quite short. If you need longer exposure, you will have to change the duration of shutter press from the remote screen.


The last and complete setup include an extra input the get the night/day sequence.
During simulated night time; only the picture mode light is activated (or not…).


The shutter remote (intervalometer) should be programmed with a bulb mode of few seconds, so the relay for the lighting commute first, and the camera shutter is activate next. Other sequence are possible, of course. Depending on your time-lapse plan, you can think of a picture every 5mn for fast blooming and one every 20mn for the growing part.


The full electric schematic is here.
The input 1 and 2 of the relay box have been linked together to get 2 relays working in parallel. This will allow a day/night illumination, but still taking picture during this time with the White LED system.
The third relay is connected to the camera trigger system.


Which camera / lens should I go for my time-lapse studio?
There is no need for a very professional camera body as the most important part is the sensor more than the body itself. You will be putting the camera indoor on a fixed tripod, so IBIS or water sealing is not a necessity. Also, you will have a video at the end, quite likely to be compressed for social media export. So each picture just need to get enough pixel and dynamic range.
It needs to be compatible with the remote system, so most likely Canon or Nikon.
I also do not recommend a full frame camera as you may want to get a large depth of Field to get most of the flower blooming in focus. With a crop sensor as APS-C; it offers you already better option.
My go to is a Canon 800D (The Canon 850D is now available too) It’s a perfect camera for such time-lapse using the RAW file as output. The JPG pictures directly out of the camera body are not so good.
On the lens side, You need to get a manual focus NOT driven by wire to be able to lock it down). I love the Tokina range as they have a mechanical hard stop o the focus ring. For this project; I’m using the sigma 35mm ART. It will gives an equivalent of a 55mm Full frame so the flower is not distorded.

The lens is equipped with a printed focus ring to be able to adjust it precisely and lock it down eventually.
I will use an aperture around F8 to get the full flower in focus and the best sharpness from the lens.
I put a huge 512gb SD memory card, so I don’t need to remove it from the camera the entire duration of the blooming. This will avoid any shacking. This card is quite cheap as you don’t need a super fast model.Possible add on to your plant blooming time-lapse studio
Obviously, as we have now a powerful relay to control one camera; it’s easier to remote many camera shutter altogether! So you can easily have multiple cameras focusing on many different framing or bulb working in parallel to maximize the time-lapse video impact. Make sure you connect all he ground the same way and you can easily have 10 shutter released at the same time!
I will suggest to get same camera brand if you connect directly the shutter plug together.
The second thing to add maybe some battery backup, especially on the main controller side. If power drop for one second, the intervalometer lose its sequence and your time-lapse video is over.
It can be done simply by adding a battery in parallel with the power supply + a diode to avoid charging it. In case of power loss, the battery is taking over for the few minute the power is missing.If you liked this post, feel free to click on the Google advertising banner. It’s 2 seconds of your time yo support such posts.
Jun 30 2020 

Hack camera intervalometer adding 2 relay outputs
Output Two relays from camera intervalometer with a simple hack
There is many occasion where you need a simple timer; something easy to program (and re-program) with clear view of the sequence running.
My idea is to use an existing camera intervalometer (Shutter release control) and connect it to a relay board with a simple hack. This way, we can cascade many actions with sequence easy to program and a nice screen to help you. As the remote already have few integrated timer; you don’t need to reinvent the wheel and focus on the other part of your project.
The beauty of it is the low price and the fact that many existing shutter release technology exist already. As soon as you will understand the way it works, you can start experimenting with wireless flash repeater as well to cascade many action without wires.What this camera intervalometer hack is about?
The idea is to use a old tech shutter signal from the photographic world and simply adapt it to a array of relays.
Most of modern camera can take remotely a picture using a 2 signal, 3 wire remote. It use to be a simple wire pushing down the real shutter, but all is done electronically since DSLR took over.
One signal is use to emulate a half press on the shutter and the second one is a full press.

You can assign on your camera what you like to do with the half press state; but the default mode is to focus.
If you are happy with the half press focus area, you press fully the shutter and a photo is taken.
As a photographer, I usually do not work this way and assign the focus to another button. It allows me to “lock the focus” and do as many pictures without losing it. So, I never really use the “half press” function. But that’s another story.Trigger remote technology
It’s always hard to get into these steps, but I feel important to describe what is happening inside the intervalometer.
This principle is working for Canon and Nikon as far as I know and not for Sony or Panasonic. The reason is the way the trigger order is understood by the camera body itself.
On Nikon and Canon, it’s very simple. It’s a open circuit that we are closing. There are 2 circuits actually. One to control the half press button and one to control the full press.
So it’s a 3 wires and 2 switches.
At the predefined time, the intervalometer will press one after the other these 2 switches. For this DIY time-lapse studio; we only need the “take a picture” function. The first focus switch output will be there to handle the light swap. The second output will be used to take a picture directly, assuming you are using manual focusThere is no power distributed FROM the intervalometer to the camera. It’s only a switch and the camera feel it by using it’s own power. The cable can be super long as it’s really a 0 to 1 state. I run 10 meters long trigger remote cable without any problem.
Here is how things works.


The camera have the line at high state, supposedly 3.3V, and the remote simply connect the ground to either one or both inputs.
The remote have one manual button 2 transistors internally to connect the ground on request.
Depending on the camera model, the plug to connect is different. On the one I choose, it’s a mini 2.5mm jack, easy to work with.
Please note that Sony or Panasonic do not use such system, but more a different level with few resistors, so this hack will not work with a Sony/Panasonic remote and camera.Running a simple picture sequence
I have many of these intervalometers but they all present almost the same options.
If you like to loop, you should put the amount of request pictures to “–“.
Bulb is the time when Shutter and focus are activated.
Interval is the space between picture.
The focus is always 2 seconds prior to the shutter release on this model. I guess you will find some where this timing is also adjustable.


And don’t forget that you can always take over by pushing the manual button on the remote itself.
Last but not least, a start stop, button to pause at any time.
A buzzer is also present to help you in the dark. A simple LED is also blinking once per second to let you know when a picture is supposed to happen. The screen display the remaining time.The relay board
The relay board can be ordered in many websites and come with different names. What you need to make sure is the way it can be controlled.
As your intervalometer will connect the ground of each input, you need to find one where the ground is the “input”. That actually the most common one if you look into “relay board Arduino” under Google.
It should look like this one.


Here is how each input is working. It’s quite simple, with an opto-coupler that trigger a transistor that trigger a relay.
The power supply for the relay can be completely independent from the one for the led /opto-coupler side. But if you order a 12V board, both sides waist for a 12V signal. So the intervalometer may not be able to accept such high voltage.
I have tried 5V an 3V and both are working just fine.
These relay boards exist with 1, 2 4 or eight relays. Here, only 2 are necessary, but it’s easier to chain them if you need extra output when ordering a larger board.
You can buy them individually and upgrade later.
The connection to the trigger remote is quite straight forward. The simplest hack ever!
To be noted that some relay board have the – connection ac common instead as the +3V as described here. No big deal, just need to to change le schematics if so.


What to improve?
The obvious missing part in this hack project is the power and I’m not sure how many days this setup can work. But as it’s powered with 2x AAA, It’s super simple to either put a 2 x D sized for plenty of juice.
On my time-lapse project, I’m using a 3V unlimited power on top of the battery. The camera is also powered with an external power supply.I also suggest to remove the power switch on the side. It’s very weak and it may put your project at risk if it turns off by moving the remote. I have weld the contact internally to prevent this.


I ordered a 5V board by mistake, discovering later than some offer goes down to 3V. The relay are 3V and so the signal to apply to them too. It let you use only one kind of power for the entire remote + relay board. I suggest you go for such.
Funny enough, even with my 5V board, the 3V powered remote have enough voltage to light up the led and so trigger the order for the relay. I’m using a super cheap 5V usb charger as power for the relay.Cost
The relay board can come at around 2 USD when the JCC intervalometer is bout 20 USD. The principle should work with many different models.
Building the same with an Arduino, including, board + screen + button + time to develop the software and debug will obviously be more expensive starting from scratch.
As you will see the shutter remote can be set as counter or indefinite loop timer going from few second to hours, have a screen and work on tiny 2 x AAA batteries.
Here is the 4 soldering points you will have to do; even the +3V power is almost ready for you!


Possible applications
I started this project as I wanted a simple way to trigger a picture with a specific lighting for growing time lapse studio. This way I could swap the growing/blooming lighting to a more accurate color rendering during a few lapse of time; enough to take a picture. You can read about my blooming photo studio here. So far, this is the perfect way to do.
One relay will simply trigger the camera and one will swap lighting.
I guess there are many applications when you don’t want to spend time programming an Arduino or Raspberry Pi.Another usage from a Facebook audience suggest night sky picture . You can us it to turn on/off lights/lasers, etc during each time-lapse exposure at night. This device allows to get perfect exposure with those triggered lights along with the night sky.
Feel free to post your remarks below!
If you liked this post, feel free to click on the Google advertising banner. It’s 2 seconds of your time and a tiny cash back for me.
I also have selected items to order on Amazon, but, of course many other shops can help you getting these.Where to order Time-lapse camera system
Ready to shoot camera system to order
As popular request, please find here a possible ready to shoot camera system.
You can buy it directly online hereBrinno BCC2000 Pro HDR Time Lapse
As popular request, please find here a possible ready to shoot camera system.
You can buy it directly online here
https://amzn.to/34JBuuH (For European market)
or https://amzn.to/3vTrU4t (For US market)
is a product that can work, but is limited to Full HD. A new model in 4K is planned for 2022.
They are cheap options that can be a great help for basic recording directly online.


(This post will be updated soon with more details on such system)
Apr 24 2020 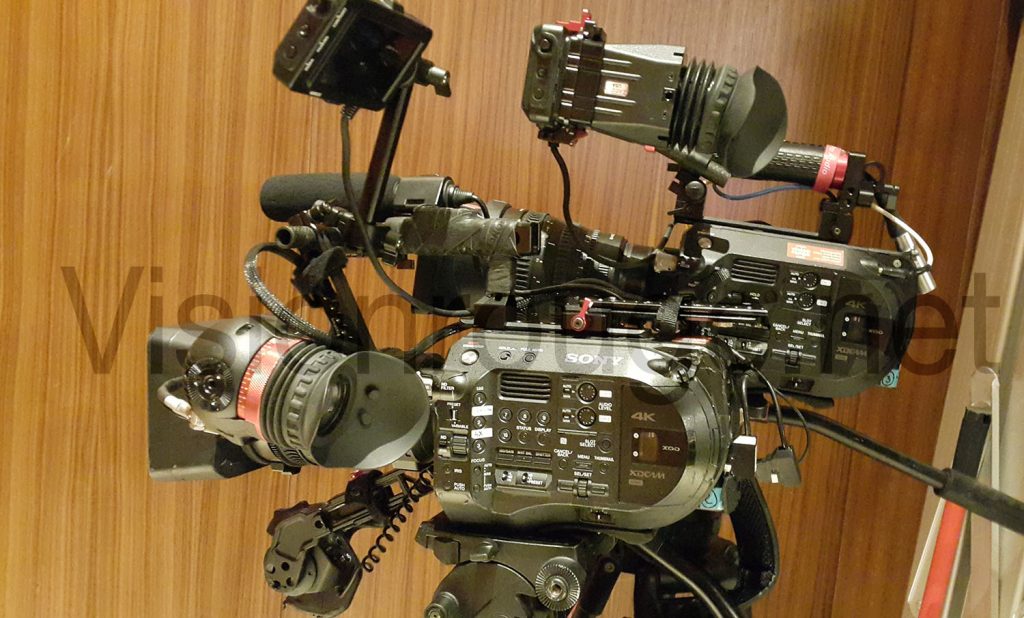

Compare Sony FX9 versus FS7mk2 vs C300 mk3 and C500mk2.
Comparing Sony FX9 vs FS7mk2 vs C300 mk3 vs C500mk2.
We are all wondering what would be the next camera to buy. It’s time to compare Sony FX9 versus FS7mk2 vs C300 mk3 and C500mk2.
I wrote this blog entry following a post on social media looking like this: What do you think of the FX9 now that the C300 M3 has been announced? Don’t get into technical…just the elevator pitch.
So here is my answer comparing the new Sony FX9 and FS7 vs Canon C300 mk3 and C500mk2. Please note that I’m writing this at the end of April 2019 and I did not had access to a C300 mk3 to put it in front of the contender. It’s a bit longer than an elevator pitch but the idea is to get real use and work assignment done more than focus on pixel peeping.
 Continue reading
Apr 04 2020 

Repair H98 error, Panasonic NN-894s, 2M261-M36 magnetron : FIXED
Repair H98 error on Panasonic NN-894s with 2M261-M36 magnetron : FIXED
Don’t move just yet, you are still in a video production website! I’m describing the different steps on fixing a NN-894s combi oven displaying the common H98 error by replacing the power board and 2M261-M36 magnetron. Reading this post will help any of your repair process.
With the current world situation; trying to spend time saving money and enjoy good food at home is a must. By doing your own repairing, you also reduce the overall waste and help making this world a better place.
Apr 03 2020 

▷ Autley silent Ergonomic Wireless mouse Review and test : FAILED
▷Autley silent Ergonomic Wireless mouse Review and test : FAILED
Before buying a new Silent Ergonomic Wireless mouse from Autley; please read here my experience. I wrote this review and tests after 2 months of use as the mouse started to malfunction. I have contacted Autley and god full refund. This product just failed after few months of regular use. FAILED.

Continue readingJan 14 2020 

How de-flicker long term time lapse pictures for smooth video.
How de-flicker long term time lapse video.
After choosing your long term time lapse controller, install your power supply and wait month to gather all the pictures; the last step is to assemble these and create your final video. But If you simply drop all of your footage to a timeline, it will be flashing and shaking.
Here is a step by step guide on how to de-flicker your long term time lapse movie with simple effects. I will be using After Effect and Photoshop, but some filter effect can be found on other video editing software. Feel free to add you comments below this post.

Continue readingJan 13 2020 

Sony FS7 hand-grip slipping repair *FIXED
SLIPPING REPAIR Sony FS7 hand-grip *FIXED
Here is the way to repair the slipping Sony FS7 hand-grip by yourself. It will involve some tools and some time, but still faster and cheaper than buying a new one. This fix is working on a Sony FS7 Mark I, and I’m not sure the Mark II suffer the same problem. It seems that the Sony FS5 or FX9 share another system, which is also faulty, but for others reasons.
What is happening when your hand-grip is slipping?
You have you nice FS7 camera for a while, or bought it second hand and notice something super annoying. When you choose the right position on the hand-grip, it do not lock anymore. The hand-grip seems to slip between each position with a scary noise at each step. It get hard to be confident when holding the camera in certain position and it start to worries you about the full rigidity of the system.
If your camera is under warranty, you may just want to ship it back as soon as the slipping start to shows. One main axis is broken and it will not be back by itself or with some glue.Jan 03 2020 

(DIY) Solar panels to power a long duration time lapse photo project
Solar panels to power long duration DIY time lapse photo project.
In this article, I will try to help you choose the right solar panels for your long duration photography time lapse system. As you may imagine, as soon as we are talking weeks duration for a time lapse project; batteries only is not an option anymore.
 Here is part of my small army of construction time lapse enclosures under testing.
Continue readingNov 16 2019 

Sony FS7 ND wheel problem and solution [FIXED]
The Sony FS7 ND filter wheel problem and fix
How to fix the insane Sony FS7 ND wheel problem? Here is our solution to avoid being caught with such trouble?
There are plenty of great feature packed in the Sony FS7 camera. One of them are the internal ND wheel allowing you to shoot under very sunny condition with a large aperture and slow shutter speed. There is no way to go out under such sun without ND filters. Here I’m using the 10-18 mm F4 Sony lens which can’t hold external neutral density filters, so the use of internal is the only way.

Continue readingOct 06 2019 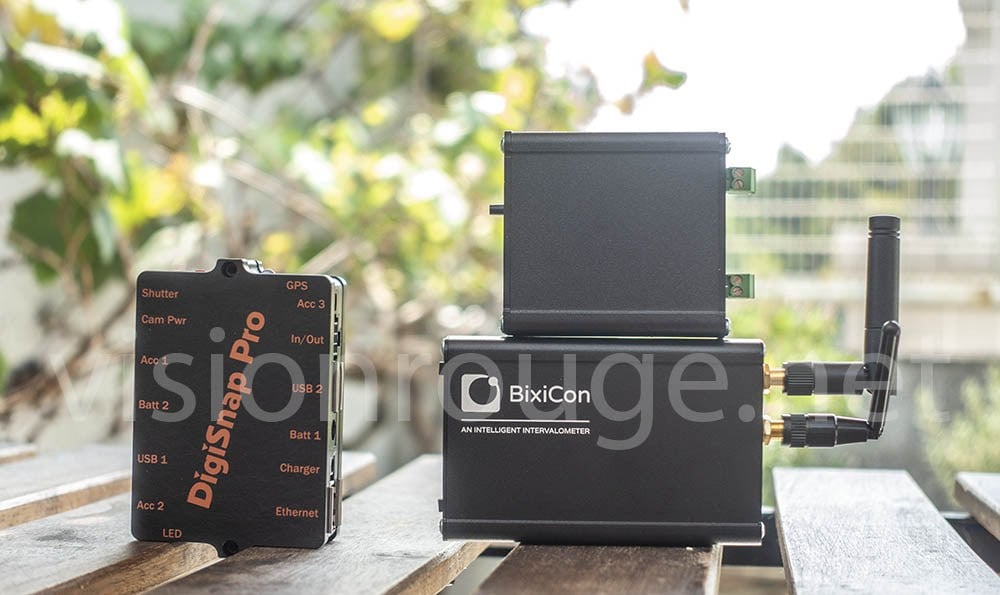

Time lapse controller review: BixiCon Vs DigiSnap Pro
Long Time lapse controllers review: BixiCon VS DigiSnap Pro
After many years in the photography business, I came across a new possible open time lapse control system with Bixion. My current system being Digisnap Pro from Harbortronics. I have removed all the offers forcing you to rent their servers and offering a complete and rigid offer.
For example, systems like Photosentinel or TBox are clearly at a higher price range with plenty of limitations on the way to design your enclosure and which camera to use. You need to buy all from them, from the solar panel to battery. If you are looking for a complete offer; they may fits you. But for something more flexible; designing your own enclosure is more suitable.
Here is my time lapse controller review : BixiCon vs Digisnap Pro.
Jun 28 2019 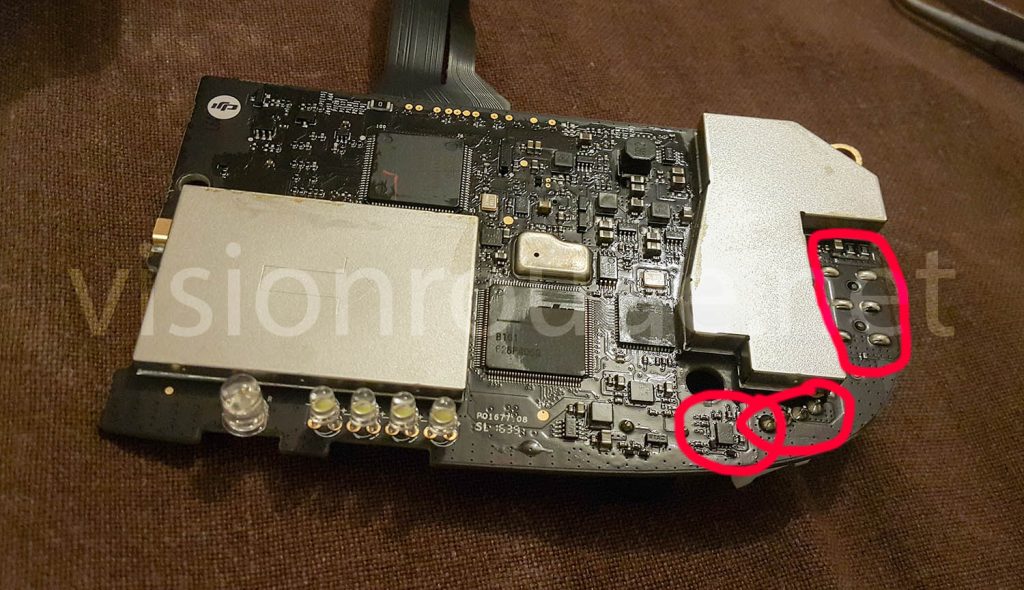

DJI Inspire 2 remote control wont charge: Fixed!
DJI Inspire 2 remote control wont charge: fixed!
I let my DJI Inspire 2 remote control for 6 months without using it. That was the biggest mistake ever! When I try to turn it back on to fly; only the last white led was rapidly blinking with the alert beep asking for a full charge. The status LED was on. It was a bit a surprise cause all the other batteries for my DJI Inspire 2 drone were only half depleted.
It got worst when I plugged the DJI charger. I discovered a new embarrassing problem; my DJI Inspire 2 remote control wont charge anymore. When powered off and plugged to the DJI charger; the first white LED is blinking at fast pace for a while and turn off. The DJI Inspire 2 remote control charger is not even warm. There is way to charge it anymore. If It try to turn it on, I have the screaming waring that there is no enough power to use it.
One day prior to my assignment, that’s a big problem. And I guess another warning that you need to to not trust these DJI toys.Open your DJI Inspire 2 remote control.
Jun 02 2019 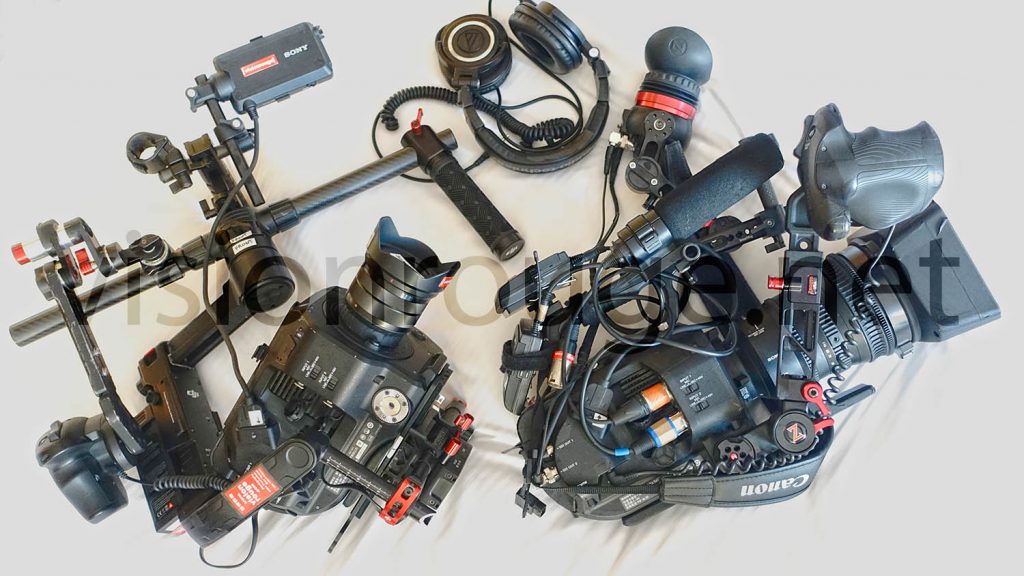

Sony PXW-FS7 mark1 vs mark 2, Which one to choose?
Sony PXW-FS7, mark1 vs mark 2, Which one to choose?
This is a very classic question when you like to enter the Sony S35 camera world, maybe upgrading from a FS5 or switching, as for me, from a Canon EOS C300.
There are few obvious differences between the FS7 mark I and the FS7 mark II. Where most of them can be seen as an improvement, I have to agree that the new lens locking system is still not perfect. I own both camera, bough a FS7 mark 2 first to get my my work covered. I bought a second FS7 mark 1 when a second angle was necessary for interview.Sony FS7 mark1 vs mark 2, which one is the best for you? Please check the differences below from an owner point of view.
And if you don’t know that the Sony FS7 is still the smartest choice for one man band ENG setup, please check the competition here.May 26 2019 

Sony FS7 2019 ultimate ENG Kit: Wooden Camera / Zacuto / Smallrig
Zacuto, Wooden Camera & Smallrig for the 2019 ultimate ENG kit for your Sony FS7
As an happy owner of two Sony’s PXW-FS7 (FS7M2 & FS7M1), I wanted to share my findings on the best way to gear it up for my camera operator on ENG assignment.
You can already see a similar post there done about 15 months ago during Victoria Secret Fashion Show in Shanghai. This is the new version that I used as freelance cameraman in Hong Kong last week. To gear up y camera I used few different brand as Zacuto, Wooden Camera and Smallrig.
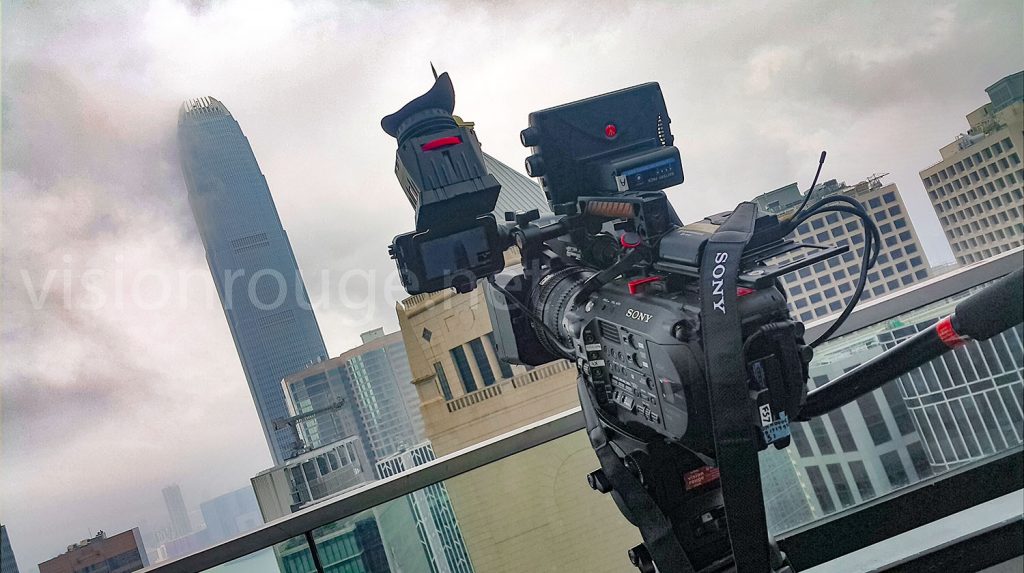 Continue reading
Dec 02 2018 
Why white balance do not matters when shooting RAW or Cine EI?
What is a white balance and why it do not matters when shooting RAW or Cine EI.
For once, a long explanation for basic understanding of what is a white balance. Why it do not maters so much when you are shooting RAW or Cine EI. It’s a bit about lighting source but more about what white balance means for RAW footage to help you understand how your camera is working to get the better of it.
What means: “white balance”?
To be simple; let’s says it’s a way to balance the amount of each colors to makes them look natural. The image colors can be shifted from blue to yellow and from green to magenta to get as natural as possible. “Natural as possible” may looks like a crazy concept, but let says that on a sunny day; the snow should be white, trees looking green, sky should be blue…

Continue readingJun 23 2018 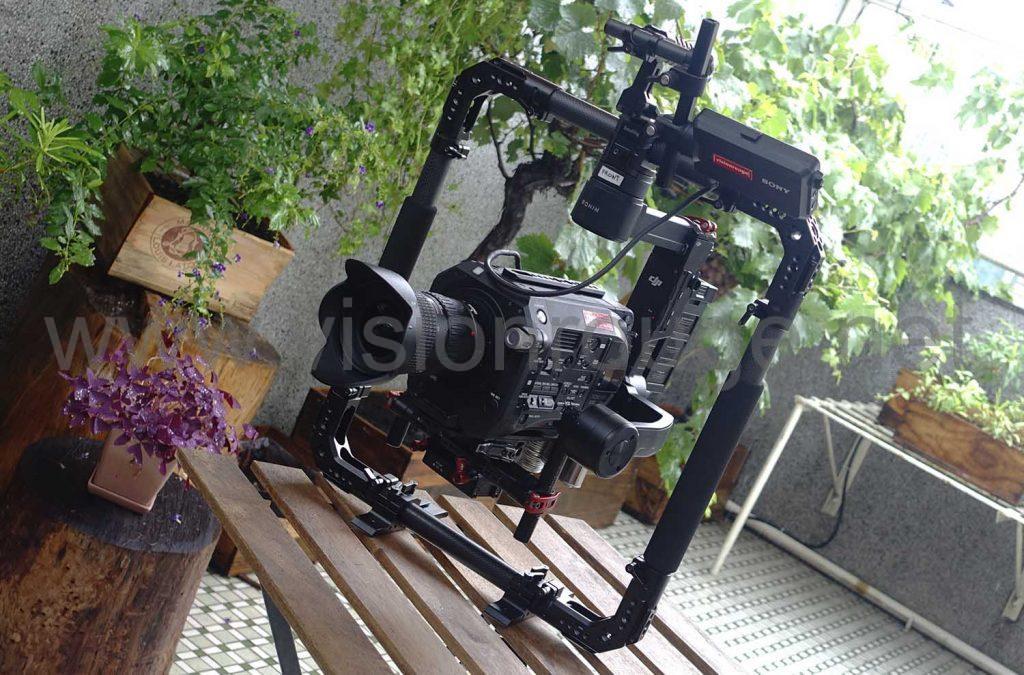

Smallrig handheld ring for DJI Ronin review’s
My Smallrig cage for DJI Ronin M/MX and DJI Ronin review’s.
On a past work as camera operator in Hefei, I was asked to get my FS7 on a DJI Ronin for most of the shooting time. Is the SmallRig Handheld Ring would have been a great option? How the Smallrig cage stands in real life situation? What improvement can you make and get safety and usability fixed? You own already a DJI Ronin and looking for an upgrade?
Here are few tips to check if it’s the cage for you.

This is my final setup with few tweak and hacks.Jun 06 2018 

DJI CrystalSky and SmallHD 702 for Inspire, DIY remote support
DIY remote support to put a CrystalSky screen and SmallHD on top (DJI Inspire 2 )
This is a DIY Hack describe how to stack in an elegant way 2 screens on your DJI Inspire or Phantom drone. Here the final result:


Apr 27 2018 
NATO Handle #1688, One handle to rules them all.
Smallrig top plate handle #1688 review
Sometimes, I have a feeling my blog is more a catalog of Smallrig product presentation, but it’s also a way to says that something is happening in Shenzhen area and DJI is not the only one to get out of the copycat market. I have been using plenty of their products and have positive feedback to share here.
Going for a project last month where one of my Sony FS7 should have been used half of the time as a regular camera and the second half on a gimbal. I wanted to check how makes thing even smarter for me. I was planning on using with a Ronin-M as it was actual a successful test, but needed also a strong way to carry the camera when put on sticks. You can check my past setup here.
I love the Nato system as it keep the camera body with a limited weight on the gimbal, but still super sturdy and can be locked when adding a handle. I wish I could even have a longer NATO plate. It seems that Smallrig is thinking about it.
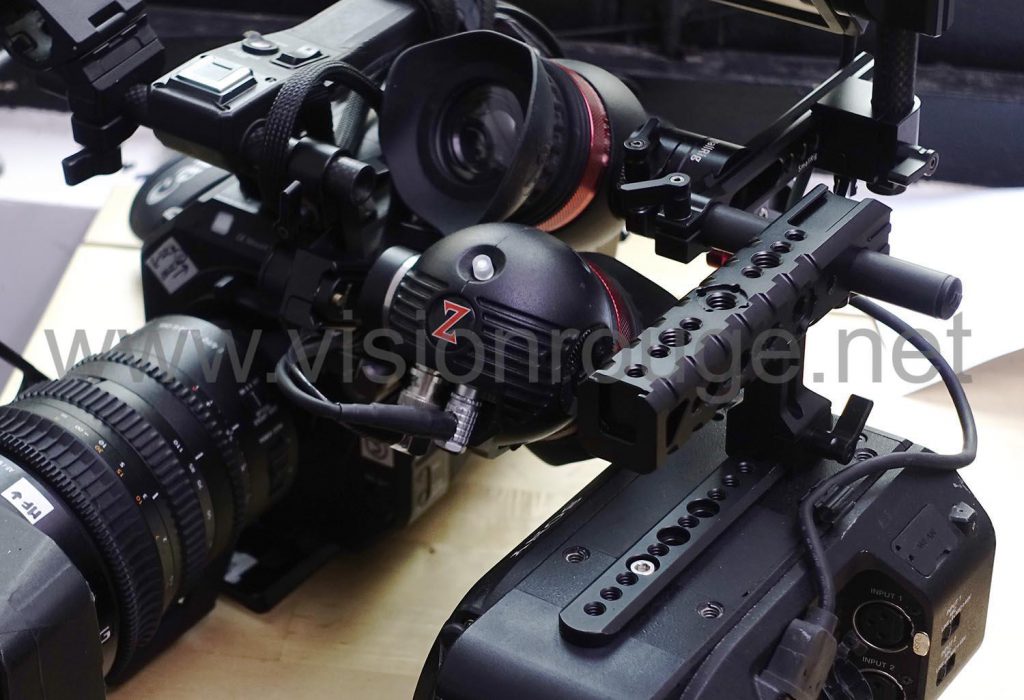
 Continue reading
Jan 01 2018 

Hand held gimbal for mirrorless: Sony A7R3 with ZhiYun Crane 2.
ZhiYun crane 2 review and test
Things are moving fast, super fast.
From few years ago when hiring a steadycam operator was the only way to go, to the rise of Ronin and similar gimbals, to the new trend of DSLR only on top of one single hand held gimbal. I feel that every 2 years, a revolution is happening on how we produce moving images.
Continue reading


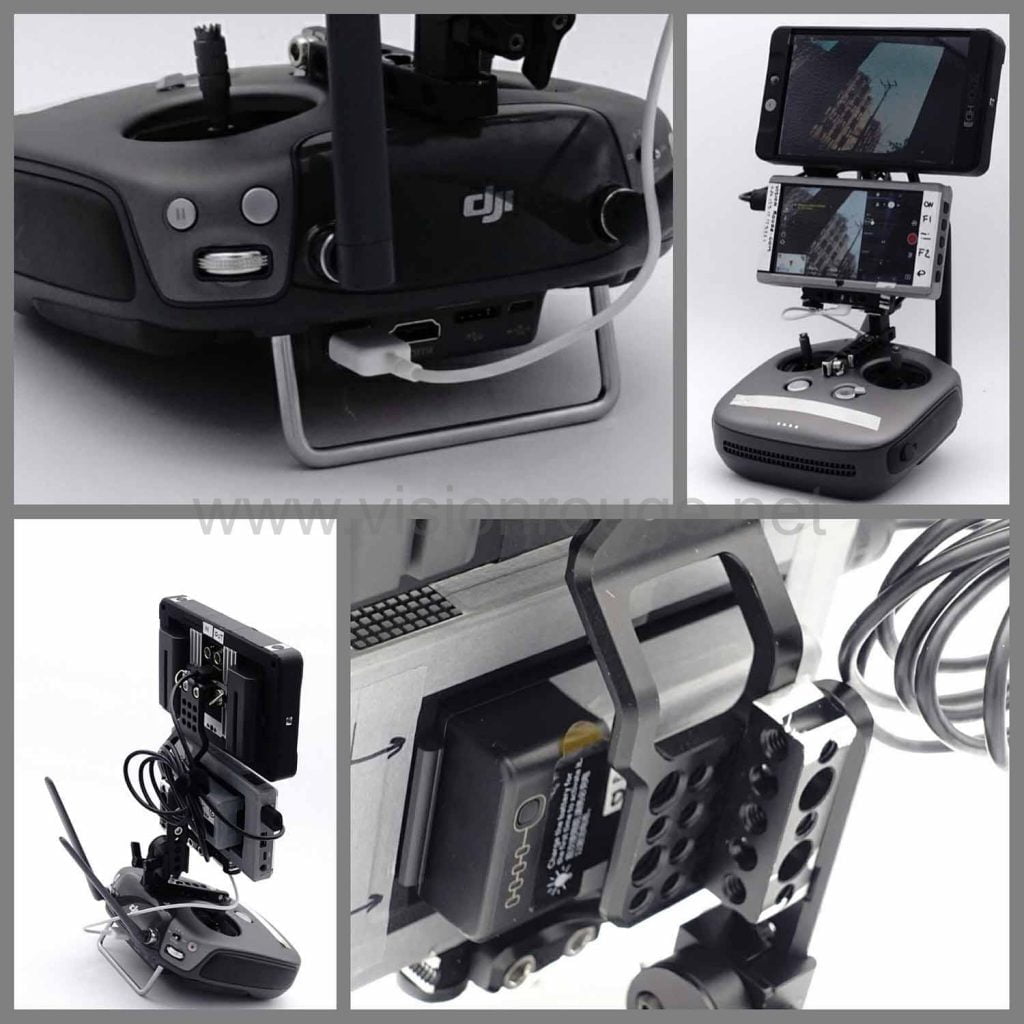
- 1
- 2